
Account, settings & security
Business profile, tax, discounts, supplies, team, 2FA, and what your rep is up to.
Your business profile & branding
Your business profile is the name, contact details, and logo your customers see on invoices, estimates, payment receipts, your pay page, and the pay widget. It lives on the Business profile card at the top of Billing Settings. Set it once and every billing tool uses it.
The logo is the only part you edit here. Upload a PNG, JPG, or SVG. Square or wide marks both work, and the image is scaled to fit. This logo is separate from the receipt logo on your TableTurn register, which is set on the TableTurn page and is not changed by anything you do here.
The Business name & contact block is pulled from your account record and is read-only on this page. To change your business name, phone, email, or address, use Request a Change on the Account page, described under the Account chapter, or contact your account manager. That keeps the legal name and address on your invoices in step with the account.
You are done when the logo shows on the card and a test invoice or receipt carries it. The card confirms with Logo saved. It will appear on invoices, estimates, and receipts.
If the upload fails, the file is probably not a PNG, JPG, or SVG, or is very large. Save it as a PNG and try again. If the old logo still shows on an invoice you already sent, that invoice keeps the branding it was sent with; new invoices use the new logo.
| On this screen | What it does |
|---|---|
| Logo: Upload | Choose a PNG, JPG, or SVG. The logo is saved right away and appears on new invoices, estimates, receipts, your pay page, and the pay widget. |
| Logo: Replace | Uploads a new file over the current logo. |
| Logo: Remove | Deletes the logo. Documents then show your business name as text only. |
| Business name & contact | Read-only. Shows the name, phone, email, and address on your account record. Changes go through Request a Change on the Account page. |
Tax rates
Tax rates are the sales-tax percentages your invoices, estimates, and virtual terminal can apply. Each rate has a name, a state, and a percentage, and one rate is marked as your default. Invoices bill the matching rate automatically based on the customer's shipping state, and fall back to the default when there is no match.
Set them up before you send your first taxable invoice. If you sell in more than one state, add a rate per state so the right one is chosen for each customer. The same rates are shared with the mobile terminal, where they show read-only under Settings with a checkbox to apply your default rate automatically.
You are done when every state you ship to has a rate and one rate is marked default. New invoices then show the tax line without you touching it.
If an invoice shows no tax, the customer has no shipping state on their record and no default rate is set, or the invoice items are marked non-taxable. If the wrong rate is applied, check the customer's shipping state first, then the state on the rate.
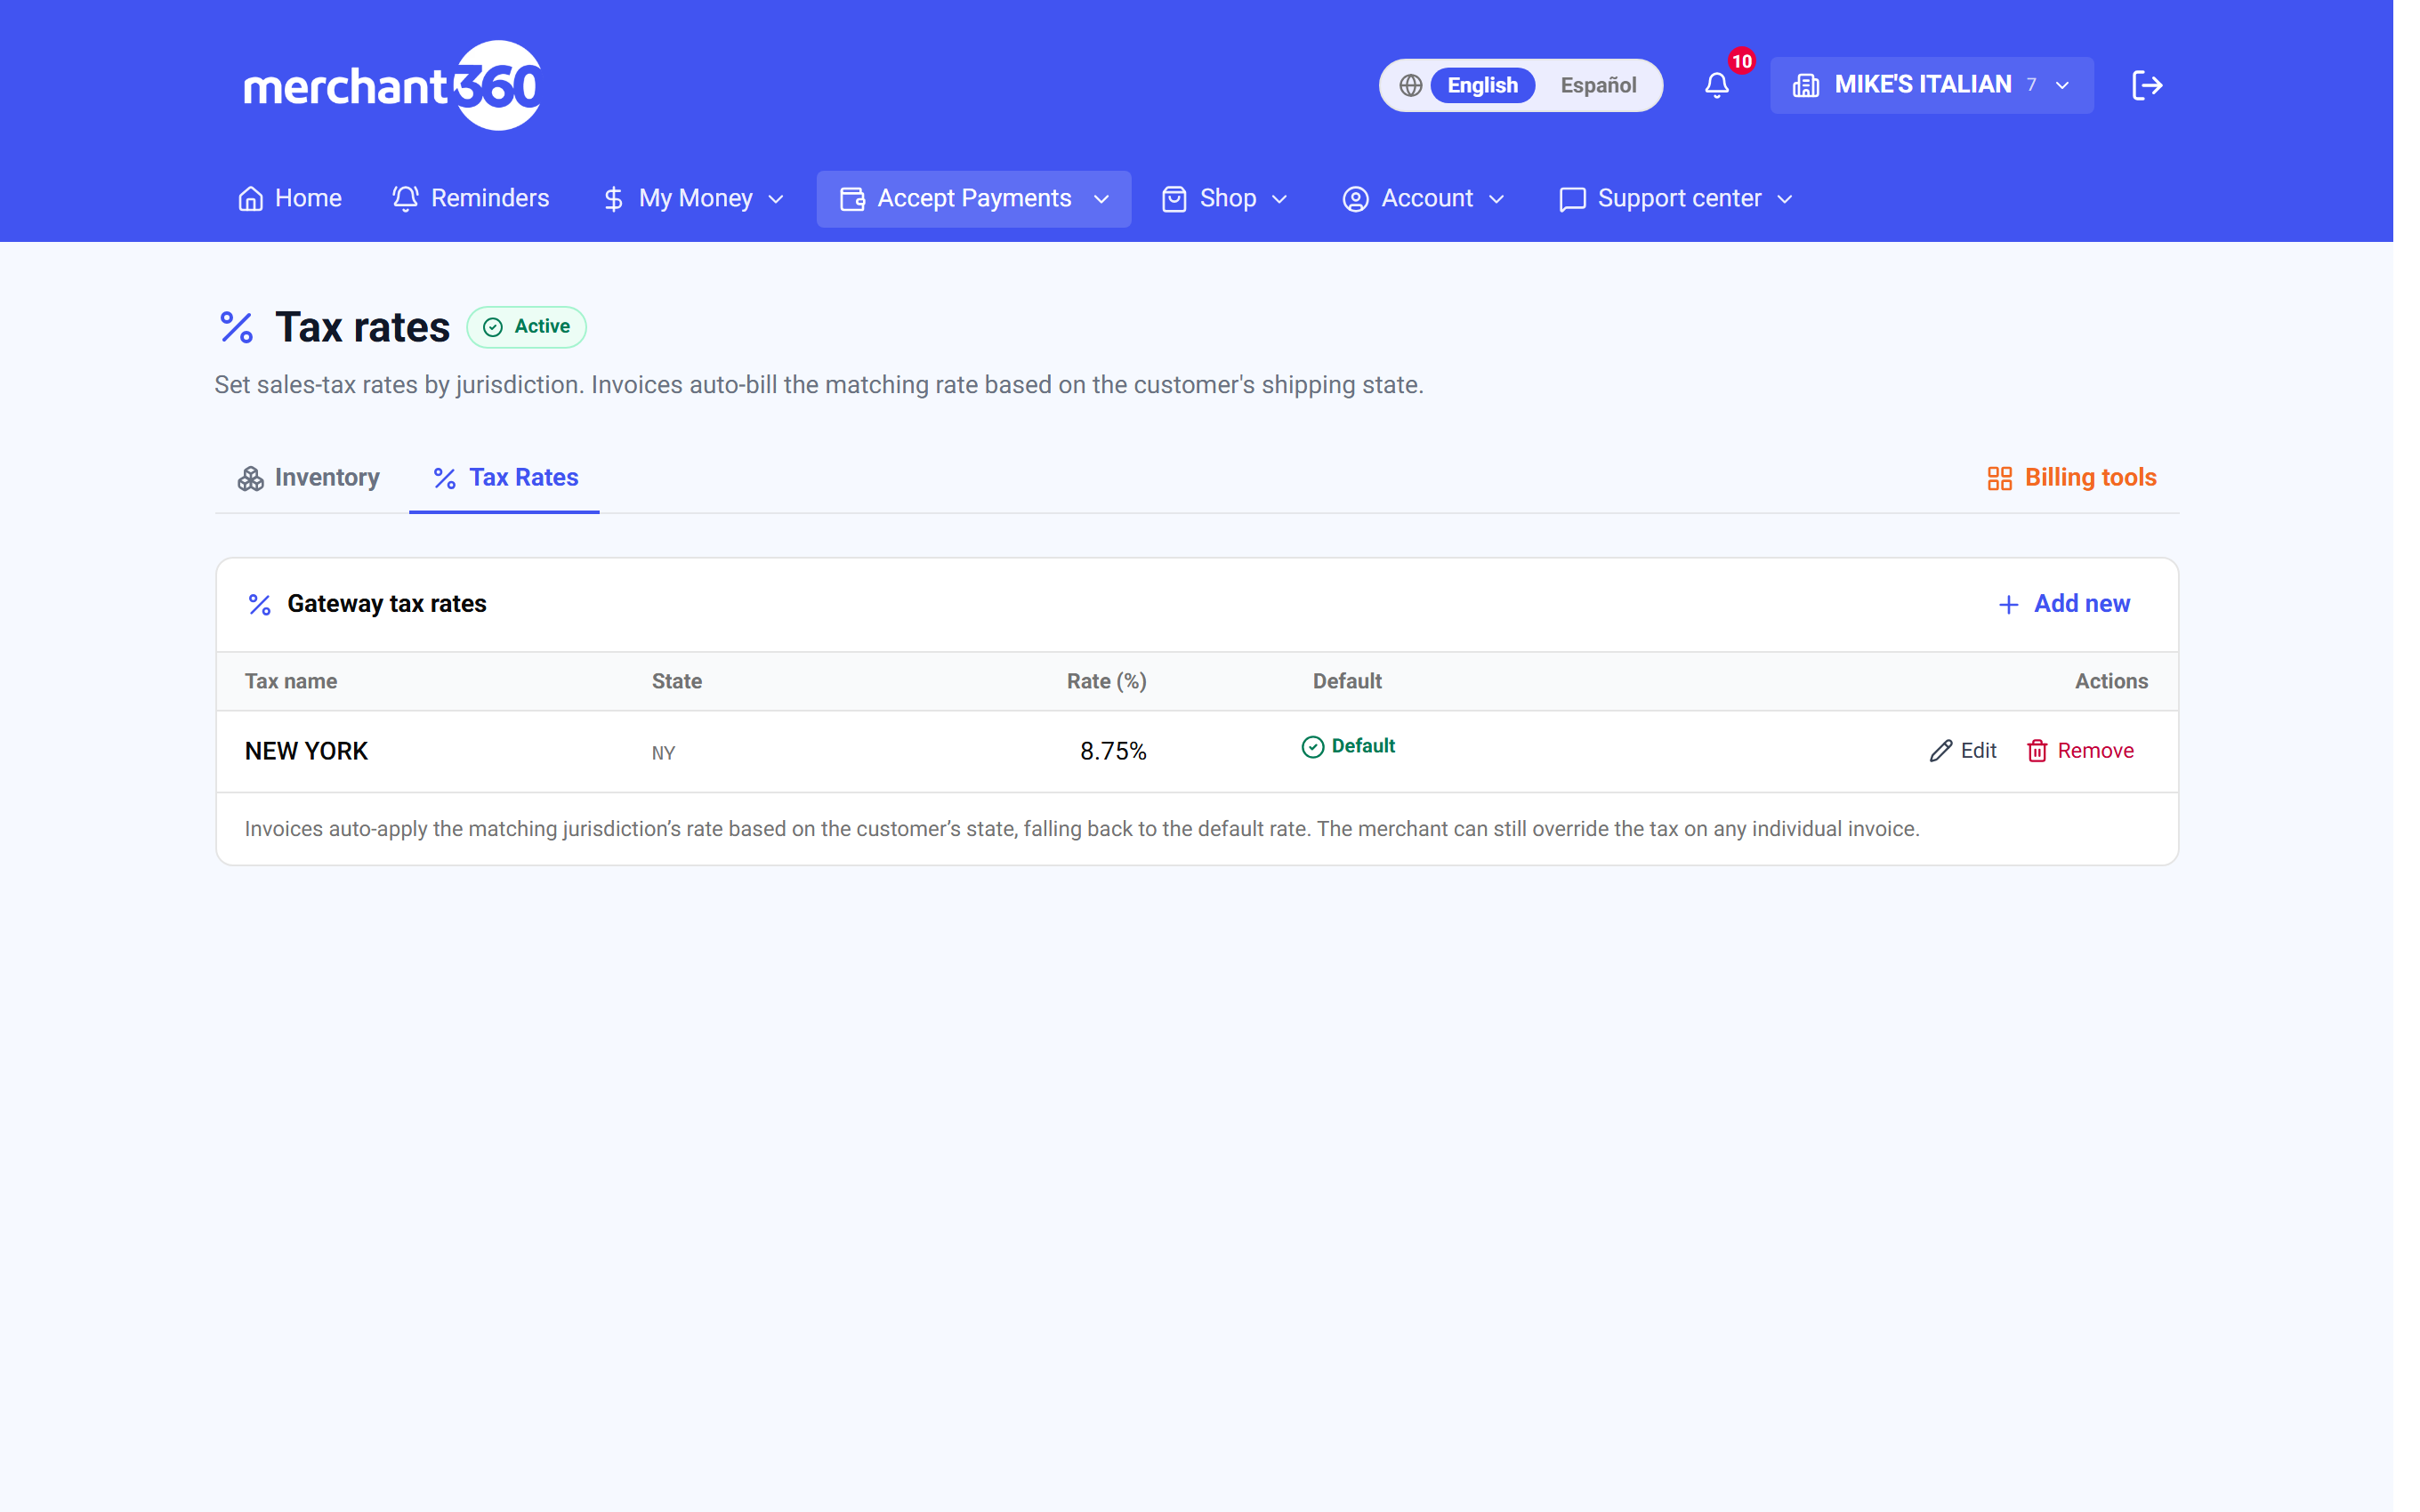
| On this screen | What it does |
|---|---|
| Add rate | Creates a rate with a Name, a State, and a Percent. |
| Name | How the rate shows on the invoice tax line, for example NY Sales Tax. |
| State | The shipping state the rate matches. Invoices to customers in that state use it. |
| Percent | The rate as a percentage, for example 8.875. |
| Default | Marks the rate used when a customer's state has no rate of its own and in the mobile terminal's apply-default option. |
| Edit / Delete | Change or remove a rate. Invoices already sent keep the tax they were sent with. |
Discounts vs coupons
Merchant360 has two ways to take money off a sale, and they live in different places because they are used by different people. Discounts are quick presets your staff tap during a sale in the mobile terminal. Coupons are promo codes your customers type themselves on an invoice pay page.
Discount presets are created in the mobile terminal app under Settings. Give each one a name and either a percent or a dollar amount, and turn it on or off. Staff apply them at the register, and the discount shows as a line on the receipt.
Coupons are created in Billing Settings under the Coupons card. Each coupon has a code, an amount or percent, and any limits you set. When a customer enters the code on the pay page, the discount is booked automatically as a credit memo against the invoice, so your records stay clean.
Use a discount when your staff decide at the counter. Use a coupon when you want to promote a code by email or on a flyer and let the customer apply it.
If a coupon code is refused on the pay page, it may be expired, used up, or below the invoice minimum you set. If a discount preset is missing at the register, it is turned off in the mobile terminal Settings or was created on another device that has not synced.
| On this screen | What it does |
|---|---|
| Mobile terminal: Discount presets | Name plus a percent or dollar amount, each with an on/off switch. Staff tap them during a sale. |
| Billing Settings: Coupons card | Lists your promo codes. Create coupon or New coupon opens the form. |
| Create coupon | Sets the code, the discount amount or percent, and any limits. The coupon is live as soon as it is saved. |
| Coupon on the pay page | The customer enters the code. The discount posts as a credit memo on the invoice and the balance updates before they pay. |
Team & roles
The Team page is where you add the people who can sign in to Merchant360 and decide what each one can do. Every person gets a role, which sets a broad level of access, and can then be narrowed further with Tool access, module by module.
There are six roles. Owner has full access and is the only role that can change billing, security, and other people's access. Manager has full operations. Accountant sees invoices and exports. Clerk covers daily operations. Billing Tools only gets nothing until you grant modules per user. Register is for TableTurn POS only.
Inviting someone takes an email address, a mobile number for security codes, and an access type. Because a team change affects who can reach your account, Merchant360 texts you a security code and asks for it before the invite is sent. The person receives an email with a link to set up their own login, so no password is ever typed for them.
The full detail, including Tool access, Handpoint device pinning, and the Only their own activity switch, is in the Team & roles chapter of this guide.
If the code text does not reach you, use Resend code. If a teammate never got the invite email, check Pending invites on the Team page and resend it from there.
| On this screen | What it does |
|---|---|
| Invite a teammate | Opens the invite form: Email address, Mobile for security codes, Access type, and an optional Register PIN. |
| Access type | The role: Owner, Manager, Accountant, Clerk, Billing Tools only, or Register. |
| Confirm invite (texted code) | Enter the six-digit code texted to you to finish inviting the user. Resend code sends another. |
| Set tool access now (optional) | Lets you pick modules and device settings for the new person as part of the invite. |
| Pending invites / Active members | The two lists on the Team page. Pending invites have not finished setting up their login. |
| Remove | Revokes a person's access after confirmation. Asks for a texted code. |
Turning billing tools off
Billing tools are the invoicing, virtual terminal, pay pages, and the rest of the Accept Payments toolset. If you stop using them, the account owner can turn them off from the Security page. The Billing Tools section disappears from the menu for everyone on the account, and no invoices, reminders, or statements go out until they are turned back on.
Turning them off is a confirmation only. Turning them back on later needs a security code texted to the owner's phone, because it re-enables the ability to charge cards on the account. You can add an optional reason when you turn them off; it is kept with the account history.
Your data is not deleted. Invoices, customers, transactions, and settings are all there again when you turn the tools back on.
If the Turn off billing tools card is not on your Security page, you are not signed in as the owner. If the tools were turned off by your account manager rather than by you, the card explains that and turning them back on goes through your account manager.
| On this screen | What it does |
|---|---|
| Turn off billing tools | Owner only. Asks you to confirm, with an optional Reason, then hides Billing Tools for the whole account. |
| Reason (optional) | A note kept with the change so you and your account manager can see why the tools were turned off. |
| Turn billing tools back on | Owner only. Asks for a texted security code, then restores the Billing Tools menu and every setting as it was. |
Supplies & equipment
The Supplies page is where you order receipt paper, labels, and tags for your terminals. Inventory is live, so what you see is what is on hand. Orders are charged automatically to the bank account on file, and each one shows in your order history with tracking once it ships.
Which paper fits my equipment? at the top of the catalog picks out the rolls that match your terminal model and marks them Fits your terminal. If your model cannot be detected, the most common terminal paper is shown instead.
Add items to the cart, fill in the ship-to address and phone, pick a shipping speed, and place the order. Ground takes five to seven business days; 3-Day Express, 2-Day Express, Overnight, and Saturday Overnight are faster. The address is checked against USPS before the order goes through. If USPS suggests a correction you can use it or keep what you typed.
Order again on a past order loads the same items into the cart so you can adjust quantities and send it through. Items that are no longer available are left out and the notice tells you which. Cancel this order is available until the order ships; if you were already charged, the credit is processed within one to two business days.
Merchants enrolled in the Merchant Advantage Program get paper rolls free, with ground shipping covered on a covered order. The program costs $39 per month and is drafted from the bank on file. Enrolled merchants order paper on the dedicated paper orders page.
If the page says Bank account not on file, add a bank account before ordering; your sales rep can help. If USPS could not confirm this address, check the street number, spelling, and ZIP, and keep the address as entered only if you are sure it is right.
- 1Go to Shop → Supplies & Paper to reorder paper rolls and other supplies. Your last three orders sit at the top of the page with an Order Again button, and View All Orders opens your full history.
- 2Not sure which roll fits your terminal? The paper guide next to the Merchant Advantage callout reads the equipment we shipped you and badges the matching paper Fits Your Terminal in the catalog.
- 3At checkout, pick a shipping speed: Ground, 3-Day Express, 2-Day Express, Overnight, or Saturday Overnight. The price for each shows right on the cart, and the speed you pick appears as its own line on your invoice.
- 4If you change the ship-to address, we double-check it with USPS. When USPS suggests a corrected version you choose Use Suggested or Keep As Entered before the order goes in.
- 5Need hardware? Equipment orders (and the signatures they require) live there too.
- 6Check Requests & Orders any time to see what's shipped, what's in transit, and what still needs your sign-off. It gathers every kind of request (banking changes, gift-card orders, supplies, hardware) in one timeline.
| On this screen | What it does |
|---|---|
| Which paper fits my equipment? | Shows the paper recommended for your terminal model with a Fits your terminal badge. |
| Add / Cart (N) | Adds a catalog item to the cart and shows the item count. The cart lists subtotal, shipping, and tax, with tax calculated at checkout. |
| Ship to (Business name, Street address, City, ST, ZIP, Phone) | The delivery address. All fields are required before the order can be placed. |
| Shipping speed | Ground (5-7 business days), 3-Day Express, 2-Day Express, Overnight, or Saturday Overnight. The shipping charge updates with the choice. |
| USPS suggests a corrected address: Use suggested / Keep as entered | Appears when the address check finds a better match. Use suggested replaces what you typed; Keep as entered ships to your version. |
| Notes (optional) | Free text sent with the order, for example a delivery instruction. It shows on the order detail as Notes you added at checkout. |
| Place order · $total | Submits the order and charges the bank on file. The confirmation reads Order placed with the total, or Payment pending if the charge is still settling. |
| Recent supplies orders / View all orders | Order history with Order, Placed, Total, Status, and Tracking columns. View all orders opens the full history. |
| Order again | Reloads a past order's items into the cart. Items no longer available are skipped and listed in a notice. |
| Cancel this order | Cancels an order that has not shipped. Reason is optional. Any charge already taken is credited within one to two business days. |
| Order status | Order received, being packed at our warehouse, On its way with a carrier tracking link, Delivered, or Cancelled. |
| Enroll in MAP | Enrolls in the Merchant Advantage Program for $39 per month, authorizing the draft from the bank on file. Once enrolled, paper rolls are free. |
Security & PCI
The Security page holds the settings that protect your login and your money: two-factor authentication by text message, the devices you have trusted, the large-refund code threshold, and the billing tools switch. PCI attestation has its own page under Security, PCI.
Two-factor authentication texts a six-digit code to your mobile number at sign-in and before sensitive changes. Enter a US mobile number to turn it on. The number shown is the cell phone on your account profile, and the same number receives every security code for team changes, key creation, and large refunds. Devices you tick as trusted at sign-in can skip the code for ninety days; the Trusted Devices list shows each one so you can revoke any you do not recognize.
Large-refund verification asks for a texted code before a refund over the amount you set is completed in billing tools. Set the amount to zero to require a code for every refund, and tick which users it applies to. The setting is available once your account manager has enabled it for the account.
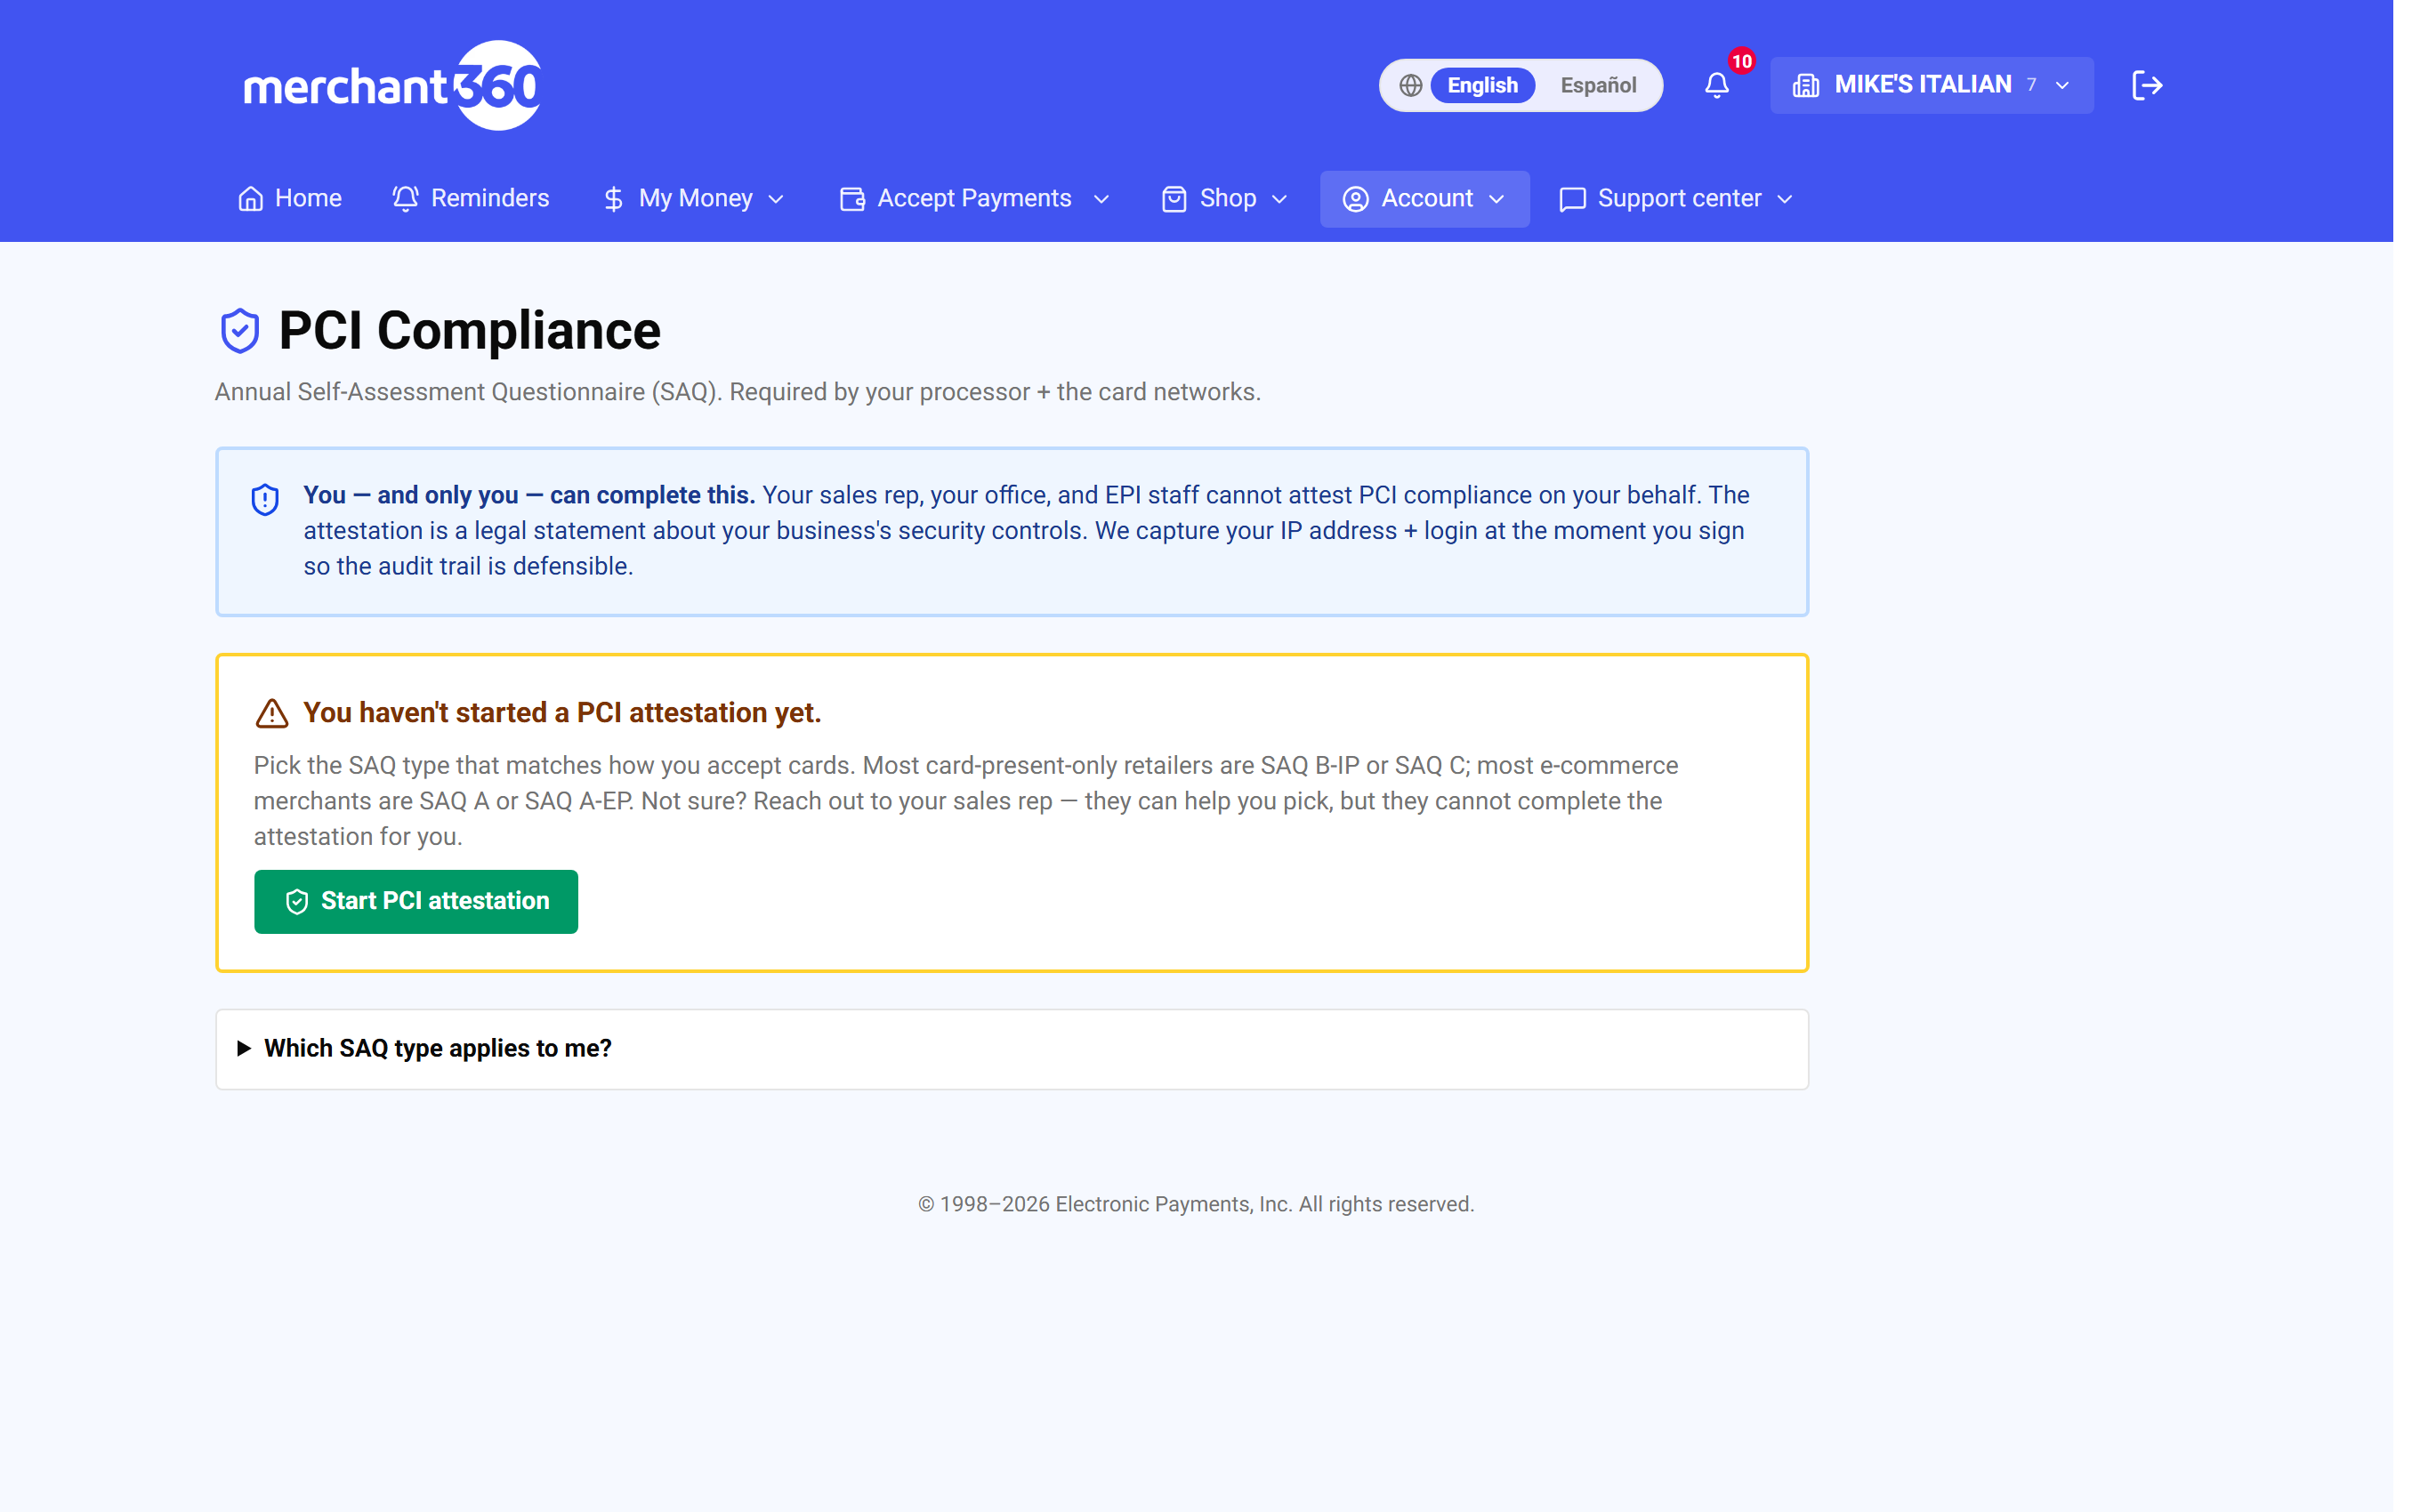
PCI attestation is your yearly confirmation that you handle card data safely. Choose the questionnaire type that matches how you take payments, upload the signed questionnaire, tick the attestation, and complete it. Merchant360 records the date, and the history shows every past attestation. A banner warns you when the current one is about to expire.
If you stop receiving codes, check the mobile number on the Security page and under Account, Login & security. If you replaced your phone, sign in on the new device with a code and revoke the old device from Trusted Devices. If the PCI page will not let you complete, the questionnaire upload is missing or the attestation checkbox is not ticked.
| On this screen | What it does |
|---|---|
| SMS Two-Factor Authentication | On or off. Enabled shows the number codes go to. Turning it off asks you to confirm and is recorded. |
| Mobile number field | Enter a US mobile number, then enter the six-digit code that is texted to it to verify the number. |
| Trusted Devices: Revoke / Revoke all | Devices that can skip the code for ninety days. Revoke removes one; Revoke all makes every device verify at its next sign-in. |
| Large-refund verification | Toggle plus Require a code for refunds over an amount. Zero means every refund. Applies to user checkboxes choose who is covered. Applies only to refunds made in billing tools. |
| Turn off billing tools / Turn billing tools back on | Owner only. Described in the previous section. |
| PCI: Start PCI attestation / Start renewal / Continue attestation / View details | Opens the attestation flow, continues one in progress, or shows a completed one. |
| PCI: SAQ type | Choose A, A-EP, B, B-IP, C, C-VT, D-Merchant, or P2PE HW to match how you accept cards. |
| PCI: Step 1 Upload evidence / Replace evidence | Attach the signed self-assessment questionnaire as a PDF. |
| PCI: Step 2 Affirm & complete | Tick the attestation statement, which records your login and network address, add Notes if needed, and complete. |
| PCI: I'm not compliant, flag this attestation | Records that you cannot attest, with a reason of at least ten characters, so your account manager can help. |
| PCI: Attestation history | Every completed attestation with its date and questionnaire type. |
Session timeout
Merchant360 signs you out after fifteen minutes with no activity. This is a card-industry requirement for any screen that can reach payment data, and it protects you if a computer is left unattended at the counter.
Two minutes before the sign-out, a Still there? prompt appears. Stay signed in resets the clock. Sign out ends the session right away. If you do nothing, the session ends and the next click takes you to the sign-in page.
Any typing that was not saved when the session ended is lost, so save long forms as you go. Nothing already saved is affected.
Activity in any open Merchant360 tab counts, so working in one tab keeps another tab signed in. Only clicks, typing, and scrolling count; a page left open with no interaction does not.
| On this screen | What it does |
|---|---|
| Still there? prompt | Appears two minutes before the automatic sign-out. |
| Stay signed in | Resets the fifteen-minute timer and closes the prompt. |
| Sign out | Ends the session immediately. |
Running a restaurant?
Restaurants and other table-service businesses use TableTurn POS, the register built into the Merchant360 family, alongside the billing tools. The Account page shows your TableTurn plan with its tier and a Manage plan or See plans & upgrade link, so you can see what you have and move up when you need more.
TableTurn has its own chapters in this guide covering tables, menus, tips, cashiers and PINs, and the time clock. The team schedule described earlier in this chapter works with TableTurn cashiers, so the same people you set up for the register can be scheduled here.
If the TableTurn plan card is not on your Account page, TableTurn is not enrolled on your account yet. Your account manager can add it.
| On this screen | What it does |
|---|---|
| TableTurn plan card | Shows your current TableTurn tier (Lite or a paid tier). |
| See plans & upgrade | Opens the plan comparison and lets the owner move to a higher tier. |
| Manage plan | Opens the current plan's detail for accounts already on a paid tier. |