
Scheduling & online booking
Appointments, work orders, and a book-online page for your customers.
Classes
Classes are group sessions with a fixed number of seats, such as a yoga flow, a workshop, or a tasting. You create the class once with its name, description, instructor, and capacity, then schedule sessions on any dates. A weekly repeat schedules several weeks in one step.
Use a class when more than one customer books the same time slot. A one-to-one appointment belongs under Services instead. Before you start, turn on online booking so the Classes calendar shows on your public booking page, and make sure your card acceptance is active if you plan to charge for the class, because paid bookings take cards and Pay with Vault at the moment of booking.
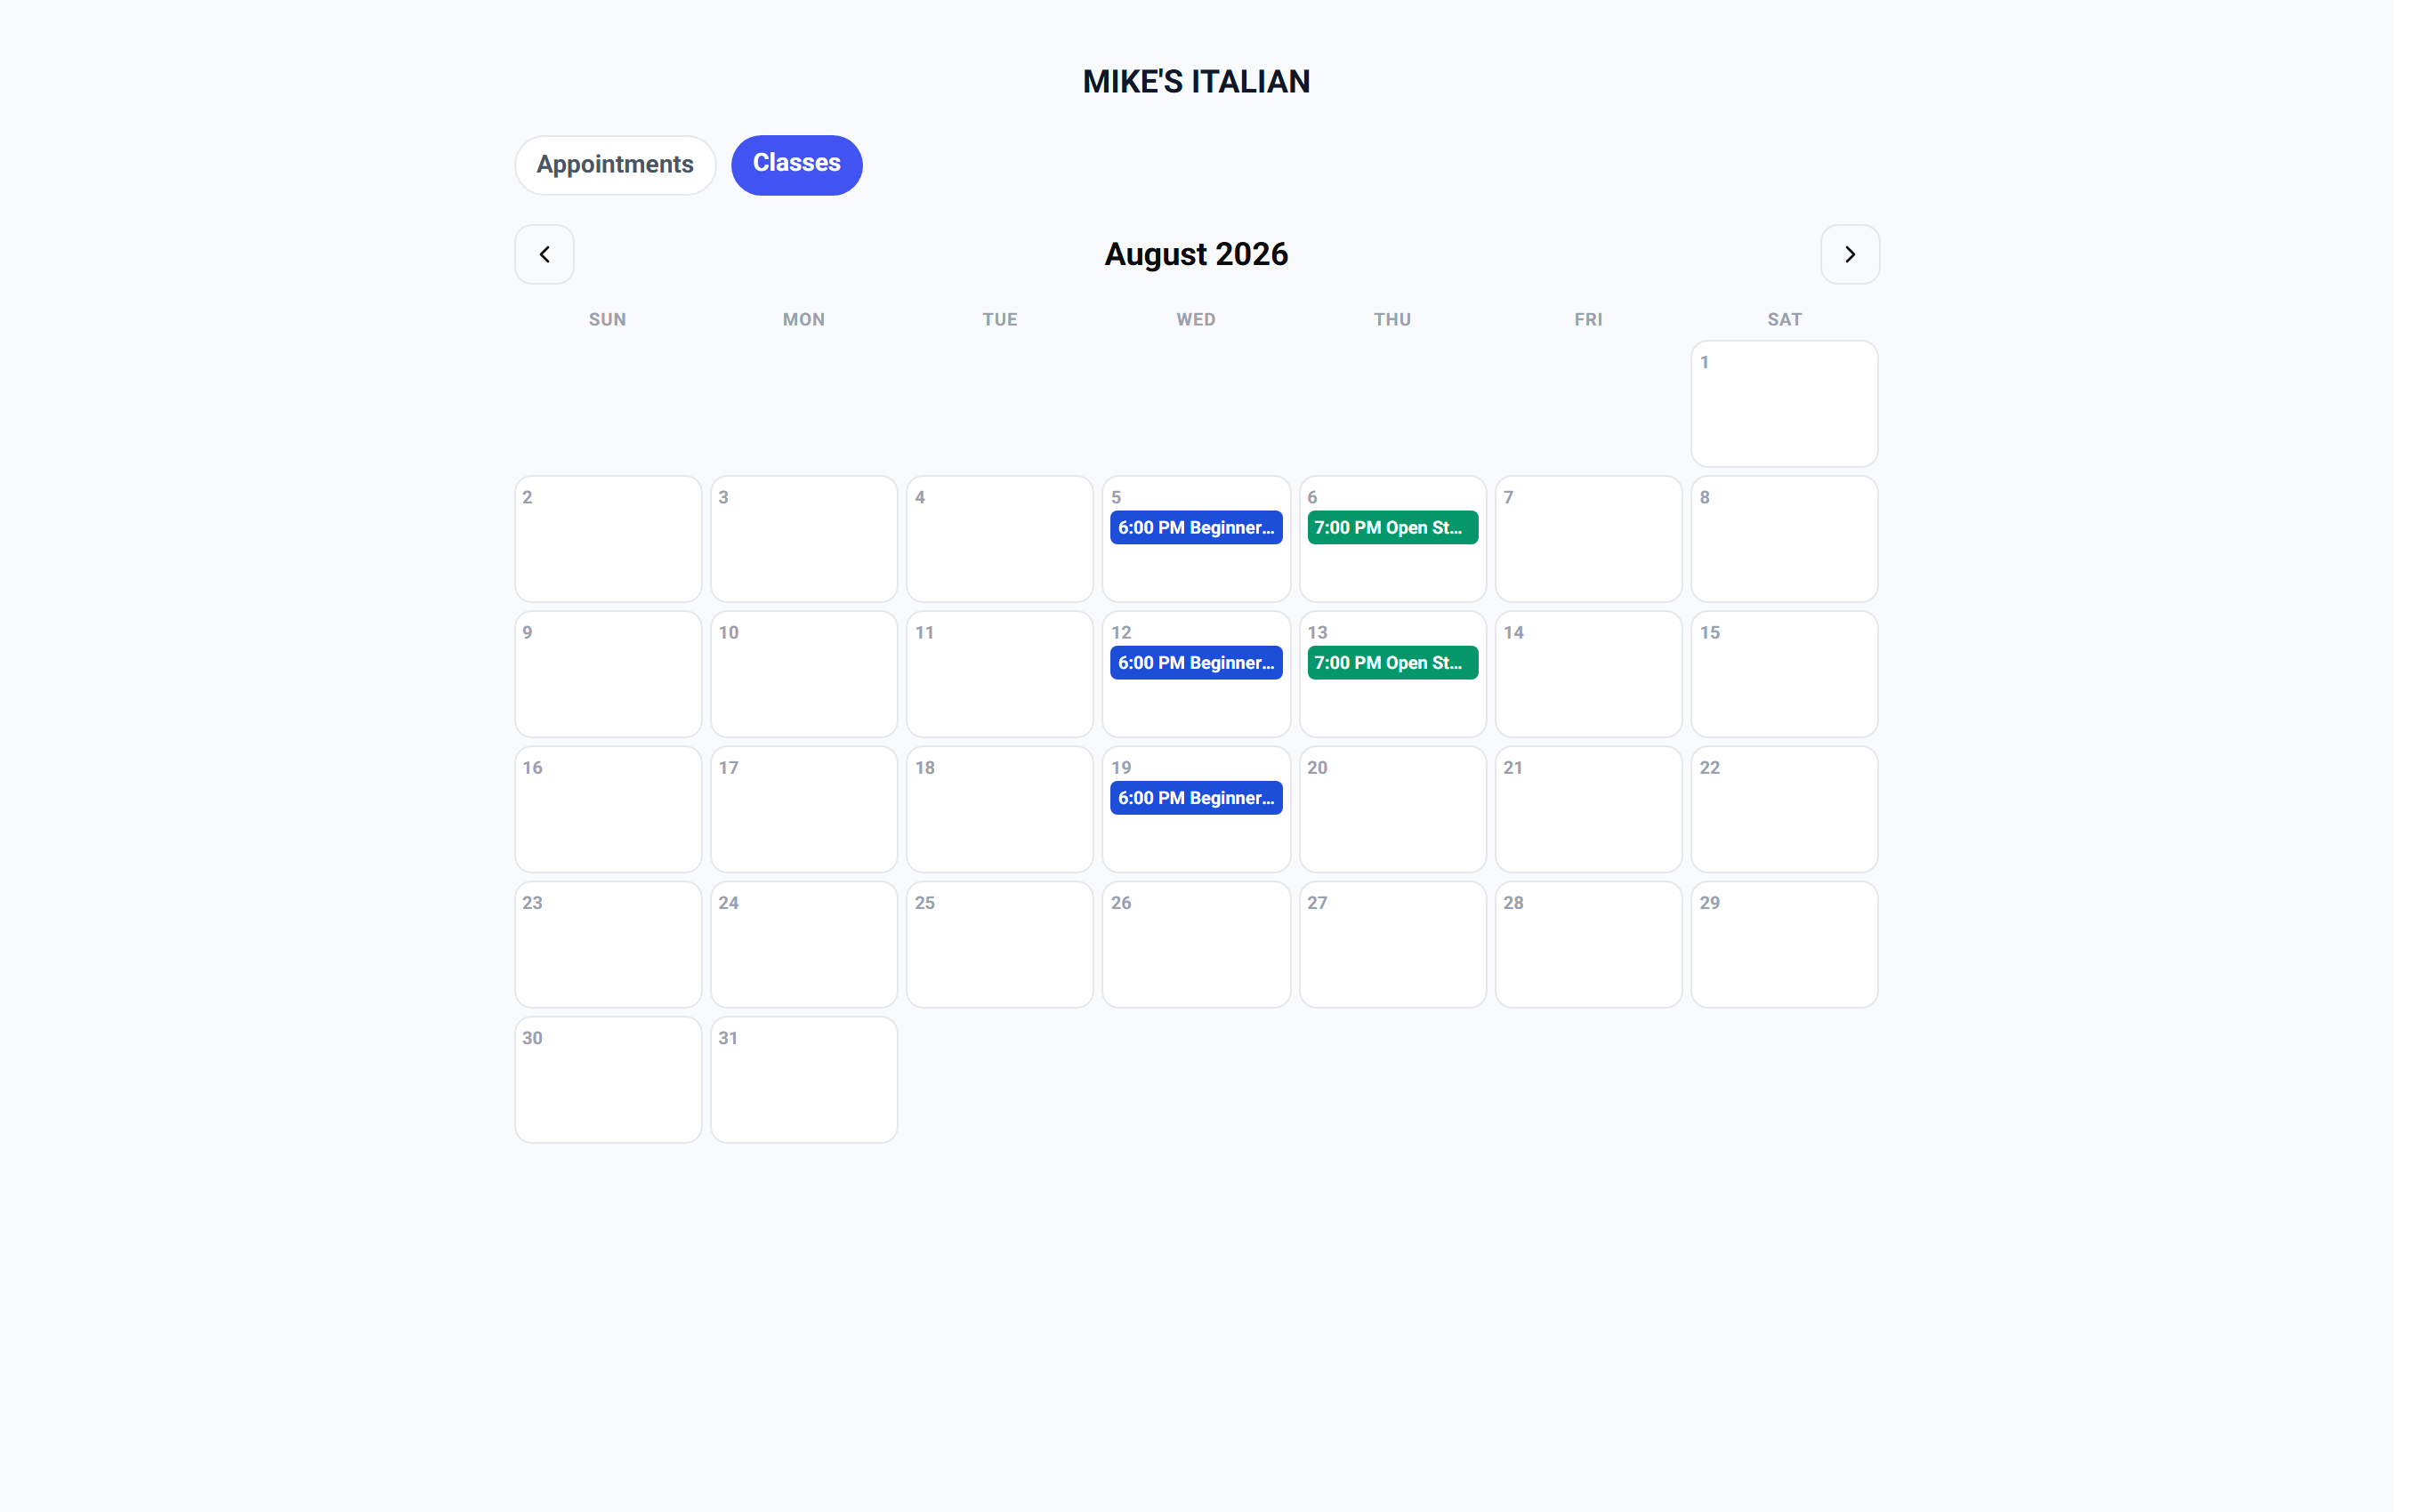
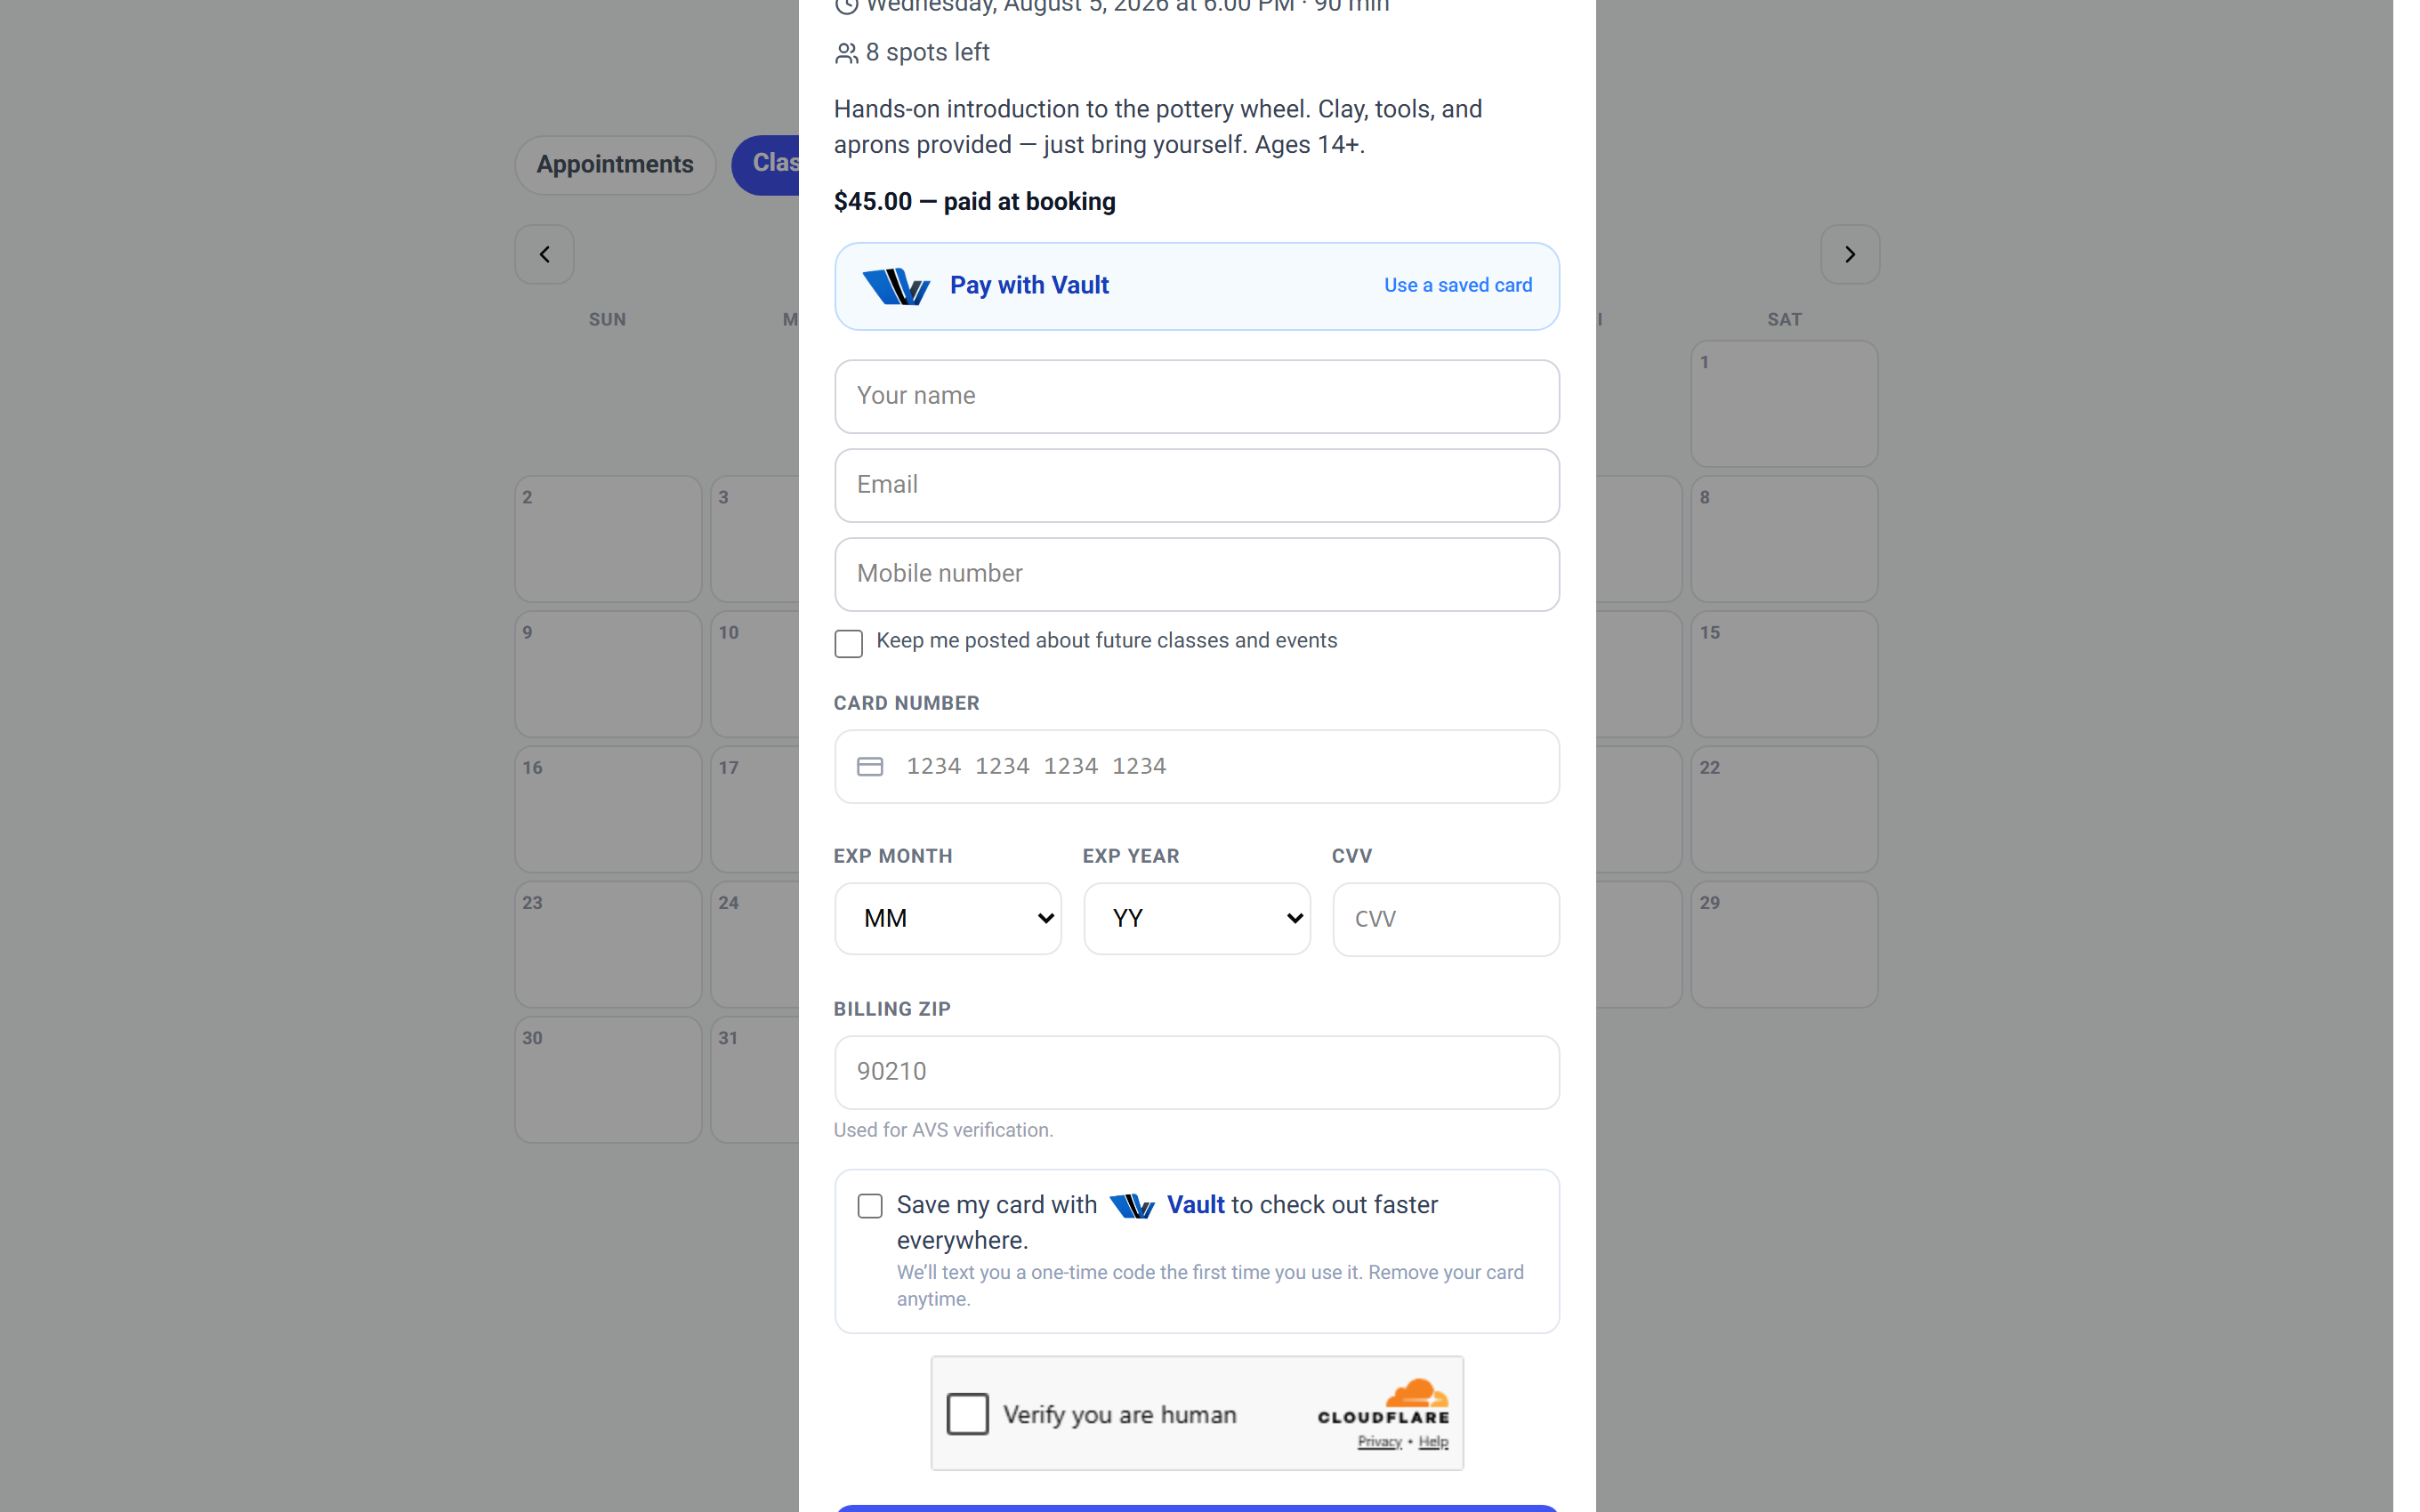
Your public booking page grows a Classes calendar. Customers see every upcoming session, tap one for the full description and the spots left, and book as a free RSVP, pay in full, or pay a deposit to hold the seat, whichever you set on the class. When a session fills, booking stops on its own, so the last seat can never be double-booked. The same two-line booking widget snippet embeds the calendar on your own website.
Done looks like this: the class shows in the Classes card on the Scheduling page without an Inactive badge, its sessions appear on the public calendar, and each session's Roster lists who booked, who paid, and who is on the waitlist.
If a class does not show on your booking page, check that Active (bookable) is on, that at least one future session exists, and that Let customers book online is turned on in the Online booking panel. If a customer needs a refund for a paid class, remove them from the roster or cancel the session here, then issue the refund from Transactions. Refunds are never issued from the Classes card itself.
- 1In the Classes card on the Scheduling page, click New class. Enter the class name, a description customers will read in the booking window, the instructor, and the capacity.
- 2Choose the booking mode: Free (RSVP), Pay to book with a class price, or Deposit to book with the deposit due at booking.
- 3Pick a calendar color, decide whether email or a mobile number is required to book, leave Active (bookable) on, and click Save class.
- 4Open Sessions, set the date and time and the minutes, set Repeat weekly if the class recurs, and click Add.
- 5Open Roster on any session to see bookings, the waitlist, and marketing opt-ins, to remove someone, or to cancel the session.
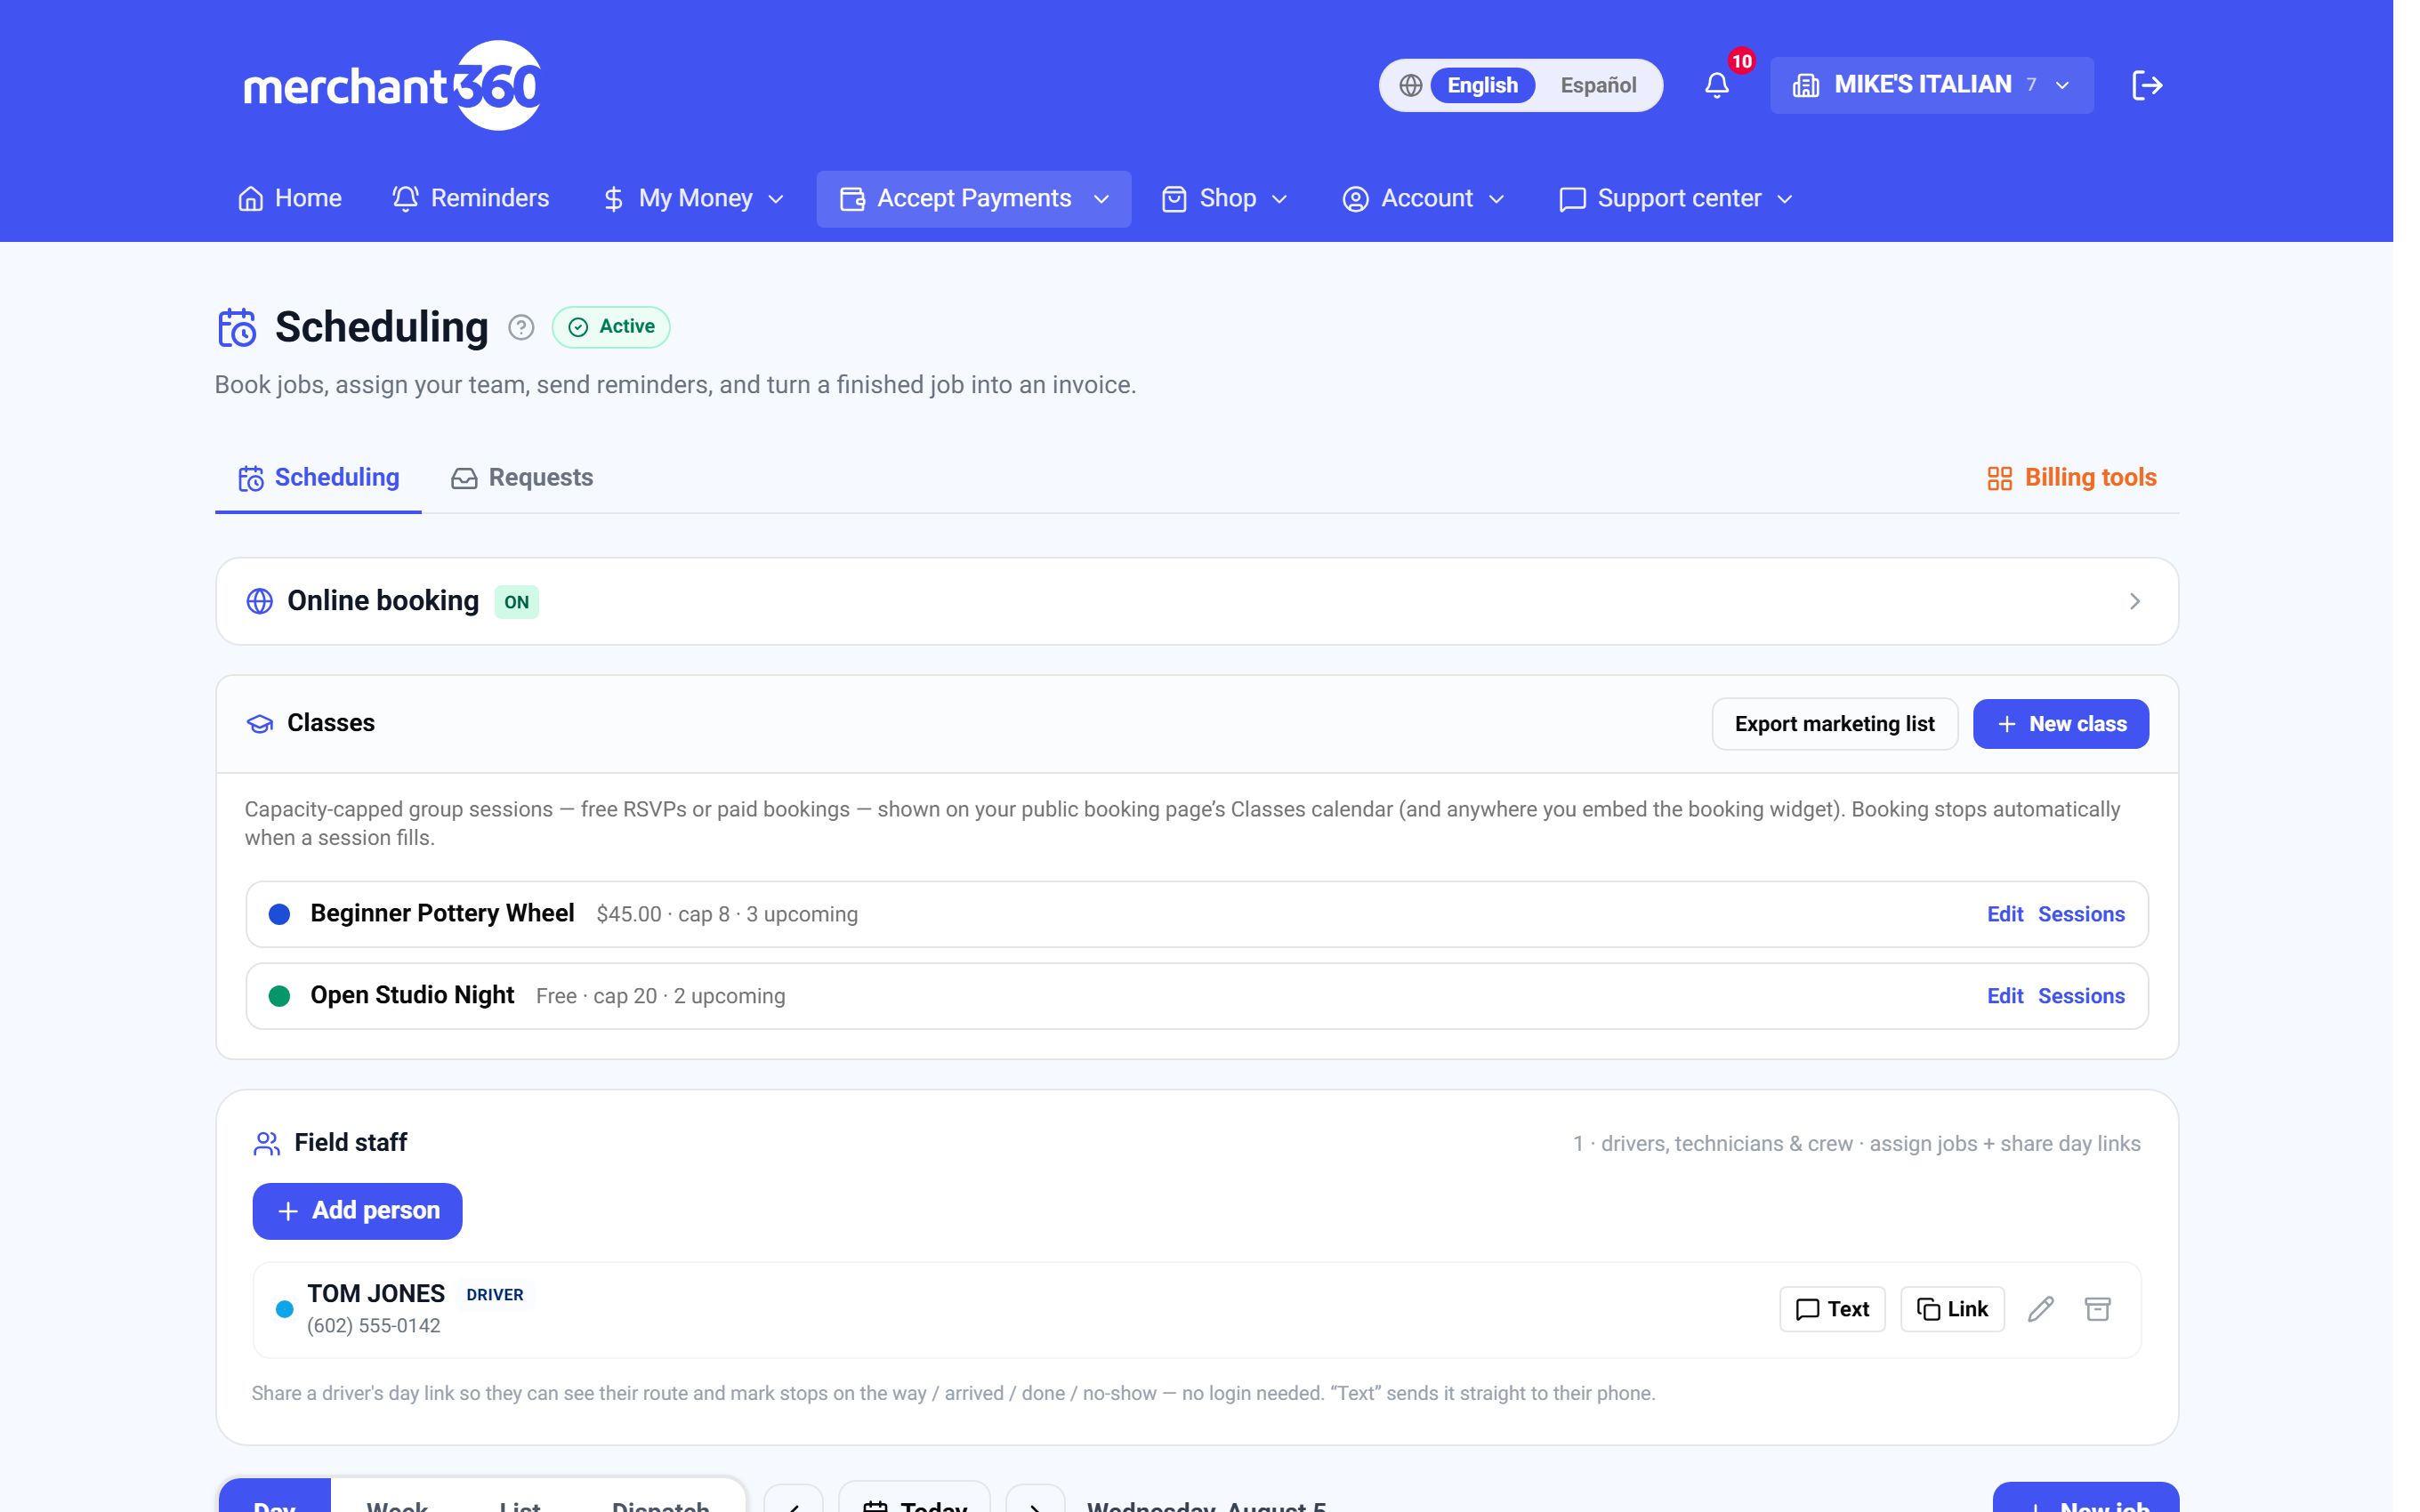
| On this screen | What it does |
|---|---|
| New class | Opens the class form. The class appears in the Classes card and on the public calendar once it has a session. |
| Class name and Description | Shown in the booking window on your public page. Use the description for what to bring and who the class is for. |
| Instructor | Picks a team member. The name shows on the session in the booking window. |
| Capacity (max people) | Seats per session. Booking closes automatically when this number is reached. |
| Free (RSVP) / Pay to book / Deposit to book | How customers book. Free collects contact details only. Pay to book charges the class price. Deposit to book charges the deposit due at booking and the rest is collected in person. |
| Class price and Deposit due at booking | The amounts charged at booking for the paid modes. Cards and Pay with Vault are accepted. |
| Calendar color | The color of this class's session chips on the board and the public calendar. |
| Active (bookable) | Off hides the class from the public calendar without deleting it. The card shows an Inactive badge. |
| Require email to book / Require mobile number to book | Fields the customer must fill in before the booking is accepted. |
| Save class / Cancel | Saves or discards the form. A failed save shows Save failed so you can try again. |
| Edit / Delete class | Edit reopens the form. Delete removes the class and its sessions and is only allowed when nobody has ever booked. |
| Sessions / Hide sessions | Expands or collapses the session list under the class. |
| Date & time, Minutes, Repeat weekly, Add | Creates sessions. The repeat count creates one session per week from the chosen date. |
| Roster | Opens who booked, who paid, and the Waitlist, Removed, and Marketing OK chips for each person. |
| Remove | Frees the seat. On a free class the earliest waitlisted person is promoted. On a paid class they are invited to book. Refunds for paid attendees are issued from Transactions. |
| Cancel session | Asks you to confirm, then lets you email everyone on the roster that the class was canceled and include a link to your other classes so they can rebook. |
| Reinstate | Restores a canceled session so it can be booked again. |
| Export marketing list | Downloads a CSV of everyone who checked keep me posted on a class booking. |
| Free / deposit / Inactive badges | Show the booking mode and whether the class is currently bookable at a glance. |
Free classes are a great top-of-funnel. The RSVP collects the customer's contact info into your directory, and paid classes convert from the same calendar.
The schedule board
Accept Payments → Scheduling opens on the Day view and offers four ways to look at your calendar. Every appointment, whether you booked it or a customer booked it online, is a job card on this board.
Use the board every day to see who is doing what, to book by hand, and to move work around. There is nothing to set up first. Add your team under Account → Team if you want a column per person, and add services so picking one fills in the duration and price.
A job card shows the time, the customer, and who it is assigned to. Online bookings carry an ONLINE badge, jobs that have already been turned into an invoice carry an Invoiced badge, and booking someone who is already busy shows a Double-booked warning with a Schedule anyway button, so you can double-book on purpose or pick another time.
Done looks like this: the job sits on the right person's column at the right time, the customer has the confirmation email if you asked for one, and the job's Status moves through scheduled, on the way, arrived, and completed as the day goes on.
If a job is missing, check the team filter at the top. All team shows everything, Unassigned shows only jobs with nobody on them, and a single name hides everyone else. If a drag does not stick, the slot was outside the person's working hours or the times snapped to the nearest 15 minutes. If the board looks empty, click Today to jump back to the current date.
- 1Day: an hour-by-hour grid with a column per team member and a red now-line. Double-click an empty slot to book it, drag a job to move it or hand it to another person's column, and drag its bottom edge to change the duration. Times snap to 15 minutes.
- 2Week: seven day columns. Drag a card to another day to reschedule.
- 3List: a searchable agenda of upcoming jobs.
- 4Dispatch: one lane per field-staff member for the day, with a status chip (on the way, arrived, completed) they update from the road.
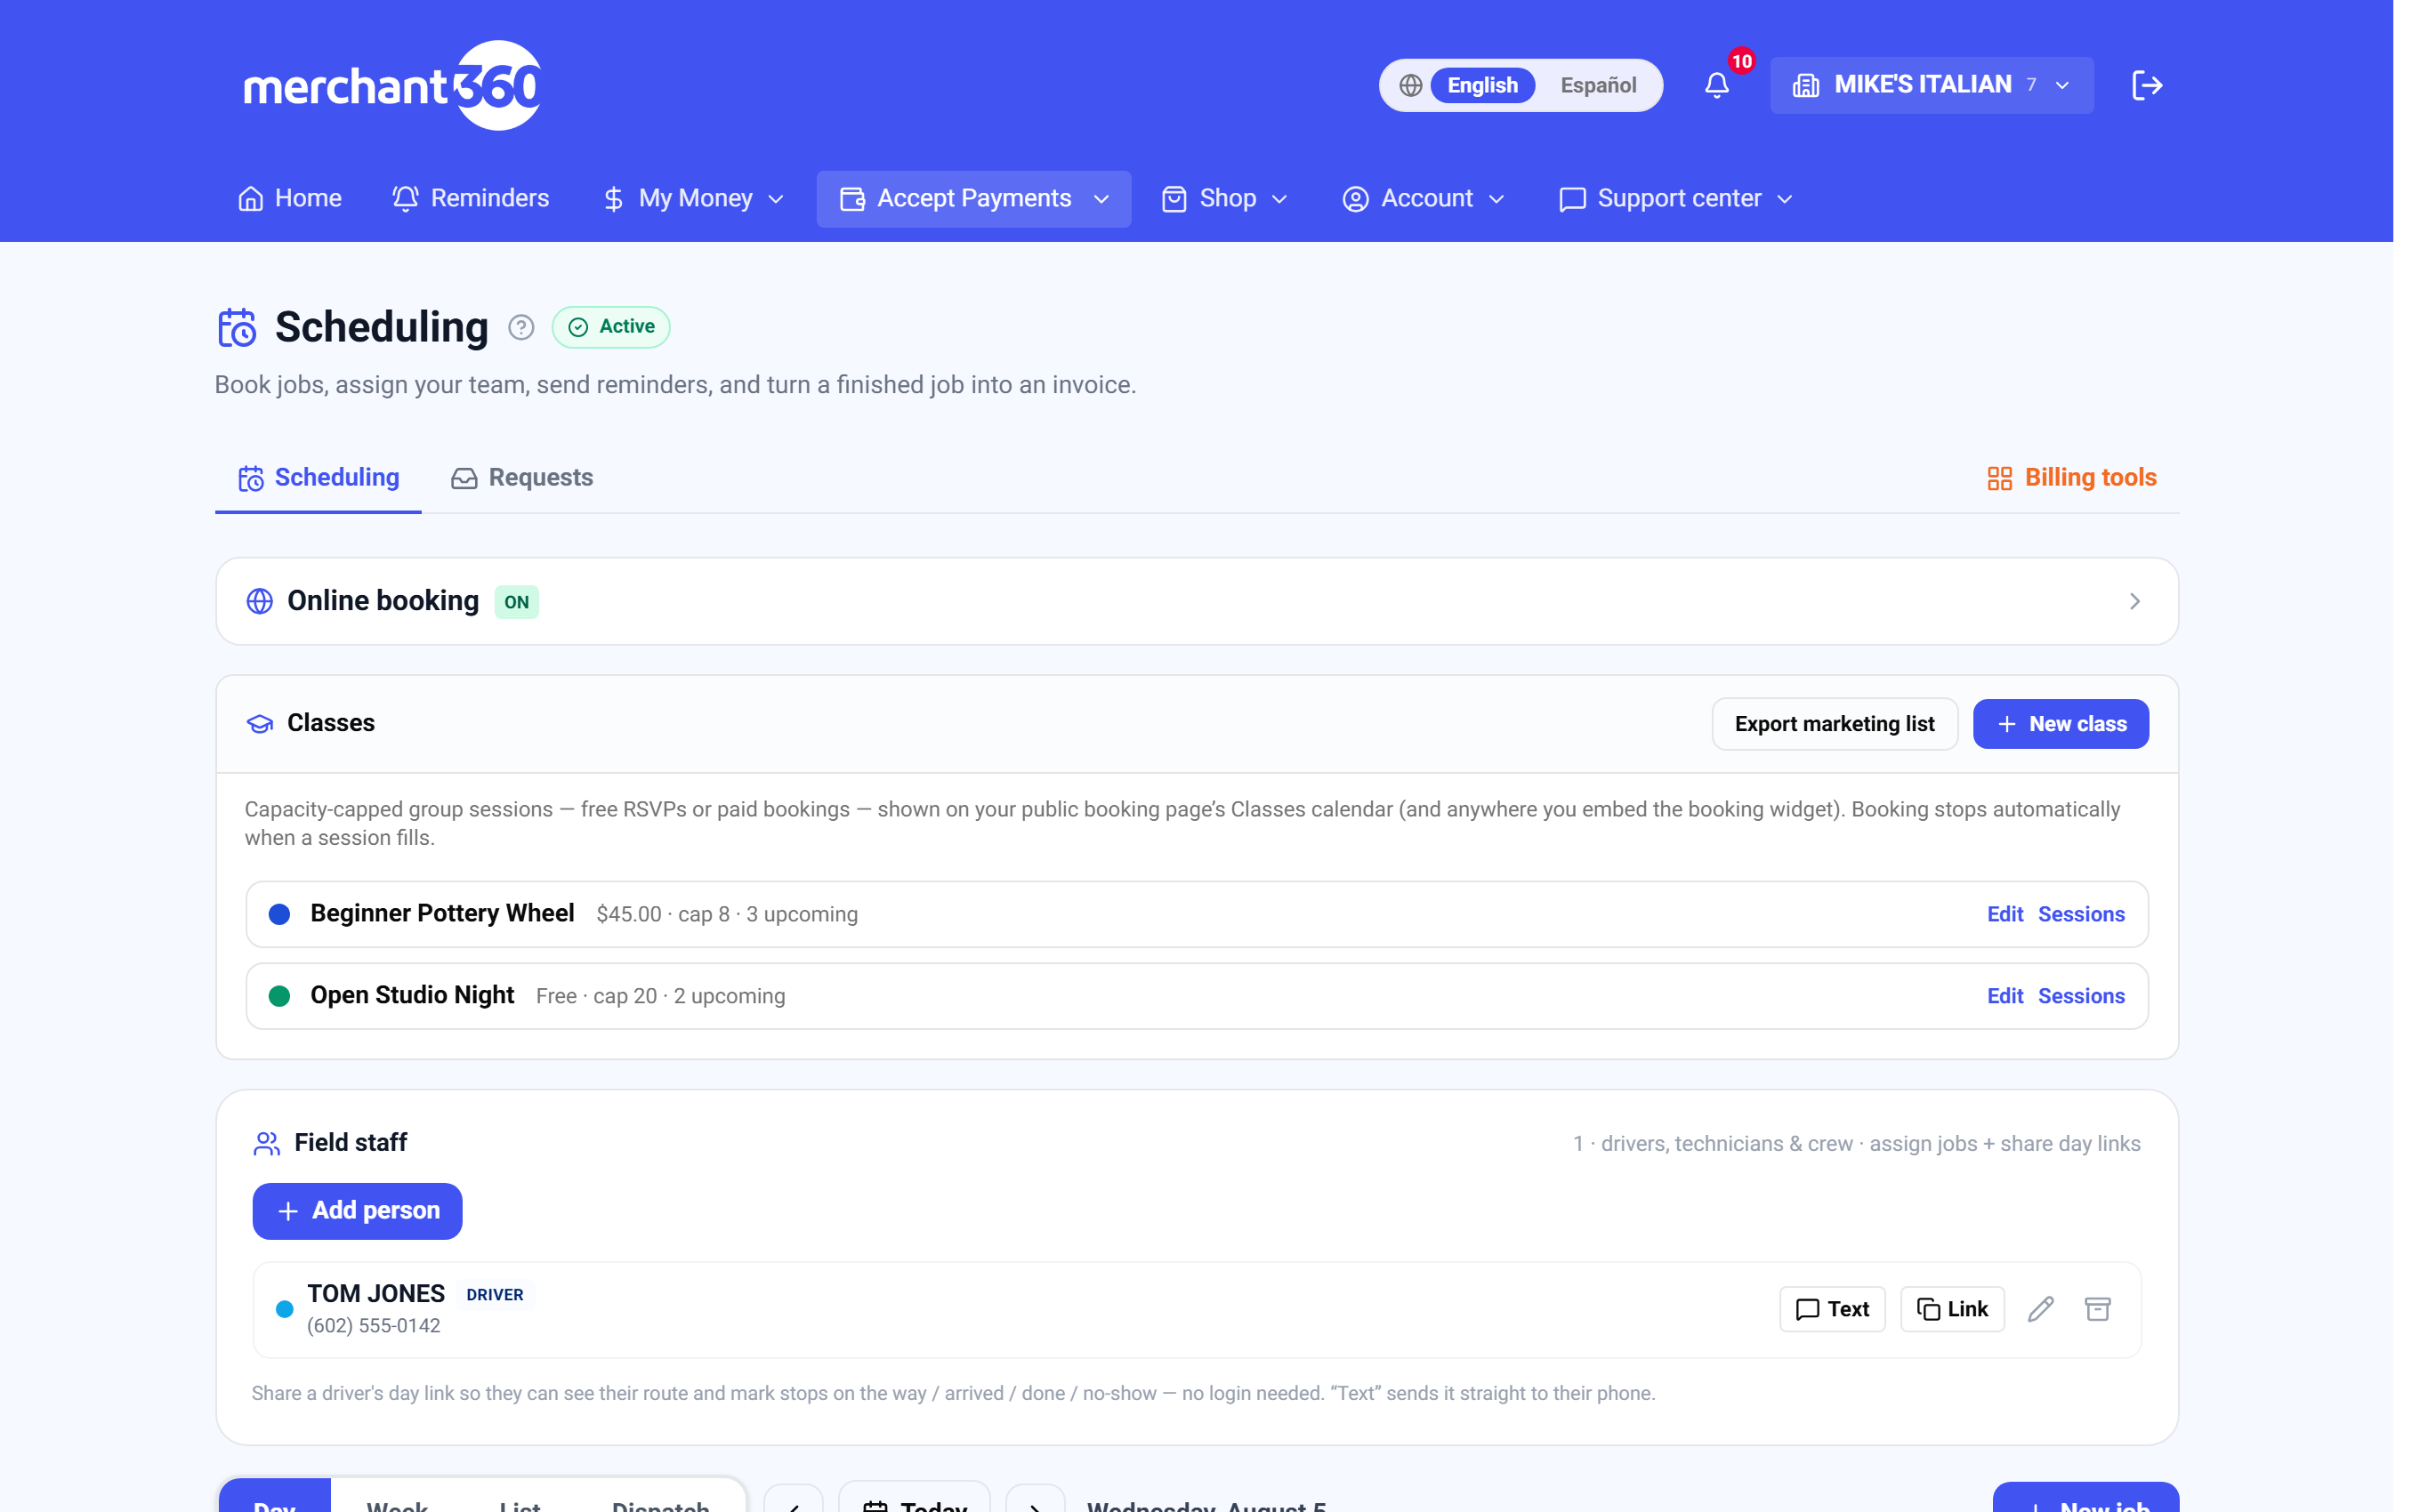
| On this screen | What it does |
|---|---|
| Day / Week / List / Dispatch | Switches the view. Your last choice is kept for next time. |
| Today | Jumps the board back to the current date. |
| Search jobs, customers | Filters the board and the List view by job title or customer name. |
| All team / Unassigned / a person's name | Filters which jobs are shown. Unassigned lists jobs nobody has been given yet. |
| New job | Opens the job editor on a blank job. Double-clicking an empty slot does the same with the date and time filled in. |
| Job, Service type, Date, Start, Mins | The title and timing. Picking a service type fills in the duration, price, and title for you. |
| Customer, or Customer name / Phone / Email | Pick a customer from your directory, or type a new one and they are added to it. |
| Assign to | Chooses the team member or field-staff person. The job moves to their column and appears on their day page. |
| Price, Location, Notes | What you expect to charge, where the work happens, and anything the crew should know. Notes show on the field-staff day page. |
| Status | Scheduled, on the way, arrived, completed, or cancelled. Field staff update it from their phone and it changes here at once. |
| Payments panel and Card on file | Shows any deposit taken at booking and whether the customer has a card saved for the balance. |
| Cancel & keep deposit / Keep appointment | When you cancel a job that took a deposit, choose whether the deposit is kept under your policy or the appointment stays. |
| Email the customer when I confirm, cancel, or reschedule | Sends the confirmation, cancellation, or new-time email with the Manage appointment button when you save. |
| Convert to invoice / View invoice | Turns the job and its work-order lines into a draft invoice, or opens the invoice that already exists. |
| Create / Save / Cancel / Delete | Creates or saves the job, closes without saving, or removes the job from the board. |
| ONLINE badge | Marks a job the customer booked from your public booking page. |
| Invoiced badge | Marks a job that already has an invoice. |
| Double-booked warning / Schedule anyway | Appears when the assigned person already has a job at that time. Schedule anyway books it regardless. |
Booking someone who is already busy warns you first, so you can double-book on purpose or pick another time.
Services you offer
Define your services once and picking one when scheduling fills in the duration, price, and title. Services live inside the Online booking panel on the Scheduling page, under Services customers can book.
Set up services before you open online booking, because the public page only lists services marked Bookable online, and a service with no minutes cannot be placed on the calendar. Each service sets a duration, prep and cleanup buffers, a price, and a color, and can override your deposit rule for that service only.
Done looks like this: every service you sell is in the list with minutes and a price, the ones customers may book online are ticked Bookable online, and picking one in the job editor fills the job in for you.
If a service does not appear on your booking page, tick Bookable online and click Save booking settings. If bookings run into each other, add a Buffer after so cleanup time is blocked. If a service should take a different deposit from the rest, set Deposit for this service instead of changing your account-wide rule.
- 1Open the Online booking panel on the Scheduling page and scroll to Services customers can book.
- 2Click Add a service. Enter the service name, minutes, and price, and pick a color.
- 3Add a buffer before or after if you need setup or cleanup time, and tick Bookable online if customers may book it themselves.
- 4Leave Deposit for this service on your default, or choose none, a flat amount, a percent, or full price for this service only.
- 5Click Save booking settings.
| On this screen | What it does |
|---|---|
| Services customers can book | The list of every service, with its minutes, price, and whether it is bookable online. |
| Add a service | Adds a blank row to fill in. |
| Service name | The title customers see on the booking page and the job title on the board. |
| Minutes | How long the job lasts. Sets the size of the card on the board. |
| Price $ | The price filled into the job and shown on the booking page. |
| Bookable online | Ticked services appear on your public booking page. Unticked ones are only available to you in the job editor. |
| Buffer before / Buffer after | Minutes blocked around the appointment for setup or cleanup. Customers cannot book into a buffer. |
| Deposit for this service | Overrides your account-wide deposit rule for this one service: inherit the default, no deposit, a flat amount, a percent of the price, or full price up front. |
| Color | The color of this service's cards on the board. |
| Edit / Delete | Changes or removes the service. Existing jobs keep their details. |
| Save booking settings | Saves the whole Online booking panel, including services. |
Let customers book online
Online booking gives you a public page where customers pick a service, a person, and a time from your real availability, and the appointment lands on your board. Everything for it lives in the Online booking panel on the Scheduling page.
Set it up once, before you share the link. You need at least one service marked Bookable online and at least one person marked bookable with working hours. A deposit or a card requirement needs your card acceptance active. Turn the master switch off at any time and the page shows a paused notice while your in-house scheduling keeps working.
Done looks like this: the Let customers book online switch is on, your booking link opens a page that lists your services and people, a test booking lands on the board with an ONLINE badge, and the customer receives the confirmation email.
If a time you expect is not offered, check the person's working hours, Min notice, Book up to, any blocked times, and the Max online bookings per day cap. If a customer's deposit is declined, nothing is booked and the slot stays open. If the embed does not show on your website, paste the whole snippet from Copy code into an HTML block rather than a plain text block.
- 1Open the Online booking panel on the Scheduling page and turn on Let customers book online. Copy your booking link to share it, or copy the embed snippet to put booking on your own website.
- 2Set your working days, day start and end, minimum notice, and how far ahead customers can book. Optionally cap the number of online bookings per day and block specific dates or times.
- 3Under Who can be booked, mark who can be booked. Each person gets their own hours and the services they perform, and customers can pick a person or Anyone available, in which case whoever is free is auto-assigned.
- 4Set a deposit to book: none, a flat amount, a percent, or full price, charged to the customer's card when they book. Or require a card on file, which places a small verification hold that is voided right away.
- 5Add a cancellation policy, a minimum-cancel window, and a no-show fee so expectations are clear up front, then click Save booking settings.
| On this screen | What it does |
|---|---|
| Let customers book online | The master switch. Off shows a paused notice on your public page and the embed. |
| Your booking page / Copy link | Your public booking address. Copy link puts it on the clipboard for email signatures, social bios, or a QR code. |
| Embed on your website / Copy code | A two-line snippet that puts the booking widget, including the Classes calendar, on your own site. |
| Working days | The days of the week customers may book. |
| Day starts / Day ends | The earliest and latest booking times on a working day. |
| Min notice (hrs) | How many hours ahead a customer must book. Blocks last-minute bookings. |
| Book up to (days) | How far into the future the calendar offers times. |
| Max online bookings per day | Caps how many online bookings a day can take. Leave blank for no cap. |
| Booking note | A short note shown on the booking page and in the confirmation, such as parking instructions. |
| Deposit to book | No deposit, Flat amount, Percent of price, or Full price up front. Charged to the customer's card at booking and shown in the job's Payments panel. |
| Always require a card to book | Takes a card even when no deposit is due. A small verification hold is placed and voided right away, and the card is saved for the balance. |
| Cancellation & no-show policy | Policy shown to customers is the text on the booking page and the Manage page. Lock changes within (hours) stops customer changes close to the appointment. No-show fee is the amount you may charge under the policy. |
| Block specific times / Block the whole day / Save blocked times | Removes times or whole days from the public calendar, for holidays or private events. |
| Who can be booked | The staff editor. Add person (no login needed) adds someone who never signs in. Each person has a Name, a Title (shown to customers), a Calendar color, Working hours with Different hours per day and Closed days, Services performed, and Time off with a reason. |
| Bookable / Off | The status on each person's row. Off keeps them on your board but hides them from the public page. |
| No login / Custom hours badges | Show that the person has no Merchant360 sign-in, or has hours that differ from your business hours. |
| Calendar feed (this person only) / Copy feed | A private link for one person's appointments to subscribe in Google, Apple, or Outlook calendar. Share it only with them. |
| Save hours / Remove person | Saves the person's settings, or removes them from the staff list. |
| Auto-invoice completed jobs | Creates a draft invoice by itself when a job is marked completed. Explained under Auto-invoice & calendar feed. |
| Save booking settings | Saves every setting in the panel. Nothing changes on the public page until you click it. |
Customers book by picking a service, a person, and a time from your real availability, and the appointment lands on your board. A declined deposit books nothing.
Confirmations, reminders & the Manage page
The moment a customer books, they get a confirmation email, and a reminder goes out the day before by email and text. Every message carries a Manage appointment button. When you book a job by hand, tick Email the customer when I confirm, cancel, or reschedule in the job editor and the same confirmation goes out.
The Manage page needs no login. From it the customer can reschedule against your live availability, cancel with a two-step confirm, or add the appointment to their own calendar. Your cancellation policy text and the Lock changes within window from the Online booking panel apply on that page, so a customer inside the locked window sees the policy instead of a reschedule button.
Done looks like this: the customer's inbox has the confirmation, a text arrives the day before, and any change they make on the Manage page shows on your board at once with the new time or a cancelled status.
If a customer says they never got the confirmation, open the job and check the email address on it, then save with the email box ticked to resend. Reminder texts need a mobile number on the job. If a customer cannot reschedule from the Manage page, the appointment is inside your Lock changes within window, so make the change for them from the board.
| On this screen | What it does |
|---|---|
| Email the customer when I confirm, cancel, or reschedule | A checkbox in the job editor. Ticked, saving the job sends the matching email with the Manage appointment button. |
| Confirmation email | Sent automatically on every online booking, with the service, person, time, location, your booking note, and the Manage appointment button. |
| Day-before reminder | Sent by email and by text the day before the appointment. The text needs a mobile number on the job. |
| Manage appointment | The button in every email. Opens the customer's Manage page without a login. |
| Reschedule | On the Manage page. Offers only times that are free on your board, and moves the job when the customer confirms. |
| Cancel | On the Manage page. A two-step confirm, then the job is marked cancelled on your board and your deposit policy applies. |
| Add to calendar | On the Manage page. Downloads the appointment to the customer's own calendar app. |
| Policy shown to customers / Lock changes within (hours) | Set in the Online booking panel. The policy text appears on the Manage page, and changes are refused inside the locked window. |
Work orders & getting paid
Open a job to build its work order. Add priced line items as Labor, Material pulled from inventory, or Fee, with a live profit margin. Track a task checklist, attach photos, run a start and stop time clock for the crew, and read a profitability card that nets revenue against materials and labor.
Use the work order on any job where the bill is more than the flat service price: repairs with parts, installs with add-ons, or anything where the crew's time matters. Materials come from your Products & services catalog, so add the parts you use there first and their cost and price fill in automatically.
When the work is done, Convert to invoice turns the job into a draft invoice with the lines included, and the normal invoice flow, with a pay link, reminders, and partial payments, takes it from there. A job that was already invoiced shows an Invoiced badge and View invoice instead.
Done looks like this: the line items add up to what you will bill, the profitability card shows a margin you are happy with, and the customer has the invoice with the same lines on it.
If a material is not in the picker, add it under Products & services and try again. If profit reads low, check the Labor rate on the profitability card and the unit cost on each material line. If Convert to invoice is greyed out, the job already has an invoice, so use View invoice to open it.
- 1Open the job and scroll to Line items. Click Labor, Material, or Fee to add a line, or + Material from inventory to pull an item from your catalog with its price filled in.
- 2Set the Qty and Unit price on each line and click Save line items.
- 3Add tasks under Checklist, photos under Photos, and use Start timer and Stop timer while the crew works.
- 4Read the Profitability card, then click Convert to invoice when the job is done.
| On this screen | What it does |
|---|---|
| Line items: Labor / Material / Fee | Adds a priced line of that type. Labor and materials feed the profitability card; fees are pure revenue. |
| + Material from inventory | Picks an item from Products & services. Its price and cost fill in, and its stock is reduced when the invoice is paid. |
| Qty and Unit price | The quantity and price per unit on each line. The line total updates as you type. |
| Save line items | Saves the lines to the job. They carry over to the invoice. |
| Checklist / Add a task | A task list the crew ticks off on the board or from their day page. |
| Photos / Add photos | Attaches before and after photos to the job. Field staff can add photos from their phone. |
| Time / Start timer / Stop timer | A time clock for the crew on site. The logged time feeds the labor figure on the profitability card. |
| Profitability: Labor rate, Revenue, Materials, Profit | Nets the revenue on the lines against material cost and labor at the rate you enter, and shows the margin. |
| Convert to invoice | Creates a draft invoice from the job with every line item, then opens it so you can send it. |
| View invoice | Opens the invoice already created from this job. |
Auto-invoice & calendar feed
Turn on Auto-invoice completed jobs in the Online booking panel and finished jobs become draft invoices by themselves, no manual convert needed. The invoice is created the moment a job's Status changes to completed, whether you change it on the board or the field-staff person marks it done from their phone.
Copy the private calendar feed under Subscribe in Google / Apple Calendar and subscribe to it in your calendar app so your whole schedule shows on your phone and stays current. Each bookable person also has a Calendar feed (this person only) link in the staff editor that shows only their appointments.
Done looks like this: completing a job shows an Invoiced badge on the card within a moment, and new bookings appear in your phone's calendar without opening Merchant360.
If a completed job did not create an invoice, check that Auto-invoice completed jobs is on and saved, and that the job did not already have an invoice. If your calendar app shows nothing, give it time, because calendar apps refresh subscribed feeds on their own schedule, often every few hours. If a feed link has been shared with someone who should no longer see it, remove the subscription from their calendar, because the link itself is private and does not expire.
- 1Open the Online booking panel, tick Auto-invoice completed jobs, and click Save booking settings.
- 2Under Subscribe in Google / Apple Calendar click Copy feed, then in Google Calendar choose Add other calendars → From URL, or in Apple Calendar choose File → New Calendar Subscription, and paste the link.
- 3For one person's calendar, open them in the staff editor and click Copy feed under Calendar feed (this person only).
| On this screen | What it does |
|---|---|
| Auto-invoice completed jobs | When on, a job whose Status becomes completed turns into a draft invoice with its work-order lines, with no click needed. |
| Subscribe in Google / Apple Calendar / Copy feed | Copies the private feed link for your whole schedule. Paste it into any calendar app that subscribes to a URL. |
| Calendar feed (this person only) / Copy feed | In the staff editor. A private link for one person's appointments. Share it only with them. |
| Copied | Confirms the link is on your clipboard. |
| Save booking settings | Saves the auto-invoice switch with the rest of the panel. |
Recurring visits
Set up a recurring plan and the next visit is generated automatically on a cadence you choose: weekly, every two weeks, monthly, quarterly, every six months, or annually. It is built for lawn care, pool service, filter changes, and anything else that repeats. Plans live in the Recurring plans card on the Scheduling page.
Use a plan instead of booking each visit by hand whenever the same customer gets the same service on a schedule. Add the customer and the service type first so the plan can fill in the price and minutes.
Done looks like this: the plan shows in the Recurring plans card with its frequency, the first visit is on the board, and each later visit appears on the board on its own as the date comes around. Every generated visit is a normal job, so it can be assigned, invoiced, and moved like any other.
If a visit did not appear, open the plan and check it is not Paused and that the first visit date has passed. If the customer stops service, click Pause to keep the plan without generating visits, or Delete to remove it. Visits already on the board stay where they are.
- 1In the Recurring plans card, click New plan.
- 2Give the plan a title, pick the customer, the service type, the price, and the minutes.
- 3Set the first visit date and time, choose the frequency, and optionally assign a team member or field-staff person.
- 4Save. Pause or Resume the plan at any time from its row.
| On this screen | What it does |
|---|---|
| New plan | Opens the New recurring plan form. |
| Title | The plan's name, such as Quarterly maintenance. It becomes the title of each generated job. |
| Customer / Customer name | Pick a customer from your directory or type a new name. |
| Service type, Price, Mins | What each visit is, what it costs, and how long it takes. Picking a service type fills in the other two. |
| First visit and Time | When the first job is created. Later visits count forward from it. |
| Frequency | Weekly, Every 2 weeks, Monthly, Quarterly, Every 6 months, or Annually. |
| Assign to / Field staff (driver / tech) | Who each generated visit goes to. Leave it Unassigned to decide per visit. |
| Pause / Resume | Pause stops new visits from being generated and shows a Paused badge. Resume picks the cadence back up. |
| Delete | Removes the plan. Visits already on the board are kept. |
| Cancel | Closes the form without saving. |
Field drivers & dispatch
If you send people into the field, such as drivers, technicians, installers, cleaners, movers, or inspectors, you can dispatch a day's jobs to each of them and they get a simple, login-free my day page on their phone. There is no app to install and no password. Their updates flow straight back to your scheduling board in real time.
It is a two-way link. You assign the stops; they see the route, mark each one on the way, arrived, done, or no-show, check off the tasks on the job, and add a note or a photo. Everything they do shows up on your board the moment they tap it, so the office always knows where the day stands.
Use the Field staff card on the Scheduling page for anyone who works from a phone and never needs to sign in to Merchant360. People who sign in and take bookings belong in the staff editor under Who can be booked instead. A mobile number is needed for the Text button and for the automatic assignment text.
Done looks like this: each field person is in the Field staff card with a role and mobile number, their day link opens on their phone and lists today's stops, and status changes they make appear on the Dispatch view as they happen.
If a driver says the link does not work, it was probably rotated with Reset link, so send the new one with Text or Link. If they see no stops, nothing is assigned to them for today, so open the job and set Assign to. If a phone is lost, click Reset link at once; the old link stops working immediately.
- 1Add your people: in the Field staff card on the Scheduling page click Add person and enter the name, role (Driver, Technician, Installer, Cleaner, Mover, Inspector, or Worker), mobile number, and optionally email, vehicle, color, and an internal note. Each one gets their own private day link.
- 2Assign the work: open a job on the schedule board and pick who it goes to under Assign to. The job immediately appears on that person's day. With Text this driver when a job is assigned on, they also get a text with the time, address, and their route link.
- 3Send them their day: from the Field staff card, tap Text to send them their personal link, or Link to copy it. It opens their schedule for the day on their phone with no login. The same link always shows today's stops.
- 4They work the day: each stop shows the time, the customer's name, a tap-to-call phone number, a tap-to-navigate address, the task checklist, and any notes. They tap to update status and check off tasks as they go.
- 5You stay in control: filter the board by a driver to see just their route, use Reset link if a phone is lost or someone leaves, and remove anyone you no longer dispatch.
| On this screen | What it does |
|---|---|
| Field staff card | Lists every field person with their role, contact details, and the day-link buttons. |
| Add person | Opens the form for a new field-staff person. They never need a Merchant360 login. |
| Name, Role, Mobile, Email, Vehicle, Color | Who they are and how to reach them. Mobile is needed for Text and for assignment texts. Vehicle is for your own reference. Color marks their jobs on the board. |
| Internal note | Office-only text. It is never shown to the driver. |
| Text this driver when a job is assigned | Sends an SMS with the time, address, and their route link every time a job is assigned to them. |
| Save / Cancel | Saves the person or closes the form. |
| Text | Texts the person their day link right now. |
| Link | Copies the day link so you can send it another way. |
| Reset link | Rotates the day-page link after a confirm. The old link stops working immediately and you send the new one. |
| Edit driver / Remove driver | Changes their details, or removes them from dispatch. Past jobs keep their name. |
| No contact info | A badge on a row with no mobile or email, so Text has nowhere to send. |
| Dispatch view | On the board. One lane per field person for the day with their status chips. |
| On the way / Arrived / Done / No-show | The statuses a driver taps on a stop from their phone. Each one updates the job on your board at once. |
The day link is the only key, so treat it like a password. Reset link on the Field staff card is the fast way to cut off access if a phone goes missing.
Work requests: a public request form and your Requests inbox
Not every job starts with a price. The request form gives customers a link where they describe what they need, and each submission lands in your Requests inbox, ready to turn into an estimate. It suits trades, repair, cleaning, catering, and any business that quotes before it bills.
Set it up under Accept Payments → Requests. In the Public request form card, tick Accept submissions, write the Intro shown on the form (what you do, your service area), list the addresses to Notify on a new request, and click Save. The first save creates Your request link, which you can Copy and put on your website, in your email signature or on a QR code. Embed on your website gives you a short snippet to paste where the form should appear on your own site.
The customer fills in their name, an email or a phone (one of the two is required so you can reach them), the service if you have set up services, what they need, how urgent it is, details, up to 4 photos, the service address, a preferred date and time, a budget and how they heard about you. They see Request sent, and if they gave an email they get a confirmation from your business.
You are emailed at the notify addresses and your notification recipients as soon as a request comes in. In the inbox each request is a card with the customer, an urgency badge when it is Soon, Urgent or Emergency, the preferred date, the budget, the address and photo thumbnails. Use the status menu to move it from New to Reviewed, Quoted or Closed, keep Internal notes that only your team sees, and Archive it when it no longer belongs in the list.
Convert to estimate creates a draft estimate with the customer's contact details and address, the request details as the notes, and one line describing the work at $0.00. The estimate opens for you to price, and the request moves to Quoted; the button becomes Open estimate from then on. From there it is an ordinary estimate: send it, take a deposit on acceptance, and convert it to an invoice.
If customers see a message that the form is not accepting submissions, Accept submissions is unticked. The form is in English.
- 1Open Accept Payments → Requests.
- 2Tick Accept submissions, fill in the intro and the notify emails, and click Save.
- 3Copy Your request link and share it, or paste the embed code into your website.
- 4When a request arrives, open it, set the status and add internal notes.
- 5Click Convert to estimate, price the line, and send the estimate.
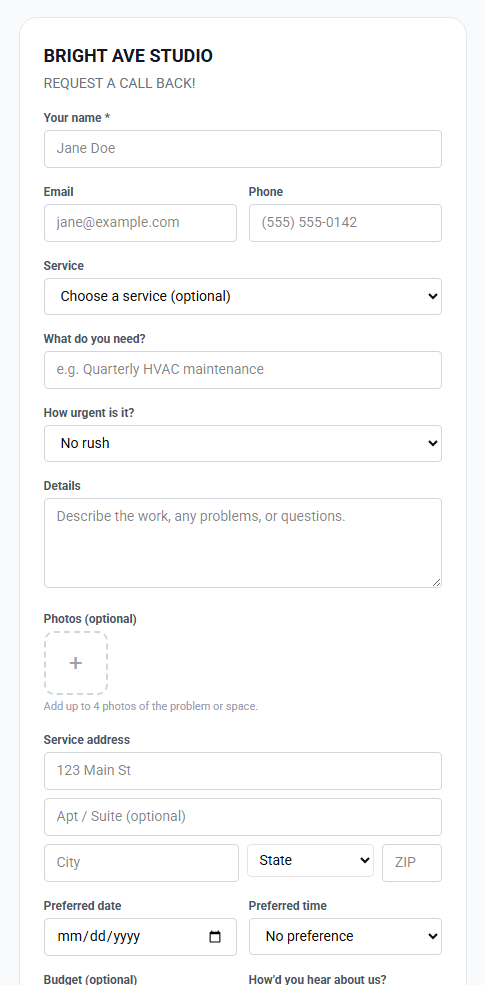
| On this screen | What it does |
|---|---|
| Accept submissions | Turns the public form on or off. Off, the form tells customers to call you instead. |
| Your request link / Copy | The public address of your form. |
| Embed on your website / Copy code | A snippet that places the same form on your own site. |
| Intro shown on the form | A short note above the form: what you do, your service area. |
| Notify these emails on a new request | Extra addresses, separated by commas, alerted on every request in addition to your notification recipients. |
| Status: New, Reviewed, Quoted, Closed | Where the request stands. Convert to estimate sets Quoted for you. |
| Internal notes | Private notes on the request. They save when you click away. |
| Convert to estimate / Open estimate | Creates the draft estimate, then opens it. |
| Archive | Removes the request from the inbox. |
Put the request link on your website's contact page and in your email signature. Photos and an address on the request help you price the job before a visit.
Rentals on your schedule
If you rent units through Reservations, a Rentals strip sits above the board for the week you are viewing: one row per unit, with reserved and blocked days marked. It is there so you can see a cabin turnover or an equipment pickup next to the day's appointments. Rentals never take a staff slot and never block an appointment, and the strip only appears once you have rental units.
