
Getting started
Your free business hub – what Merchant360 is and how to get in.
What is Merchant360?
Merchant360 is the business hub that comes with your Electronic Payments merchant account. One login covers invoicing, recurring billing and subscriptions, estimates with e-signatures, a customer directory with saved cards, hosted checkout pages and payment links, bank payments (eCheck / ACH), gift cards, loyalty, appointment scheduling, bookkeeping, and your full processing reports.
Use it from the first day. The tools are free with your account, and you can build customers, draft invoices, and design a gift program before processing is live. Card and bank charging inside the tools switches on once your payment processing is approved.
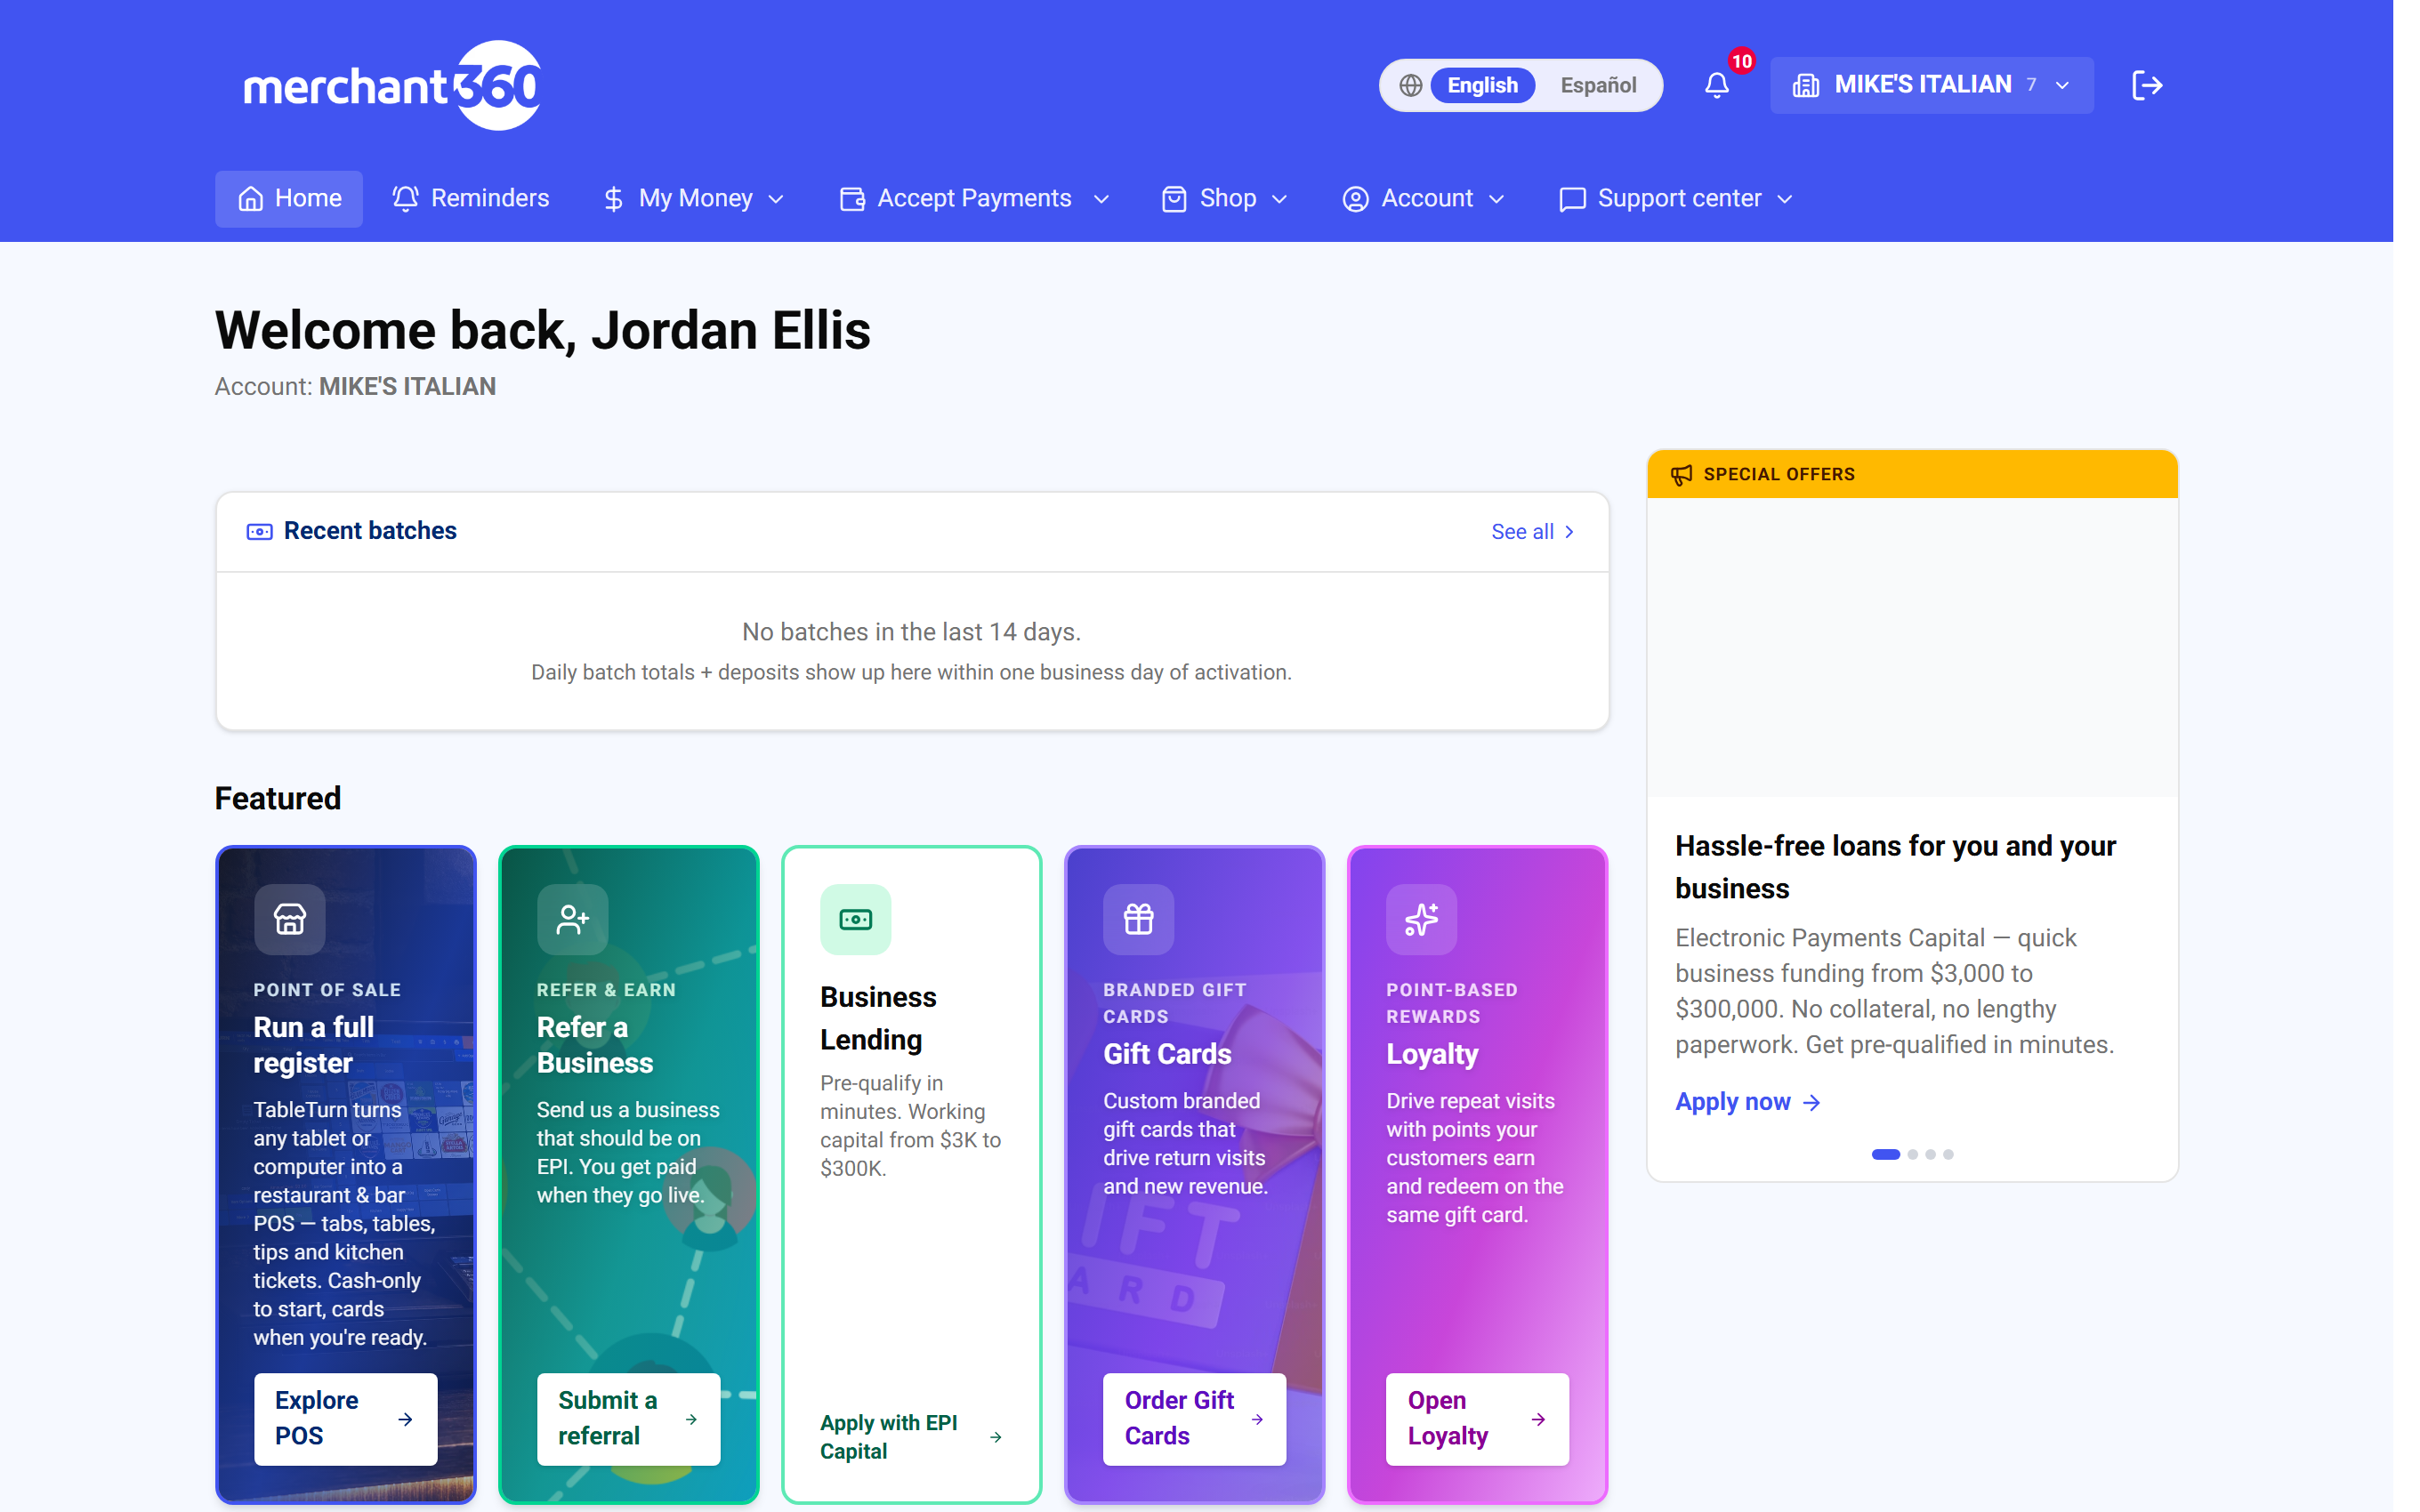
The home page is the starting point. The top bar has three menus. Tools holds everything you do (invoices, customers, recurring, estimates, checkout pages). Money holds everything you get paid and reconcile (transactions, deposits, statements, reports). Account holds team, security, supplies, and settings. The cards on the home page open the same tools with a live count of what needs attention.
Also in 2026: the Merchant360 mobile terminal app for iPhone and Android takes a card or cash payment anywhere. The Mobile terminal chapter walks through every screen.
To find a topic, use the search box at the top of every guide page. Type a word such as custom fields, refund, or bank payments and pick a result to jump straight to that section. Every section heading has a link icon so you can copy a link to that exact spot for a teammate.
If a tool you expect is missing from the menus, your login role may not include it (see Add your team & set roles), or the tool has not been turned on for your account yet. Your sales rep can turn on billing tools, bank payments, and the mobile terminal pilot.
| On this screen | What it does |
|---|---|
| Tools menu | Opens the tools you work in: Invoices, Estimates, Customers, Recurring, Plans, Checkout pages, Gift cards, Scheduling, and the rest. Each entry is a page under Merchant360. |
| Money menu | Opens what you get paid and reconcile: Transactions, Deposits, Statements, Reports, and bank payment activity. |
| Account menu | Opens Team, Security, Supplies, Support, and account settings. |
| Location switcher | Shown only when your login covers more than one location. Picks which business the page is showing; everything you create is filed under the location showing here. |
| Guide search box | Searches every chapter of this guide by word and jumps to the matching section. |
| Section link icon | Copies a direct link to that section so you can send a teammate to the exact step. |
Logging in
You sign in at merchant360.net with the email address on your merchant account and your password. The first sign-in comes from the welcome link in your approval email, which lets you set your own password. Nobody at Electronic Payments sees or sets your password for you.
Once you are in, you land on the home dashboard with the Tools, Money, and Account menus across the top. If two-factor authentication is on for your login, a texted code is asked for on a new device (see the next section).
If the welcome link has expired, or you cannot find it, click Forgot your password on the sign-in screen and a reset link is emailed to the address on file. If no email arrives, check spam, then ask your sales rep to resend the invite. If you see a message that your session ended, you were signed out after a period of no activity; sign in again and you return to where you were.
- 1Go to merchant360.net and click Log in.
- 2Enter the email address on your merchant account and your password.
- 3First time in? Use the welcome link from your approval email to set a password. If it expired or you can't find it, click Forgot your password on the login screen, or ask your sales rep to resend the invite.
- 4You land on your home dashboard. The top bar has three menus: Tools (everything you do), Money (everything you get paid and reconcile), and Account (team, security, supplies, settings).
| On this screen | What it does |
|---|---|
| The email address on your merchant account or your team invite. This is your username. | |
| Password | The password you set from the welcome link. Twelve characters or more. |
| Sign in | Checks the email and password and opens your home dashboard. On a new device with two-factor on, a texted code is asked for first. |
| Forgot your password | Emails a reset link to the address on file. Open it to choose a new password, then sign in. |
| Send Reset Link | On the reset screen, sends the reset email. The link expires after a short time; request a new one if it has. |
| Language | Switches Merchant360 between English and Spanish. The choice is remembered on this browser. |
Bookmark merchant360.net and add it to your phone's home screen. On the login page, most phones offer Add to Home Screen so Merchant360 opens like an app.
Turn on two-factor authentication
Your account can move money, so protect the login. Two-factor authentication (2FA) adds a one-time code texted to your mobile on top of your password, so a stolen password alone cannot get in. The mobile number belongs to your login, not to a business, so it protects every account this login can open.
Turn it on under Account → Security. Enter a US mobile number, enter the 6-digit code that is texted to it, and the panel shows Enabled with the number the codes go to. From then on a sign-in from a new device asks for a code. A device you mark as trusted skips the code for 90 days; the Trusted Devices list shows each one and lets you revoke any you do not recognize.
The same number is used for protected changes such as banking updates, large refunds, API keys, and team changes. The Large-refund verification card on this page sets the amount above which a refund in billing tools needs a texted code, and which team members it applies to. The Security page also holds the PCI compliance attestation and the switch that turns billing tools off or back on (owner only).
This is strongly recommended for every owner and for anyone who can send money or change banking. When a teammate is invited, their own mobile number is asked for on the invite so their codes go to their phone, not yours.
If the code does not arrive, check that the number is a US mobile that can receive texts, wait a minute, then tap Resend code. If you changed phones, sign in from a trusted device or with your password and update the number here. If you have lost access to both, your sales rep can verify you and reset the number.
- 1Go to Account → Security.
- 2Turn on two-factor authentication and follow the prompts to link your phone.
- 3From then on, logging in from a new device asks for a code. This is strongly recommended for every owner and for anyone who can send money or change banking.
| On this screen | What it does |
|---|---|
| Two-Factor Authentication | The panel that enrolls your mobile number. Enter a US mobile number and tap the button to text a verification code. |
| Text me a verification code | Sends a 6-digit code to the number you entered. Enter it to finish enrolling; the panel then reads Enabled and shows the masked number. |
| Resend code | Sends a fresh code if the first one did not arrive or expired. |
| Use a different number | Replaces the enrolled mobile number. The new number is verified with a code before it takes over. |
| Trusted Devices | Lists every device that can skip the code for 90 days. Revoke removes one device; Revoke all clears the list so every device asks for a code again. |
| Large-refund verification | Require a texted code for large refunds turns the check on. Require a code for refunds over sets the dollar limit ($0.00 means every refund). Applies to lists team members; unchecked users refund without a code. Save limit stores it. |
| Turn off billing tools / Turn billing tools back on | Owner only. Switches the invoicing, recurring, and customer tools off or on for the whole account. A reason is asked for when turning them off. |
| PCI Compliance | Opens the annual Self-Assessment Questionnaire (SAQ) attestation. Only you can complete it; upload the signed SAQ, tick the affirmation, and click Affirm & complete attestation. |
Running more than one location
If you operate several locations under one ownership, your login opens all of them and the location switcher in the top bar moves you between them. Each location keeps its own customers, invoices, deposits, transactions, and reports, so nothing bleeds across.
The switcher groups locations under their headquarters. A headquarters that does not process payments itself is marked as a non-processing HQ; expand it to see the locations underneath. Pick a location and the whole page reloads under that business.
Pick the right location before you create an invoice, add a customer, or take a payment. Whatever location is showing in the top bar is the one the work is filed under. An invoice opened under the wrong location shows a notice naming the business it belongs to, with a button to open it there.
If a location is missing from the switcher, that location has not been linked to your login yet. Team access is granted per business, so ask the owner of that location (or your sales rep) to add your email under Account → Team for it.
| On this screen | What it does |
|---|---|
| Location switcher | The business name in the top bar. Click it to list every location your login can open. |
| Expand locations / Collapse locations | Shows or hides the locations grouped under a headquarters. |
| Non-processing HQ | A badge on a headquarters that holds the locations but does not process payments itself. Pick a location under it to work. |
| Location row | Switches the page to that business. Every tool, report, and customer list now shows that location's data. |
| Open in <business> | Shown on an invoice or customer that belongs to another of your locations. Switches to that location and opens the record there. |
Add your team & set roles
You do not have to share one login. Give each staff member their own, with an access type that shows them only what their job needs. Only the account owner can invite or remove teammates; anyone else sees the page read-only with a note to ask the owner.
Each invite needs the teammate's email address, their mobile number for security codes (optional but recommended, because protected changes and large-refund verification text that number), and an access type. Owner has full access. Manager runs full operations. Accountant gets invoices and exports. Clerk gets daily operations. Register is TableTurn POS only. Billing Tools only lets you grant exactly the modules this person may use, such as the virtual terminal, the saved-card vault, invoices and estimates, payment links, recurring billing, credit memos, inventory, scheduling, transactions and batches, reports, statements, exports, checkout pages, and the register. The page shows a matrix of what each role can do with money.
A Billing Tools only invite can also be locked to one card terminal by serial number, and can be limited to Only show this user their own activity so a clerk sees only the sales they ran. An optional 4-digit register PIN sets the person's TableTurn POS passcode.
Team changes are confirmed by text. After you click Invite, a 6-digit code is texted to your own mobile; enter it and click Confirm invite. The invite appears under Pending invites until the teammate accepts the emailed link and sets their own password, then moves to Active members. New teammates receive no automated emails until you add them under Automated email settings, so review that after the invite is sent.
The Sales rep access card on the same page shows whether your sales rep's office has asked to help run your billing tools. Authorize access lets their office open and use your invoices, recurring billing, and payment links on your behalf; Revoke access ends it immediately. Every action they take is logged against their name.
If the invite email never arrives, check the address and spam, then remove the pending invite and send it again. If a teammate cannot see a tool, open their row and adjust the modules or access type; changes apply the moment you save. Owner-only screens such as Profit & Loss and banking stay owner-only no matter what access type you grant.
- 1Go to Account → Team and click Invite. Enter their name, email, and role.
- 2Roles scope access: a bookkeeper sees bookkeeping and reports; a front-counter user sees the terminal and the register but not your Profit & Loss or banking.
- 3The invitee gets an email to set their own password. You can change a role or remove access any time.
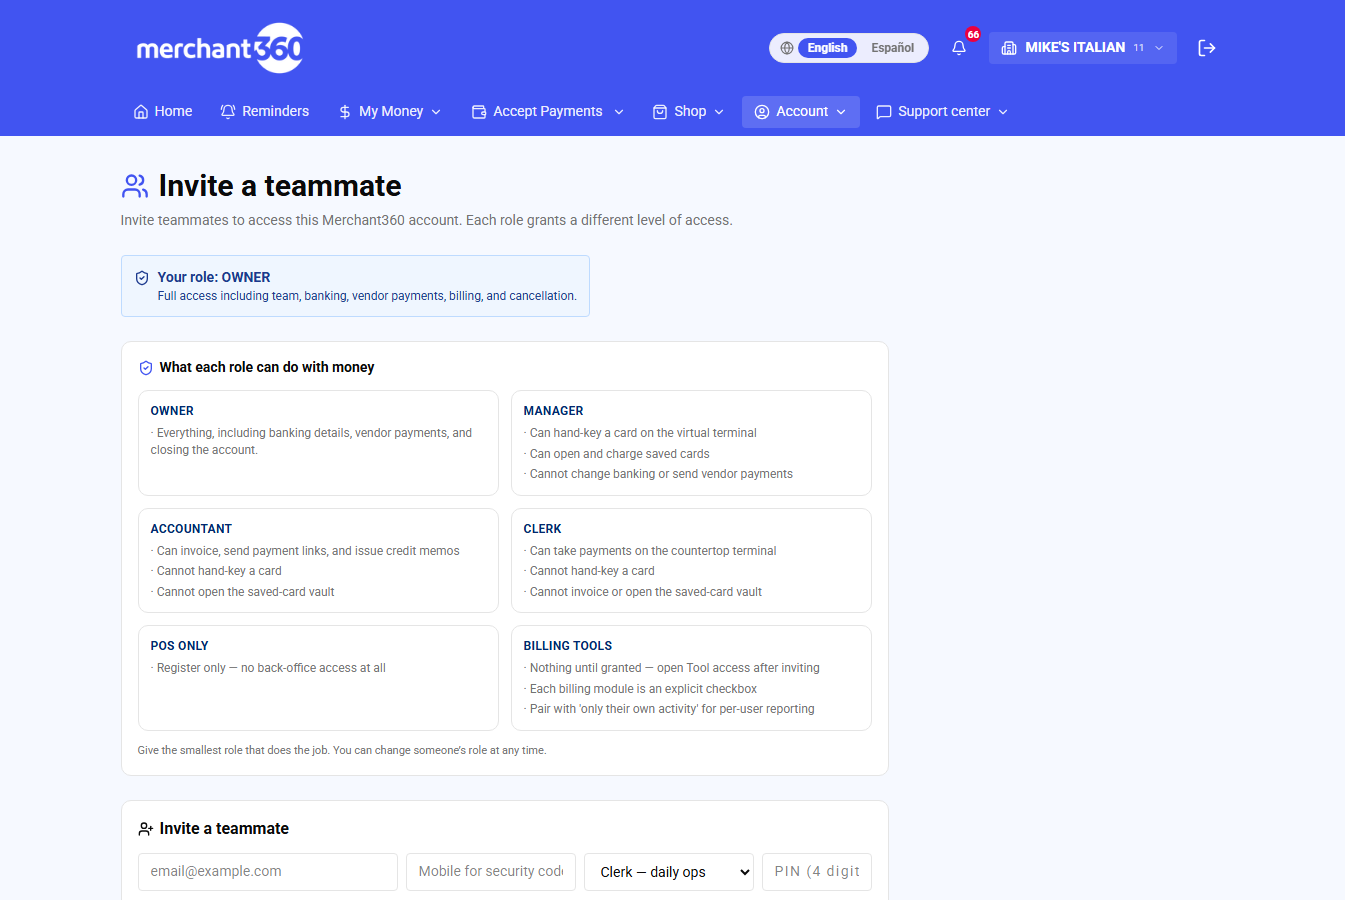
| On this screen | What it does |
|---|---|
| Email address | The teammate's login email. The invite link is sent here. |
| Mobile for security codes | The teammate's own mobile. Security codes for protected changes and large refunds are texted to it. Add mobile on an active member fills it in later. |
| Access type | Owner, Manager, Accountant, Clerk, Register (TableTurn POS only), or Billing Tools only. Sets what the person can open. |
| Set tool access now (optional) | For Billing Tools only. Tick exactly the modules this person may use; applied the moment the invite is sent and editable any time from their row. |
| Handpoint terminal device lock | Choose any device, or Locked to one device by serial number, so this login can only run sales on that card terminal. |
| Only show this user their own activity | Limits transaction and report views to sales this user ran. |
| Register PIN (optional) | A 4-digit passcode for the TableTurn POS register. |
| Invite | Sends the invite after you confirm the texted 6-digit code. Confirm invite finishes it; Resend code sends a new code; Back returns to the form. |
| Pending invites | Invites not yet accepted. Remove cancels one. |
| Active members | Everyone who accepted. Each row shows the access type, the security-code number, and Remove, which revokes access to this business only. |
| What each role can do with money | A matrix of every money tool by role, so you can check an access type before inviting. |
| Sales rep access | Authorize access or Decline a pending request from your sales rep's office; Revoke access ends an active grant. Owner only. |
| Automated email settings | Choose who receives the monthly statement, daily batch reports, and gift-card activation emails, including teammates. |
| Storefront sale emails | Choose which logins get an email when a gift card is sold on your eGift storefront. |
Owner-only screens (like Profit & Loss and banking) stay owner-only no matter who you invite, so you can add help without exposing the sensitive numbers.
Where to get help
This guide covers every tool step by step. Each chapter is in the left menu, the cards at the top of a chapter list the topics inside it, and the search box finds any word across all chapters. The Spanish edition is one click away with the language switch.
For anything account-specific, open Account → Support. The Support Center gives you the fastest routes: open a support ticket when the question needs follow-up (you are emailed on every update), chat for instant answers from the assistant or a live person during business hours, or call the department that handles your question from the directory. Your sales agent's name and direct line are on the same page for pricing, equipment, and account questions.
The floating Ask button at the bottom right of every Merchant360 page opens the same chat. Choose AI Assistant to ask about your invoices, balance, statement, or service requests, or switch to the Live Support tab to reach a person.
If a ticket has not been answered, open Requests & Orders to see its status and every reply so far. If a tool is behaving unexpectedly, include the invoice number, customer, and the time it happened in your ticket so support can find the record.
| On this screen | What it does |
|---|---|
| Open a support ticket | Starts a ticket that support follows up on. You get an email on every update, and the ticket is listed under Requests & Orders. |
| Chat with us | Opens the chat. AI Assistant answers questions about your own account data; Live Support Chat reaches a person during business hours. |
| Call us | Jumps to the Department directory so you dial the right team the first time. |
| Your sales agent | Shows the agent assigned to your account with their contact details, for pricing, equipment, or account relationship questions. |
| User Guide | Opens this guide. |
| Requests & Orders | Tracks equipment orders, service requests, and support tickets with their current status. |
| Department directory | Direct lines for each department, with hours. |
| Ask button | The floating button at the bottom right of every page. Opens the AI Assistant or the Live Support tab without leaving what you were doing. |