
Merchant360 Payment App
The Merchant360 app on the PAX A920 terminal: keyed sales, an item grid, appointments, cash, gift cards and receipts, with settings and sales kept in Merchant360.
Applies to app version 2.42.6 · updated Oct 12, 2026
- What the Payment App is
- Connect the terminal
- Take a card sale
- Sell from the item grid
- Fuel and fleet
- Cash sales
- Receipts
- Voids, refunds and tip adjustments
- History and reports
- Gift cards on the terminal
- Training mode
- Integrated mode
- Appointments on the terminal
- Text to pay from the terminal
- Loyalty at the terminal
- Terminal settings
- Languages and currencies
- Messages that need attention
What the Payment App is
The Merchant360 Payment App runs on the PAX A920 smart terminal. It takes chip, tap (including Apple Pay and Google Pay) and swiped cards, records cash, runs Merchant360 gift cards, and prints receipts on the terminal's printer. A terminal without a printer sends receipts by email or text.
It works in one of two modes. Standalone: the clerk keys sales on the terminal, and sales sent from Merchant360 open there too when the terminal is idle. Integrated: dedicated, the terminal's start screen waits for sales sent from Merchant360 (Take Payments, Handpoint Terminal) or your POS, with no keypad; the same push flow described in the Handpoint terminal chapter.
The terminal's settings (pricing program, tips, tax, receipts, which actions need a supervisor PIN, the item list) are kept in Merchant360 by Electronic Payments. The terminal keeps a copy in its own memory, so it opens at once and keeps working when the network drops; it checks for changes every few minutes.
The terminal is locked to the Payment App: it opens on the Payment App, and the Android status bar, Home and Recent keys are off, so the terminal's own Android settings stay closed. Exit to Android in Settings is for Electronic Payments technicians and needs their PIN.
Card sales reach your Merchant360 transactions through the processor. Cash sales are sent by the terminal and show on the Transactions board with the cash icon.
About, in the Main Menu, shows the app version. When your provider's brand is set for your terminal, their logo shows in place of the Merchant360 logo, and About shows their name and contact details (phone, email, website and address).
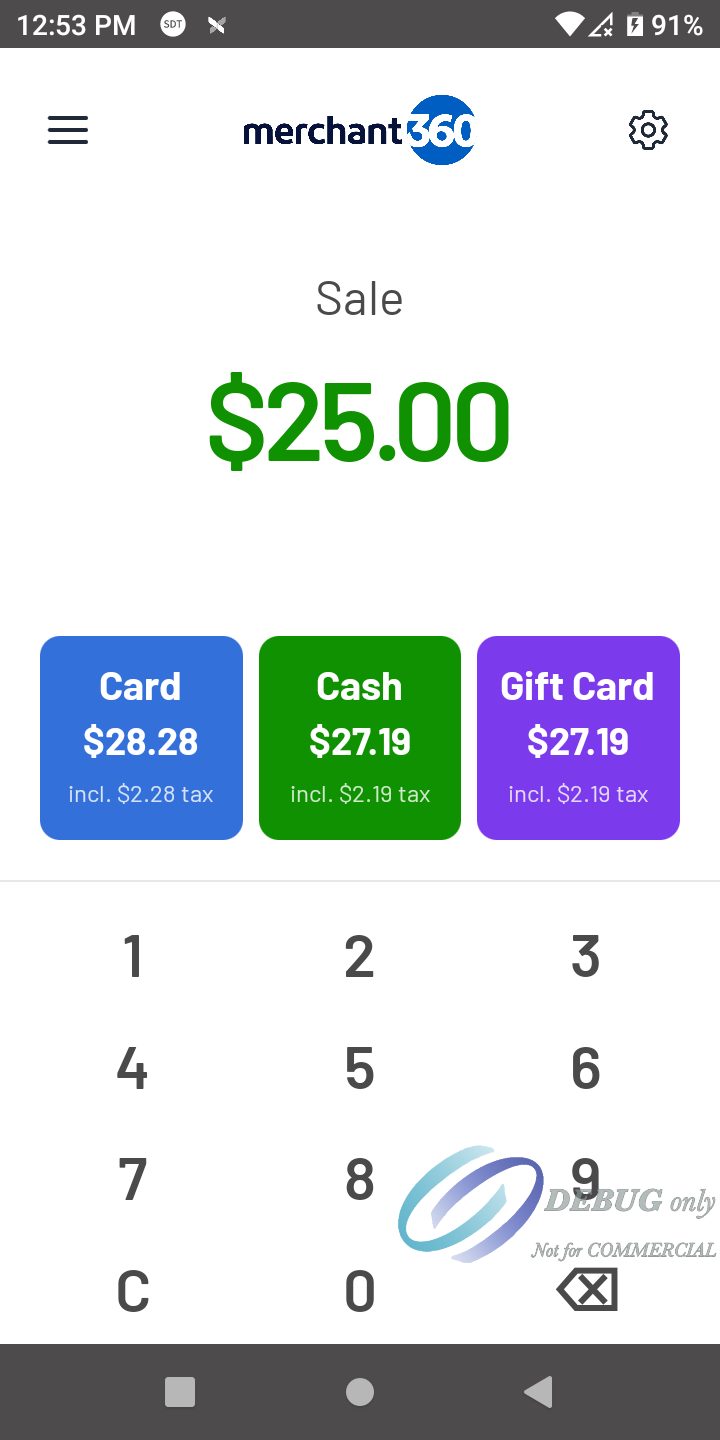
Settings show on the terminal under Settings, marked Set by Electronic Payments. To change one, contact Electronic Payments support.
Connect the terminal
Each terminal is connected to your Merchant360 account once. Electronic Payments gives you an 8-digit activation code for the terminal; the code works once and expires after 30 minutes.
If the screen shows Could not reach Merchant360, the terminal has no network: check its Wi-Fi or cellular signal and try again. A disconnected terminal needs a new code.
- 1On the terminal, open the menu (the three lines at the top left), then Settings. Enter the supervisor PIN.
- 2Press Connect to Merchant360.
- 3Key the 8 digits on the number panel and press Connect.
- 4The screen shows Connected to and your business name. The terminal loads its settings at once.
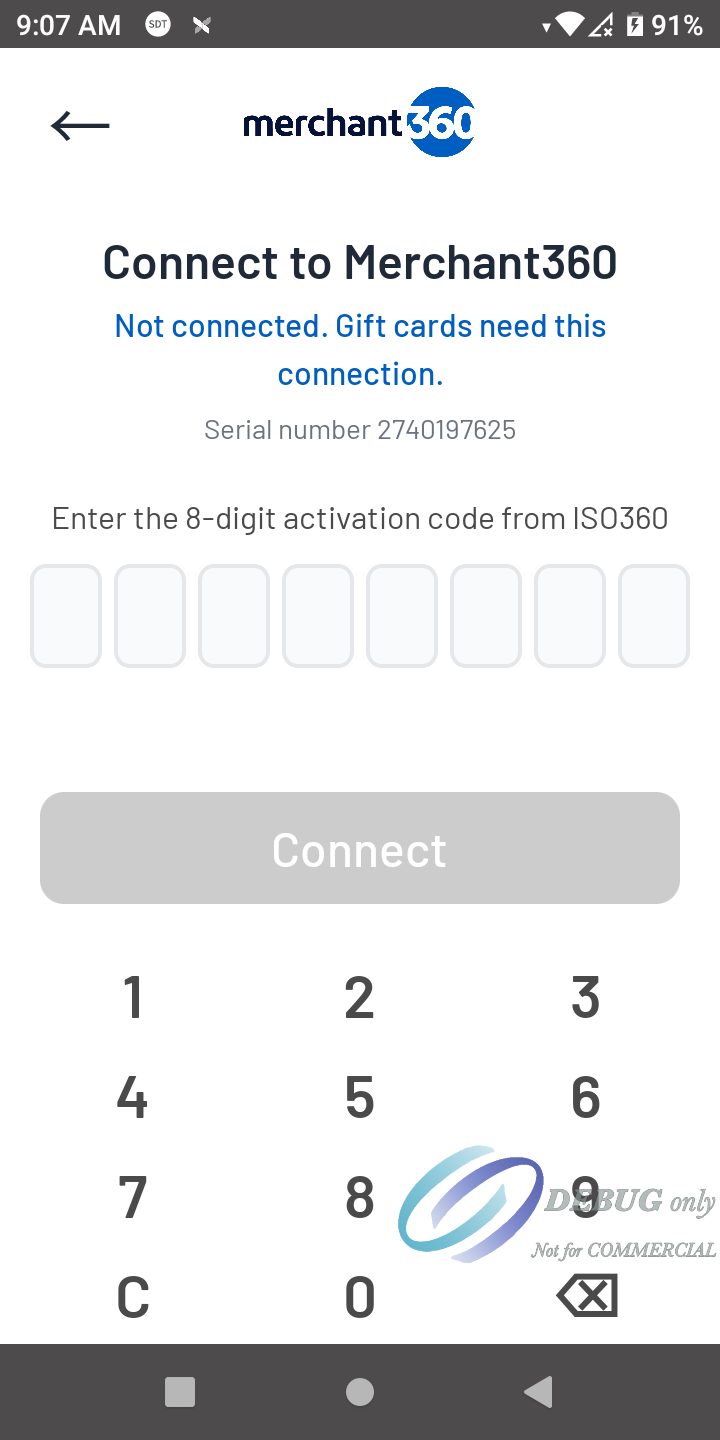
| On this screen | What it does |
|---|---|
| Connect | Sends the code with the terminal's serial number. On success the terminal stores its own login and loads its settings. |
| Disconnect this terminal | Removes the terminal's login. Gift cards and settings updates stop until it is connected again with a new code. |
Take a card sale
Key the amount and press Card. Before the card is read, the terminal asks for what your settings call for, in this order: supervisor PIN, invoice number, clerk ID, tip, and a confirm screen when a surcharge or an admin fee applies.
The customer inserts, taps or swipes. The result screen shows the status, approval code and card number; Next goes to the receipt screen.
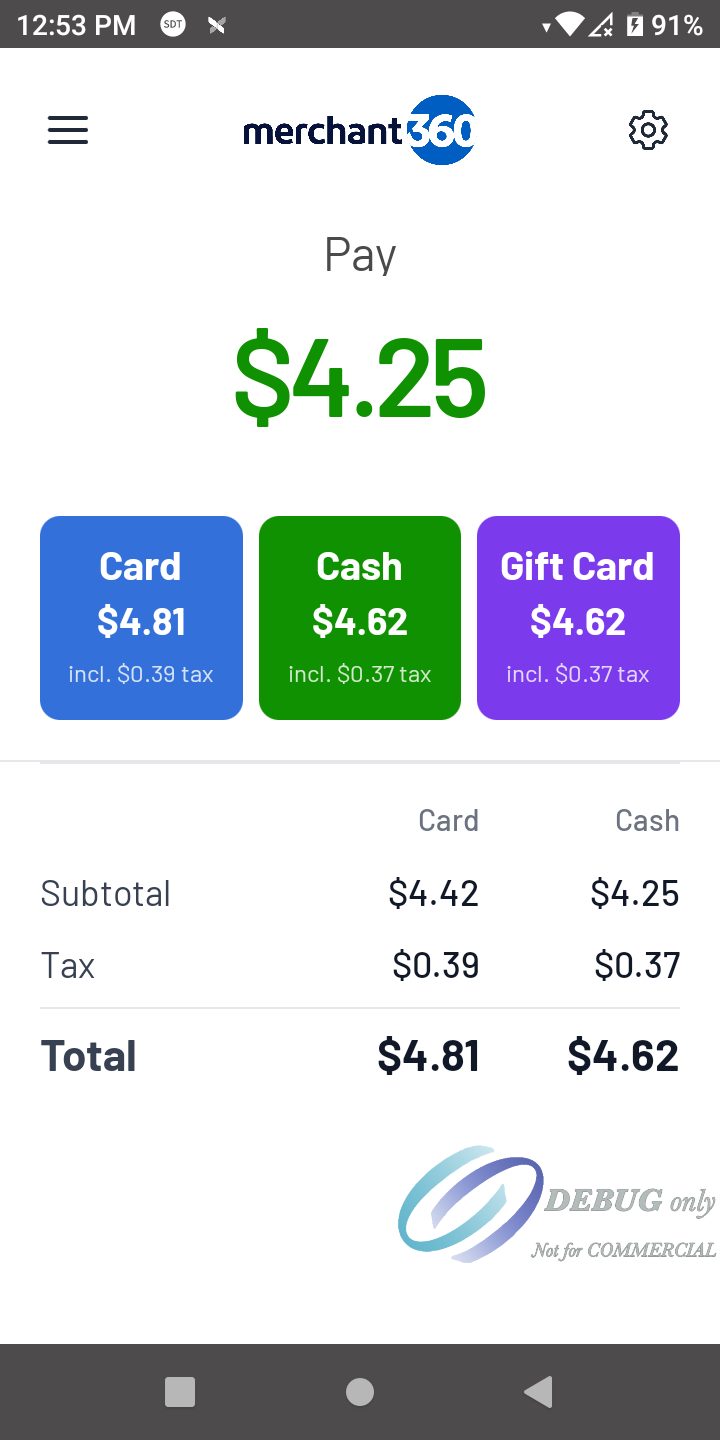
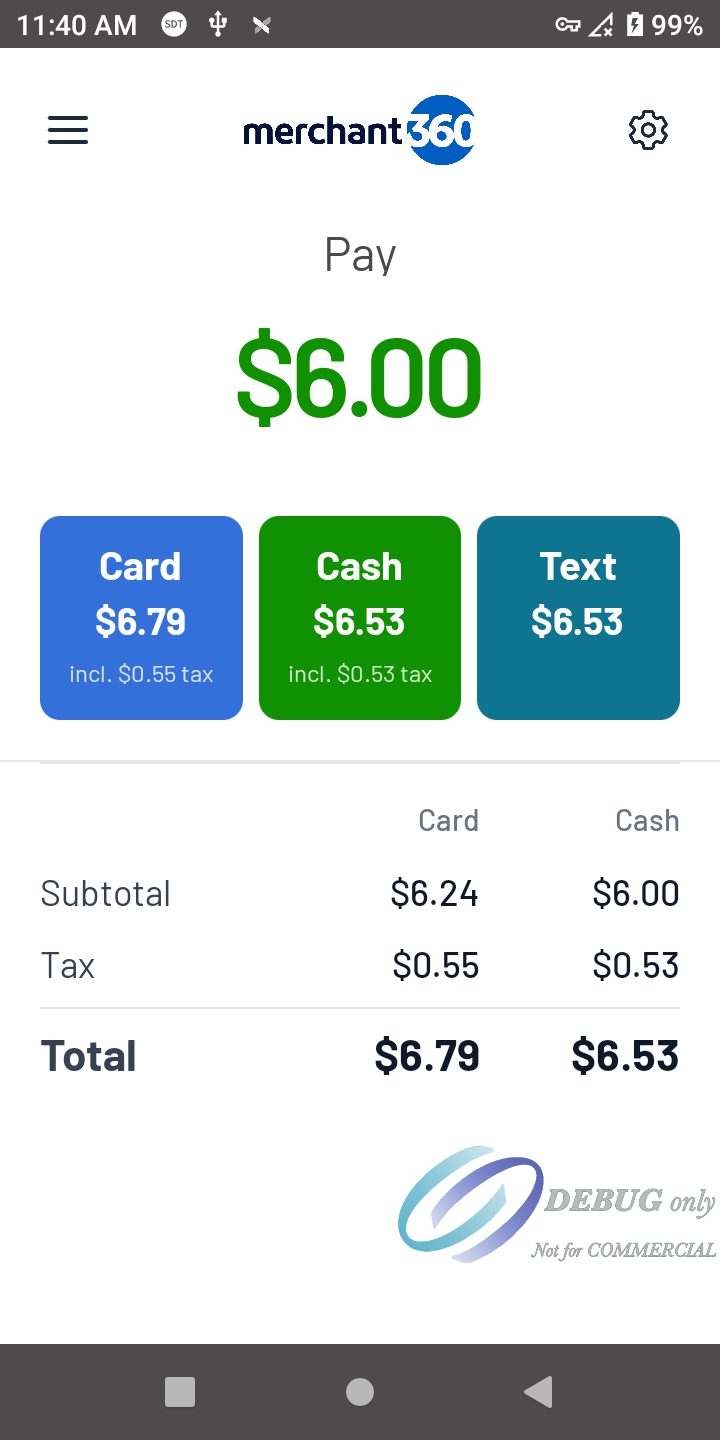
With a pricing program on, the Card and Cash buttons show different totals: Dual Pricing shows the card price on Card and the cash price on Cash, a surcharge is added to credit cards (debit cards are never surcharged), and an admin fee is added on every tender with the name your business uses for it.
A sale below your minimum or above your maximum cannot proceed; the screen shows the limit.
While the terminal waits for the card, Cancel at the bottom of the screen stops the reader and ends the sale: the terminal returns to its start screen with nothing keyed. The back arrow stops the reader and returns to the Pay screen with the amount kept, for example to take cash instead.
Card sales need internet. With no connection the terminal does not read the card: the screen says No internet connection, with Retry, and the back arrow returns to the Pay screen to take cash. A card sale that does not go through shows the amount tried and The card was not charged.
Store and forward, when Electronic Payments turns it on for your account: with no connection the terminal still takes the card, stores the sale and sends it when it is back online. The result says Stored offline and the receipt prints STORED OFFLINE. There is a limit per sale and a limit on the total waiting to be sent. A stored sale can still decline when it is sent, after the customer has left; it then shows as Declined in History.
- 1Key the amount on the number panel.
- 2Press Card.
- 3Answer the prompts the terminal shows.
- 4Hand the terminal to the customer to insert, tap or swipe.
- 5Press Next for the receipt.
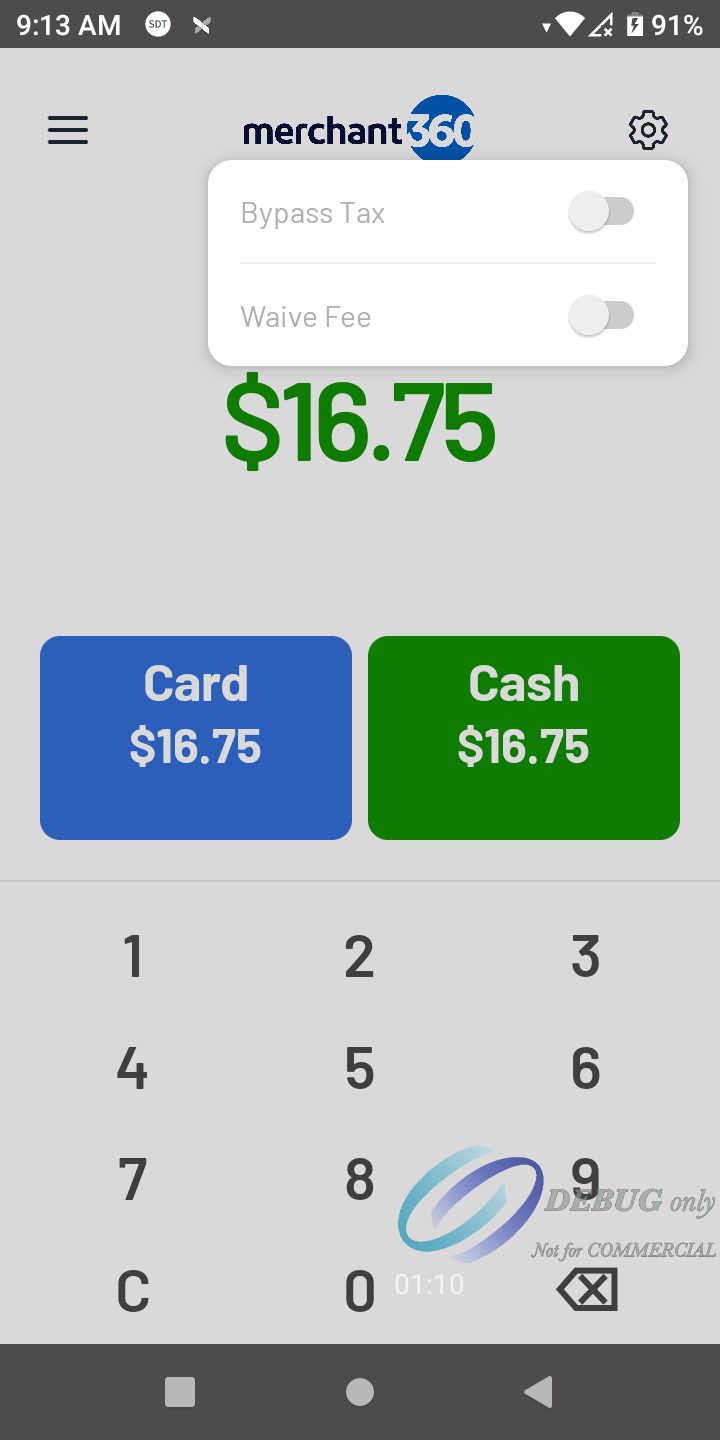
| On this screen | What it does |
|---|---|
| Card | Starts a card sale for the card total shown on the button. |
| Cancel (card screen) | Stops the card reader and ends the sale. The terminal returns to its start screen. |
| Cash | Records a cash sale for the cash total (shown when cash is on). |
| Gift Card | Redeems the amount on a Merchant360 gift card (shown when gift cards are on). Opens Gift Card Redeem with the amount filled in. |
| Gear (Bypass Tax, Waive Fee) | Removes the tax or the program fee from this sale only. Each switch is grey unless your settings allow it; a banner shows while one is on. |
| Invoice number | When invoice entry is manual: up to 20 digits on the number panel. A number already used today is refused. If your settings allow it, Continue with the field empty and the terminal makes the number. |
| Clerk ID | Called Clerk ID, Server ID or Operator ID. Up to 4 digits; all zeros is refused. If your settings allow it, Continue with the field empty. |
| Tip | Preset percentages, No Tip or Custom Tip, on card sales when tips are on. |
Sell from the item grid
For a business with a short list of items, such as a cafe, a food truck or a market stand, the terminal can show up to 48 items from your Merchant360 inventory as a grid: two across, four down, with arrows between pages (up to 6 pages). Sizes and versions can be separate items, for example Coffee Small, Coffee Medium and Coffee Large. For add-ons and choices on an item (modifiers) and kitchen tickets, use TableTurn.
Tap an item to add one and hold it to remove one. Pay opens the Pay screen with the total. From there the sale works as any other: Card, Cash, or Gift Card when gift cards are on.
Names and prices come from your inventory, so a price change or an item marked sold out reaches the terminal within a few minutes. Electronic Payments sets which items show and in what order, and whether the terminal opens on the item grid or on the Sale keypad. Tapping the logo switches between the two.
When item printing is on, the receipt lists each item (quantity, name, amount) above the subtotal, and a reprint from History shows them too. If the amount is changed after Pay, the receipt shows the totals only.
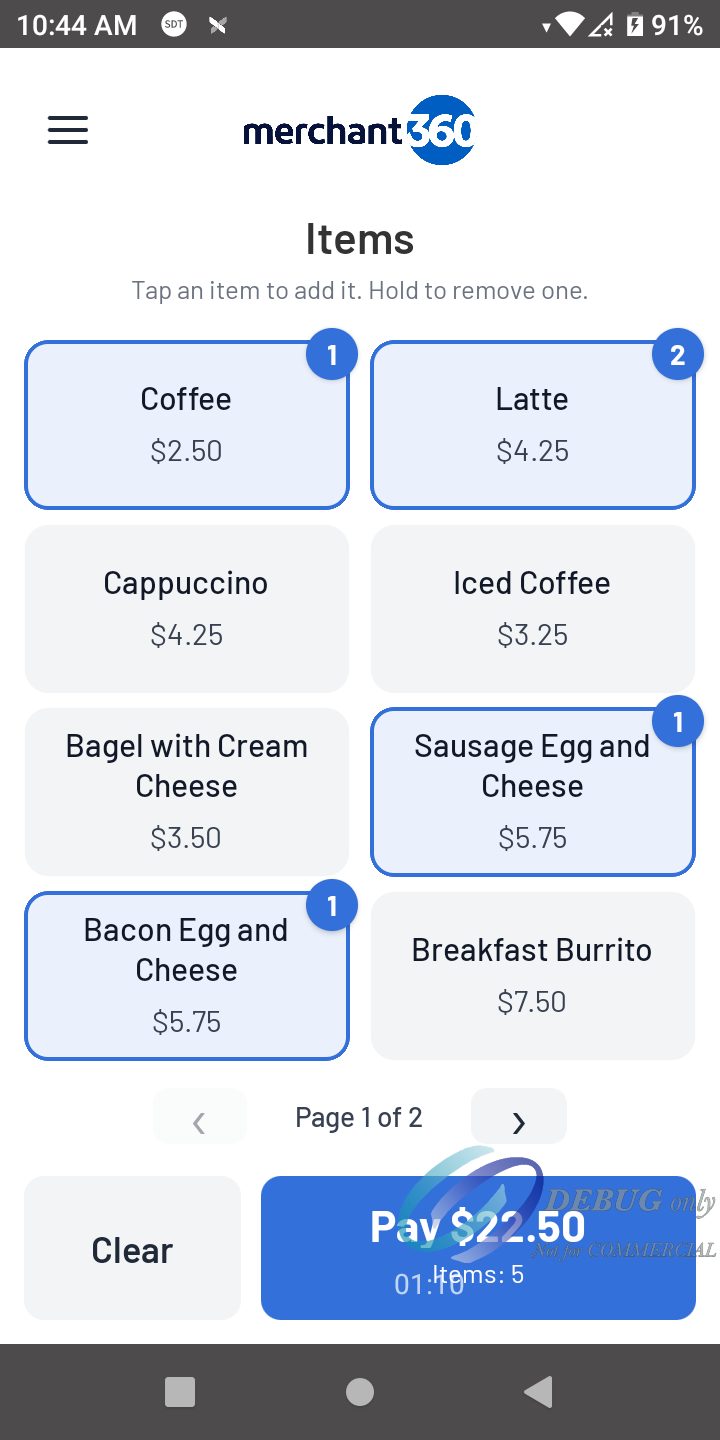
| On this screen | What it does |
|---|---|
| Item tile | Tap: one more of the item. Hold: one less. A sold out item is grey and cannot be added. |
| Arrows | Change the page when there are more than 8 items. |
| Clear | Empties the sale. |
| Pay | Opens the Pay screen with the total. |
| Logo | Switches between the item grid and the Sale keypad. |
Fuel and fleet
For a gas station or service shop, Electronic Payments turns on Fuel and fleet for your account and ticks the fuel grades and services you sell. Each one becomes an item in your inventory with its product code already set: fuel grades are priced per gallon, services are open price unless you set a price. Set your pump prices in Inventory.
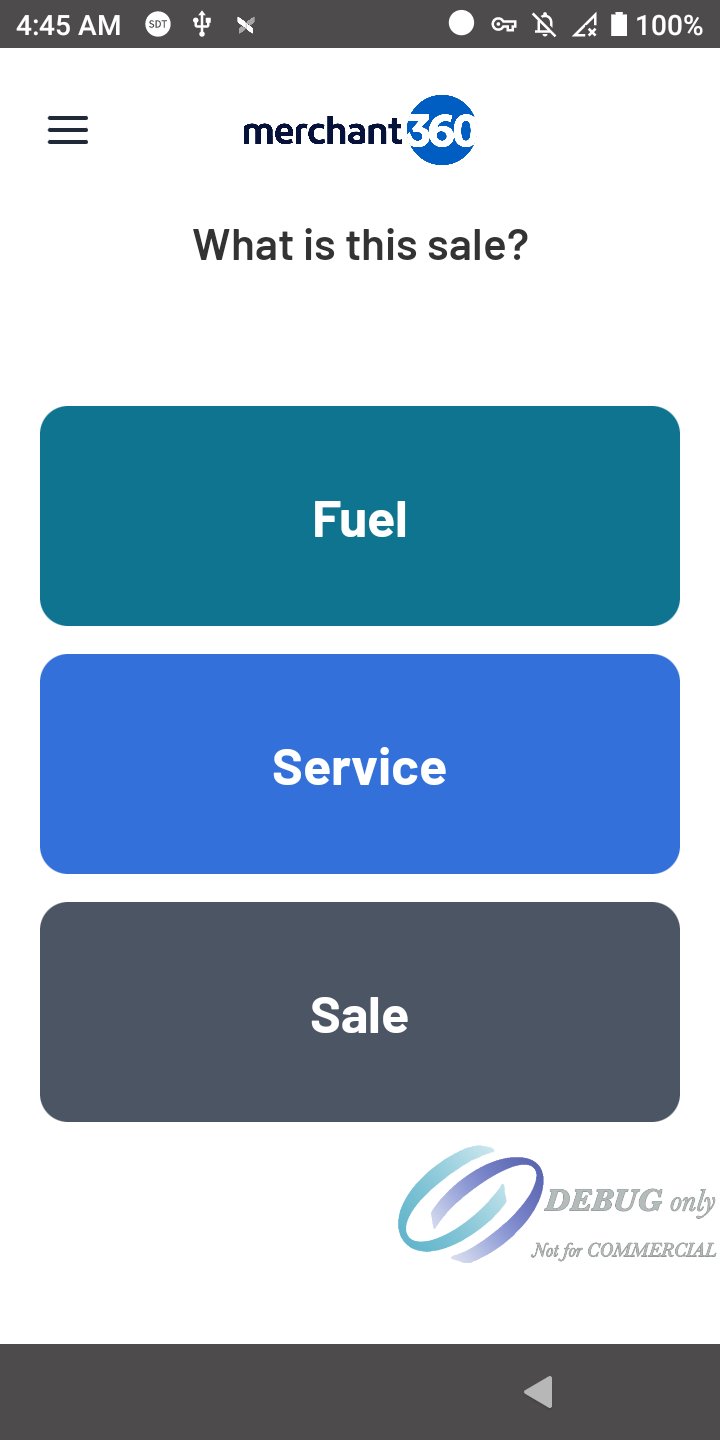
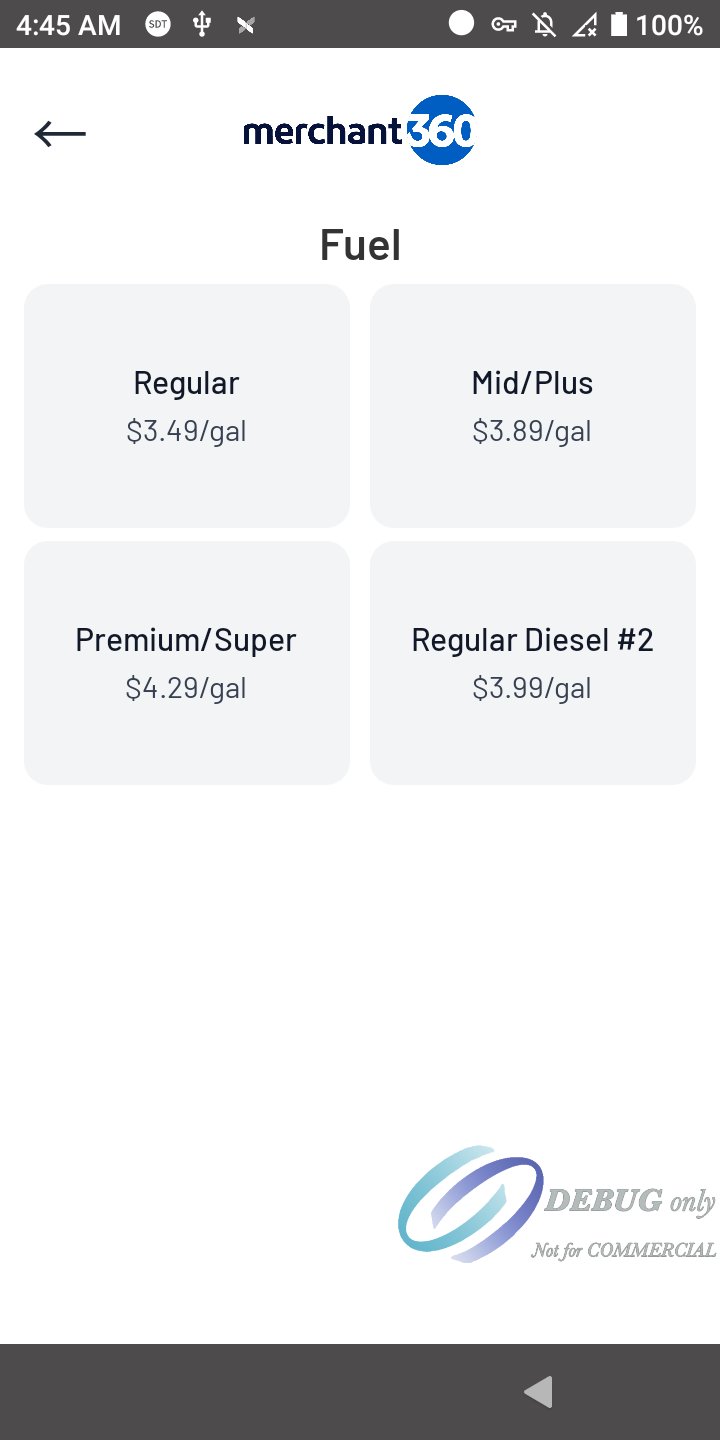
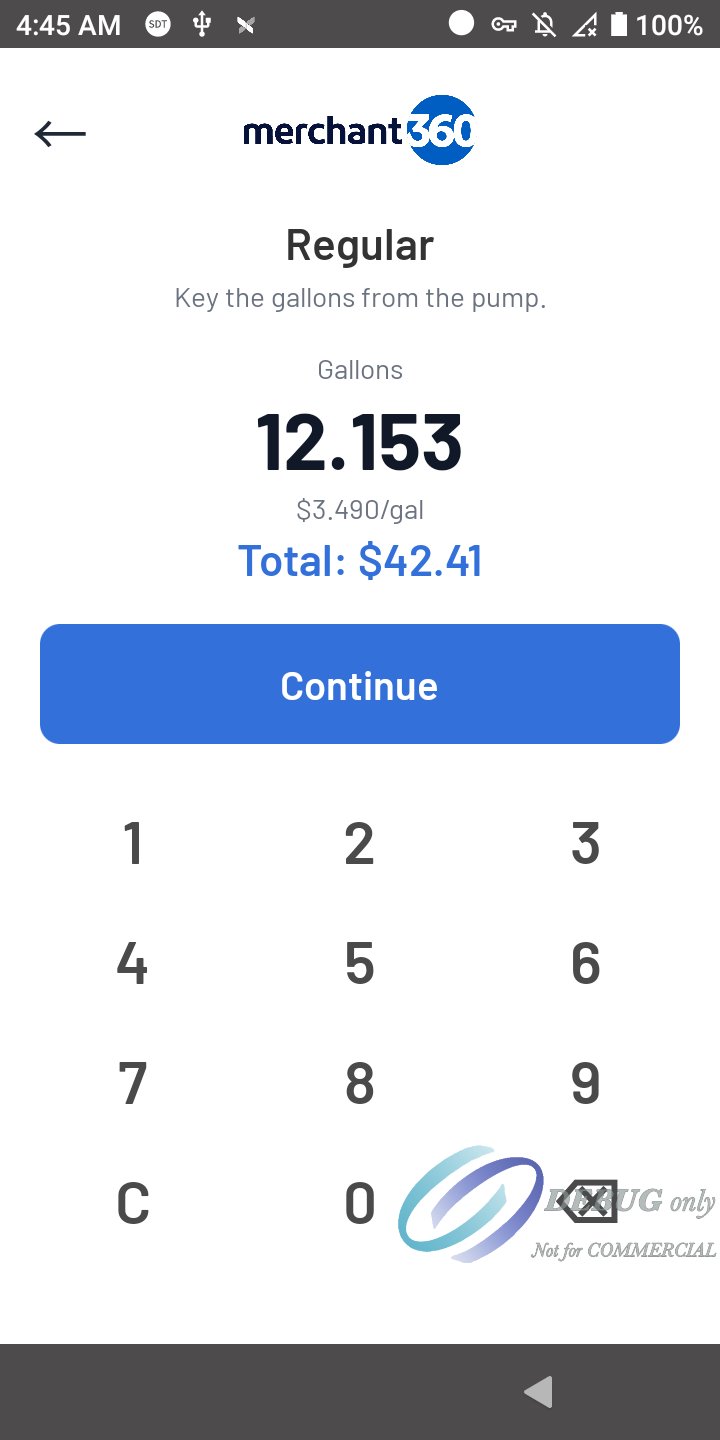
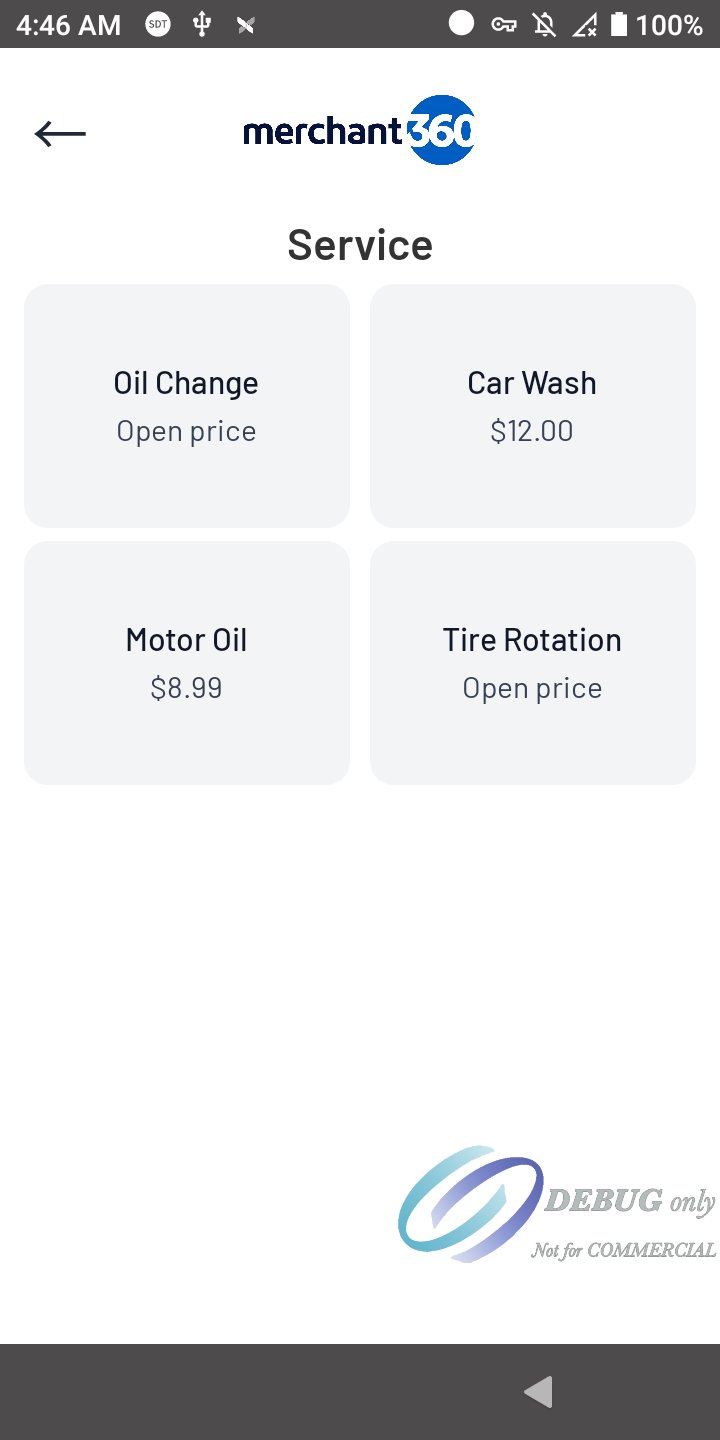
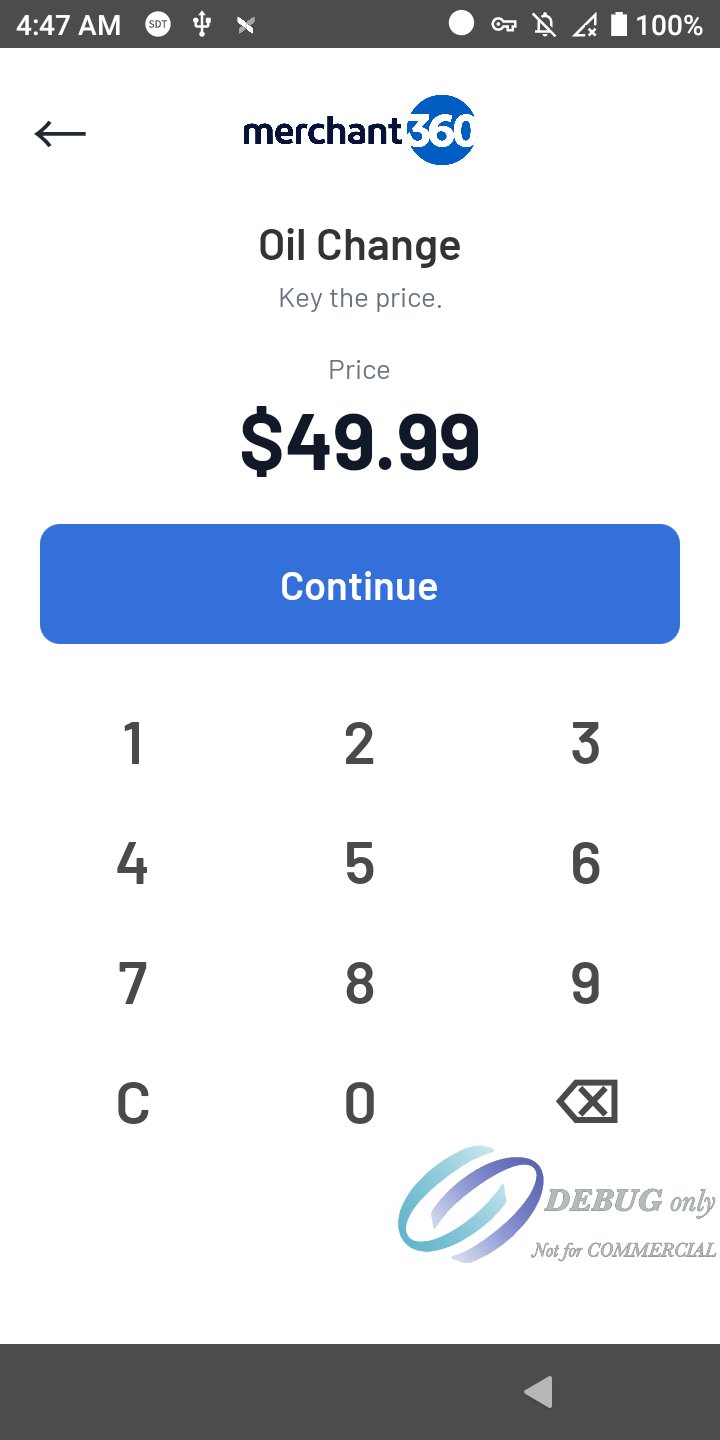
The terminal opens on three buttons: Fuel, Service and Sale. Fuel shows your grades with the price per gallon; tap one, key the gallons from the pump, and the terminal computes the total. Service shows your services; an open-price service asks for the price. Sale opens the usual keypad or item grid.
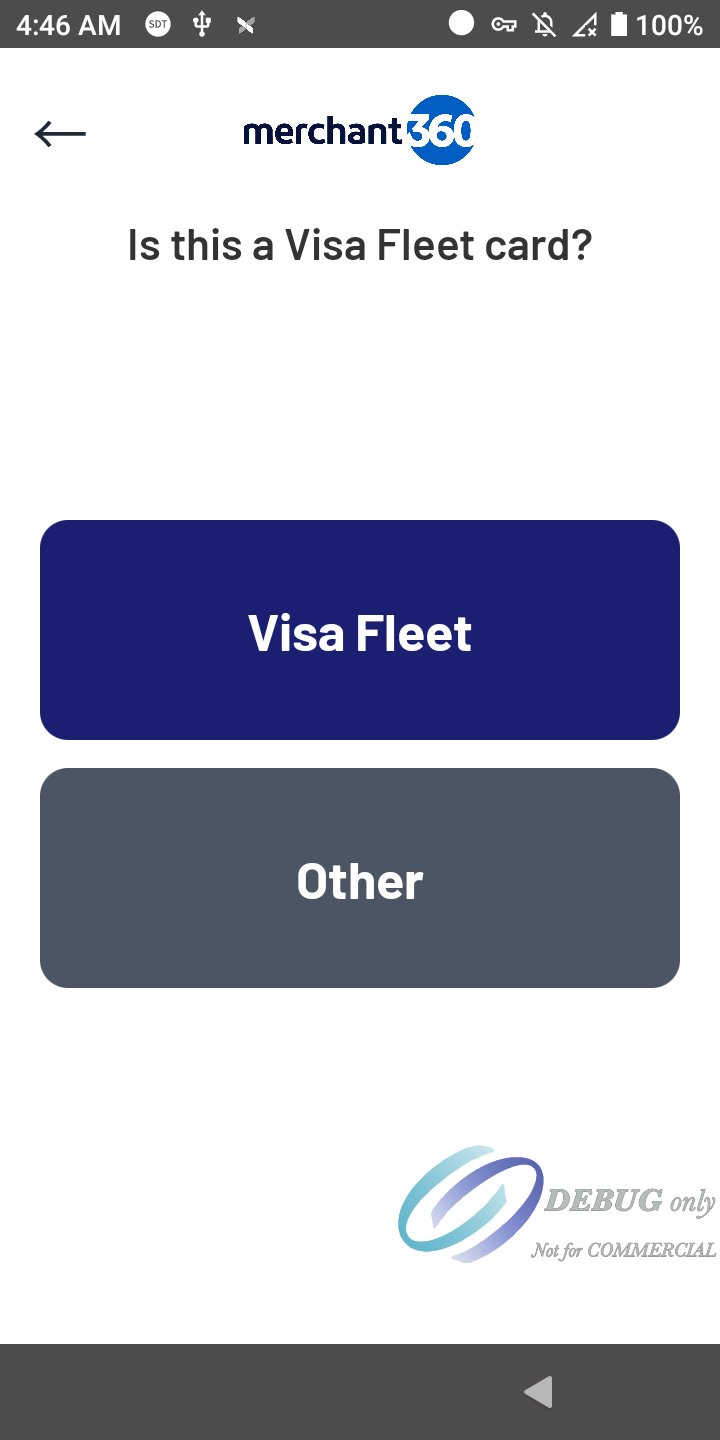
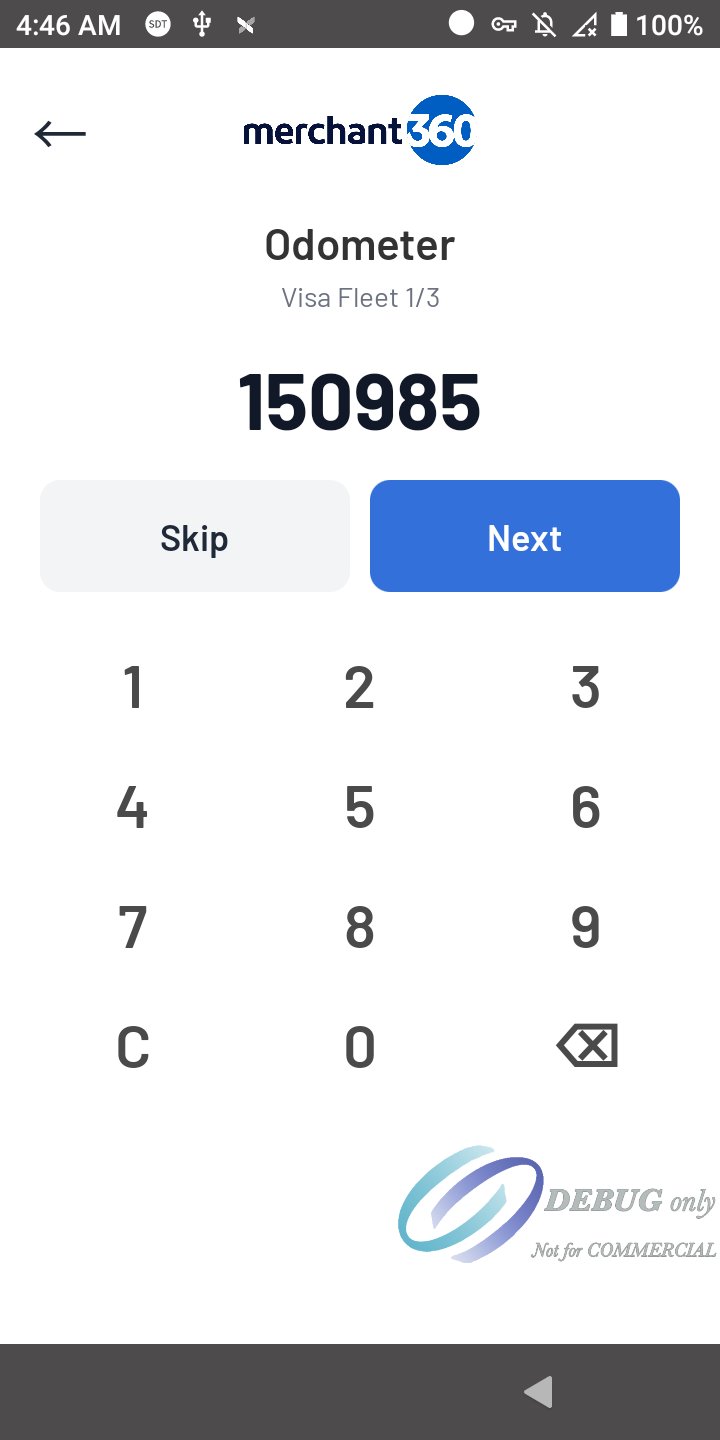
On a card sale with fuel or a service, the terminal asks Visa Fleet or Other. Visa Fleet asks for the details your settings call for (odometer, vehicle ID, driver ID); each can be skipped. Other goes straight to the card. The answers print on the receipt.
Debit and EBT buttons appear on the Pay screen when Electronic Payments turns them on. The customer enters the PIN on the terminal's secure PIN pad. EBT needs a terminal update and shows a message until then.
- 1Tap Fuel, then the grade.
- 2Key the gallons from the pump and tap Continue.
- 3Choose Card or Cash on the Pay screen.
- 4On a card: answer Visa Fleet or Other, then any fleet prompts.
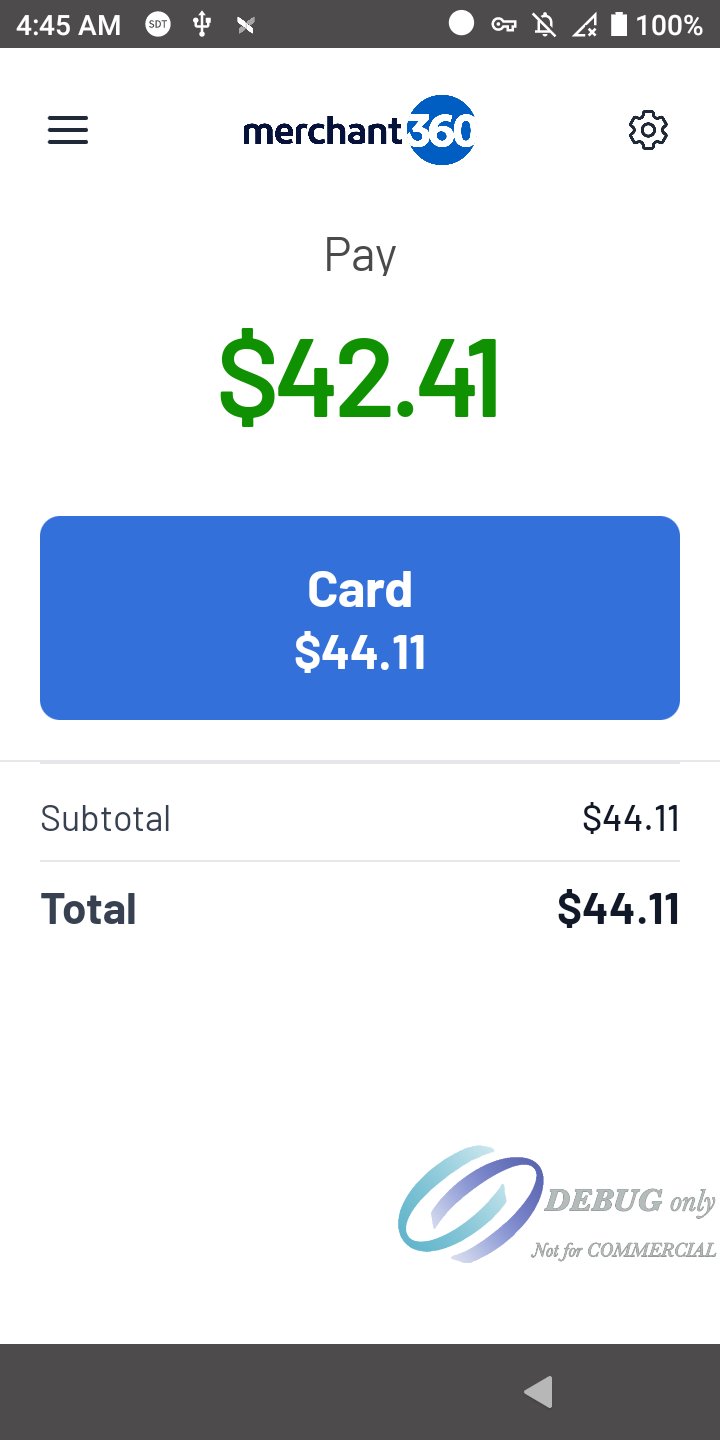
| On this screen | What it does |
|---|---|
| Fuel | Fuel grades, priced per gallon. A grade with no price asks for the price per gallon first. |
| Service | Services such as an oil change or car wash. Open price asks for the price; a fixed price goes straight to Pay. |
| Sale | The usual Sale keypad or item grid. |
| Visa Fleet / Other | Visa Fleet asks for the fleet details; Other skips them. |
| Debit / EBT | PIN on the secure PIN pad. Shown only when turned on for your account. |
Cash sales
Press Cash on the Sale or Pay screen (shown when cash is on). The terminal records the sale with no card and sends it to Merchant360, where it shows on the Transactions board with the cash icon.
A terminal without network keeps the cash sale and sends it when the network returns, dated when the cash was taken. A full cash refund on the terminal marks the sale returned in Merchant360.
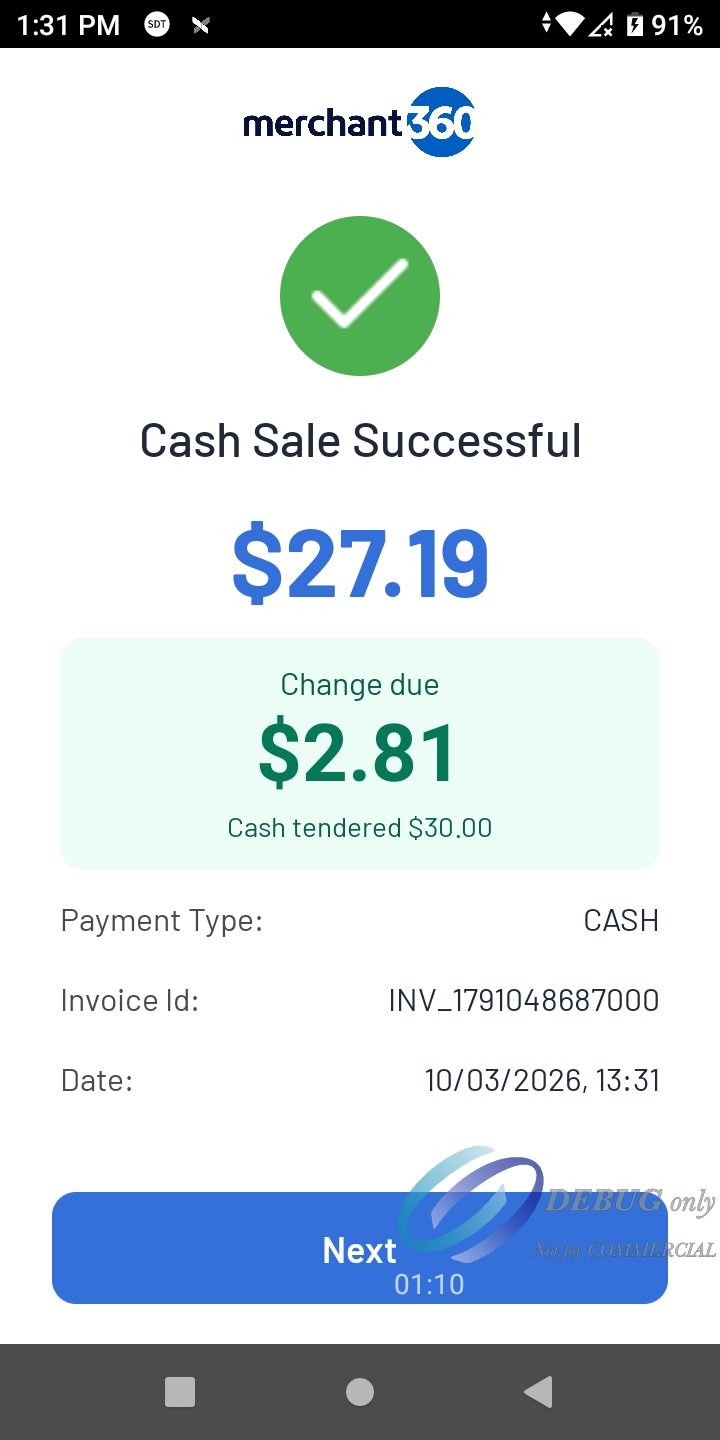
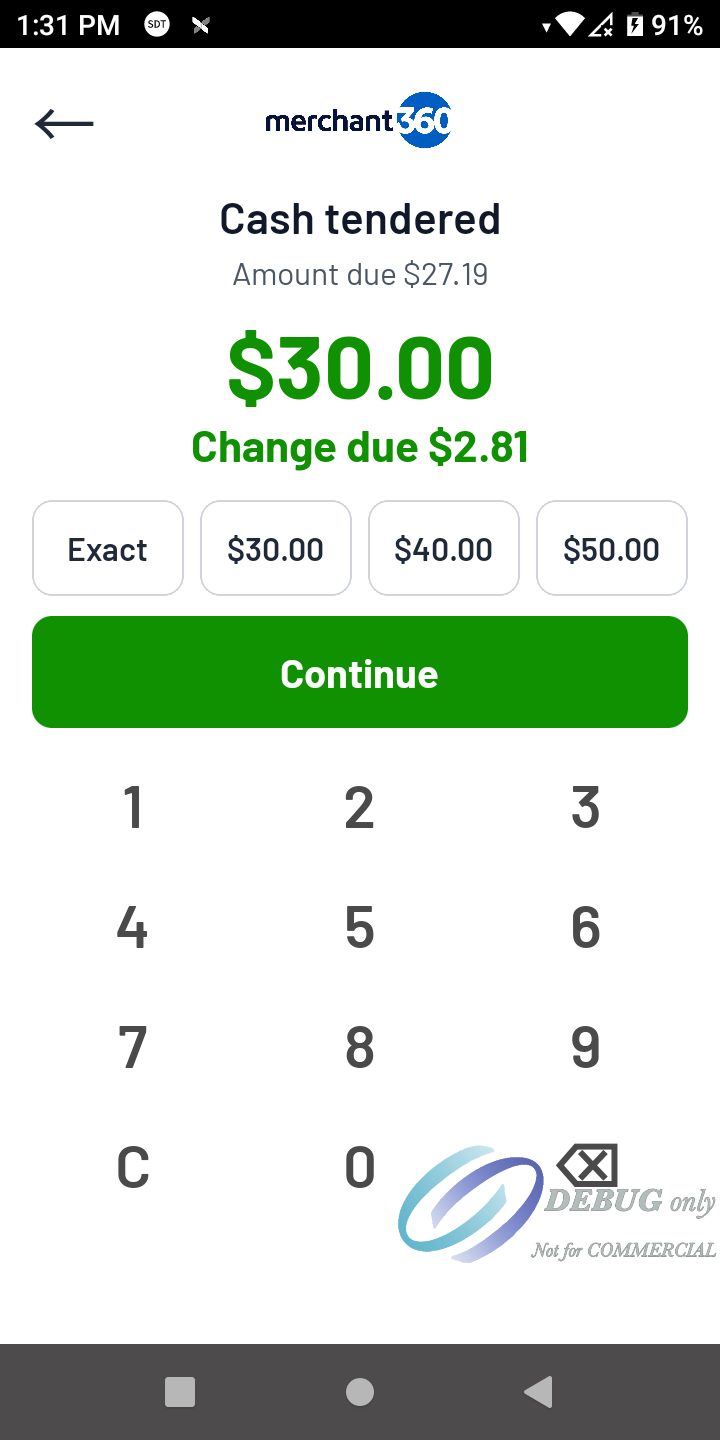
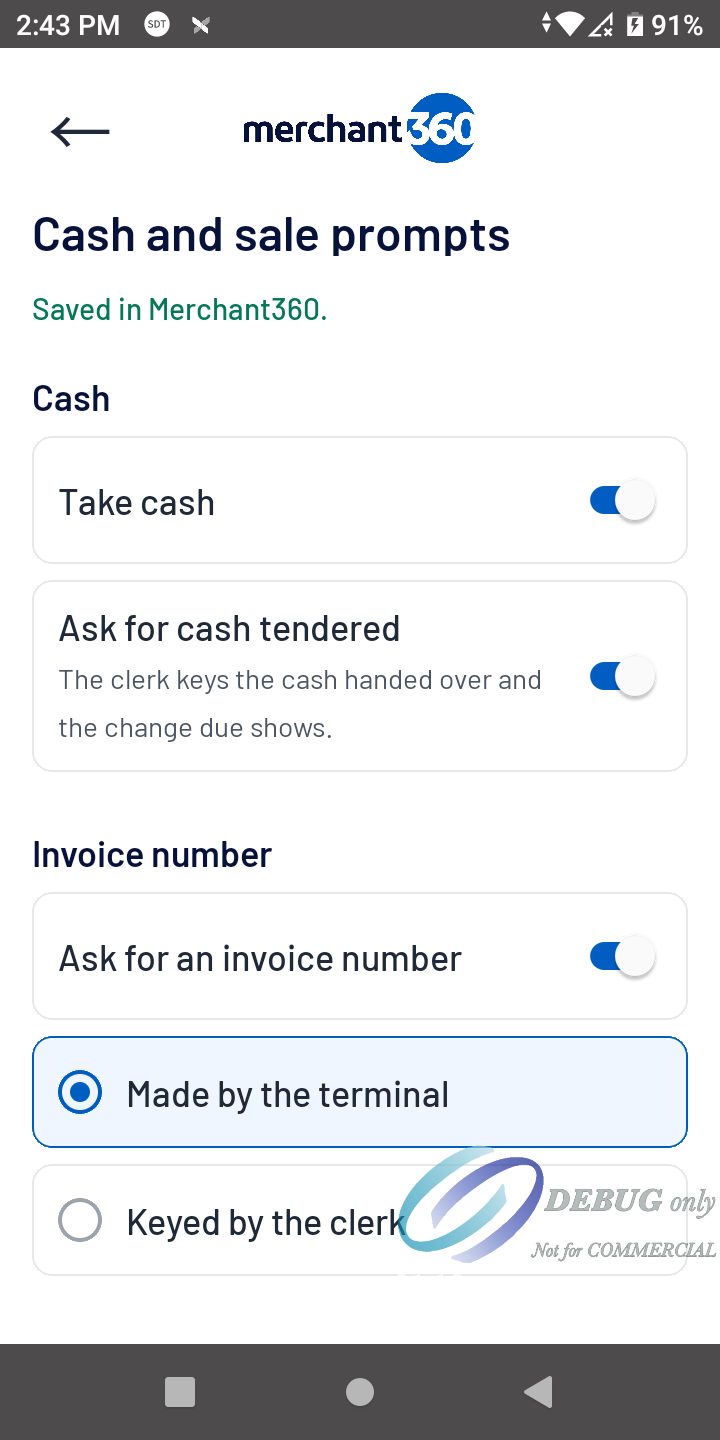
When your business asks for cash tendered, the terminal shows a Cash tendered step: key what the customer handed over or press Exact or a round amount. The change due shows as you key, large on the result screen, and both amounts print on the receipt and are kept with the sale.
| On this screen | What it does |
|---|---|
| Exact | The customer handed over the amount due. No change. |
| Round amounts | The next round amounts above the amount due, for example $30.00, $40.00 and $50.00 on $27.19. |
| Number panel | Key any other amount. C clears it. |
| Continue | Records the sale. Off while the cash is short of the amount due. |
| Back arrow | Returns to the Sale screen with no sale recorded. |
Receipts
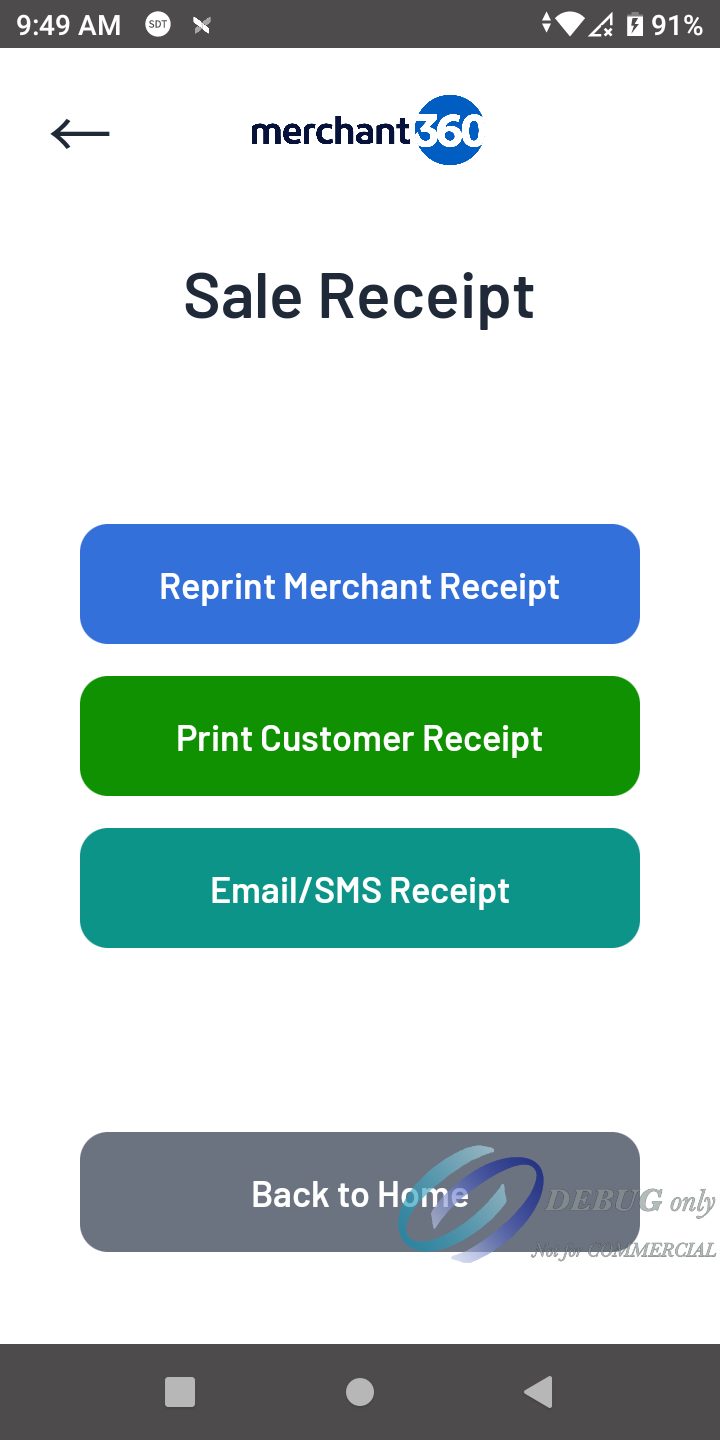
Each copy (merchant, customer) prints automatically, after a Yes / No question, or not at all, as set for your business.
A signature line prints for a swiped card, and for amounts at or above your signature amount when signatures are required.
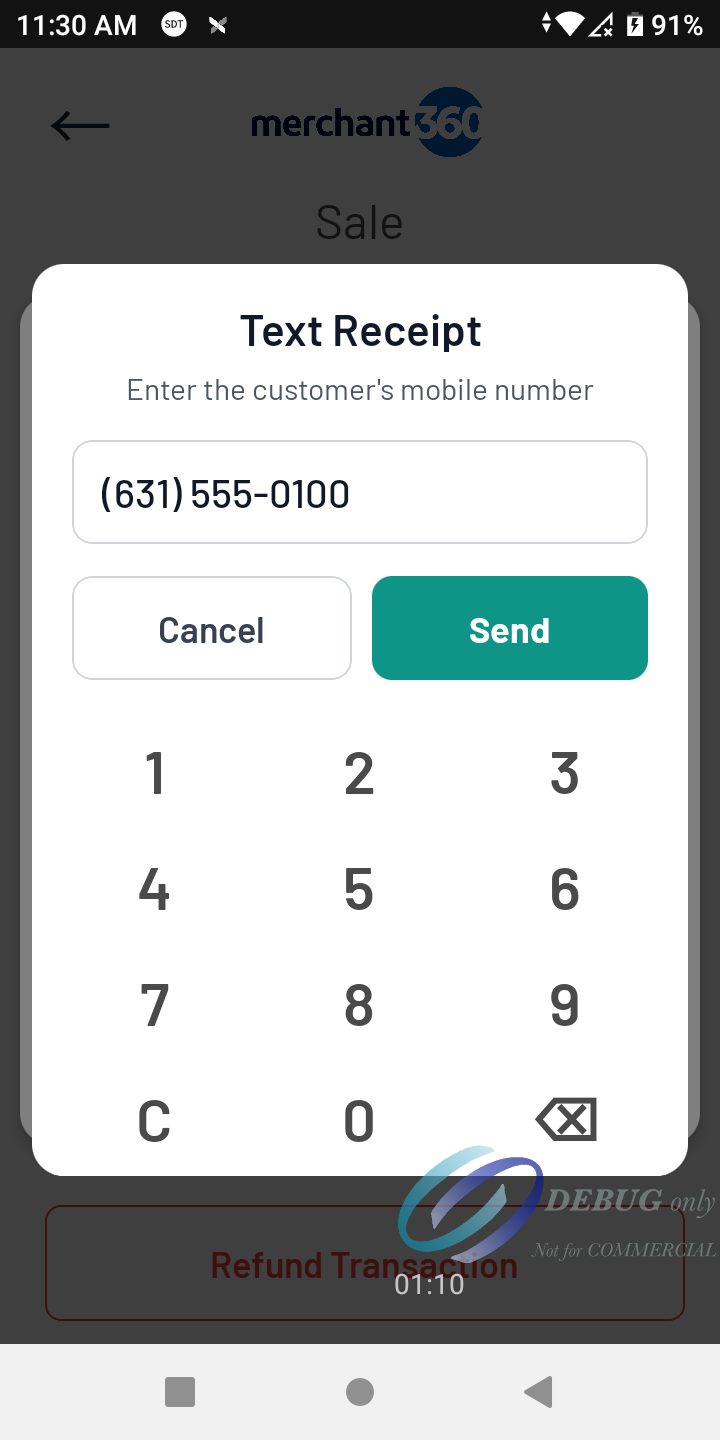
Email Receipt and Text Receipt show as your business is set up: email, text, or both. The same buttons are on Reprint Receipt in History. Email and text receipts end with your footer message, as the printed receipt does.
On a terminal without a printer, the receipt screen shows Email Receipt and Text Receipt only, and History shows Send Receipt in place of Reprint Receipt.
With no internet the terminal still prints: the receipt goes straight to the terminal's printer with the same layout.
If a print does not finish (out of paper, or no answer from the printer within 25 seconds), Print Failed shows for a moment and the receipt screen stays open to print again.
| On this screen | What it does |
|---|---|
| Reprint Merchant Receipt | Prints the merchant copy again. |
| Print Customer Receipt | Prints the customer copy. |
| Email Receipt | Sends the receipt by email. Type the customer's address and press Send. |
| Text Receipt | Sends the receipt by text message. Key the customer's mobile number on the number panel and press Send. The text names your business and the total and ends with your footer message; the customer can reply STOP. |
| Back to Home | Returns to the Sale screen or the item grid. |
Voids, refunds and tip adjustments
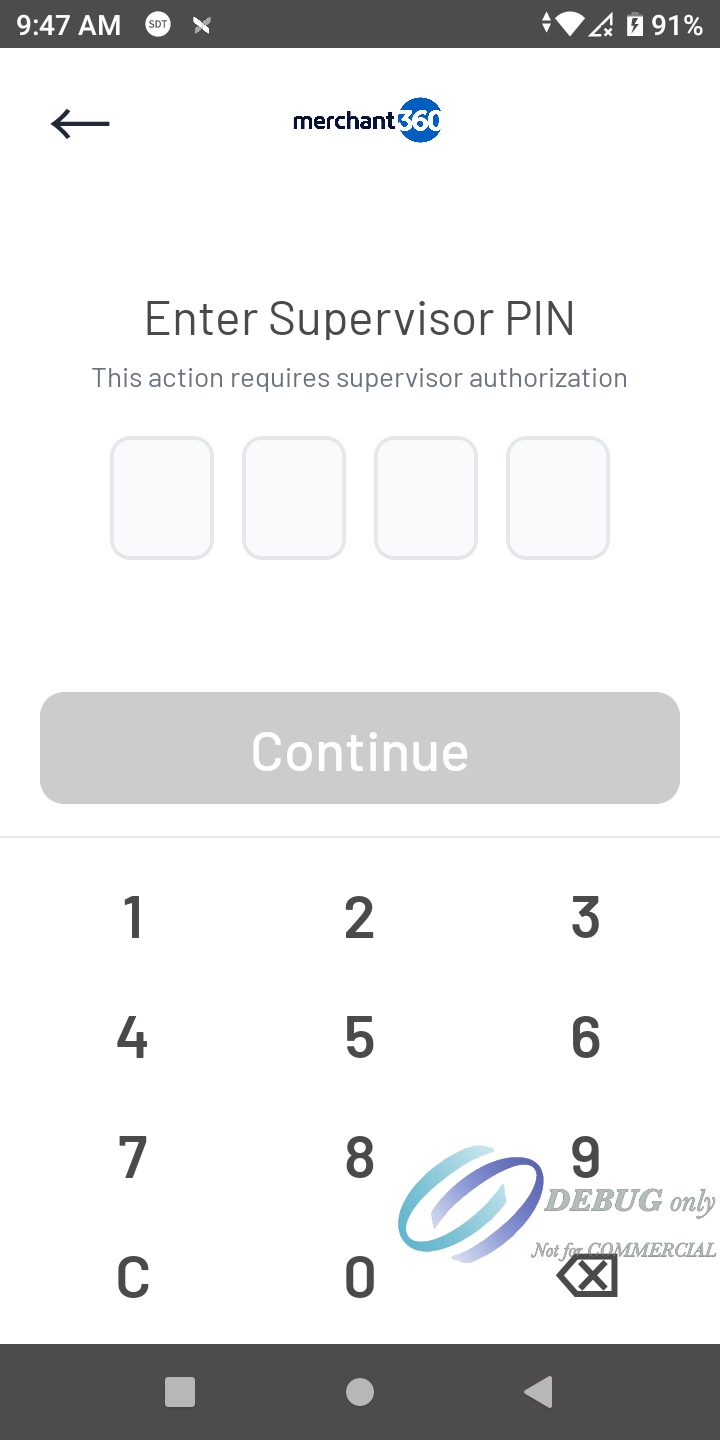
All of these start from History: open the transaction. A sale less than 24 hours old that has not settled offers Void Transaction and, on card sales with tips on, Tip Adjustment. After 24 hours the sale offers Refund Transaction.
A refund can be made with the card (insert, tap or swipe), keyed for a keyed sale, or without the card from the original transaction when your settings allow it. A cash sale is refunded in cash.
Pre-authorizations stay open for the number of days your business uses. An open pre-auth offers Complete Transaction (a higher amount runs an increase first), Decrement Pre-Auth and Void Transaction.
If an action asks for a supervisor PIN and none is set for your business, contact Electronic Payments support to set one.
History and reports
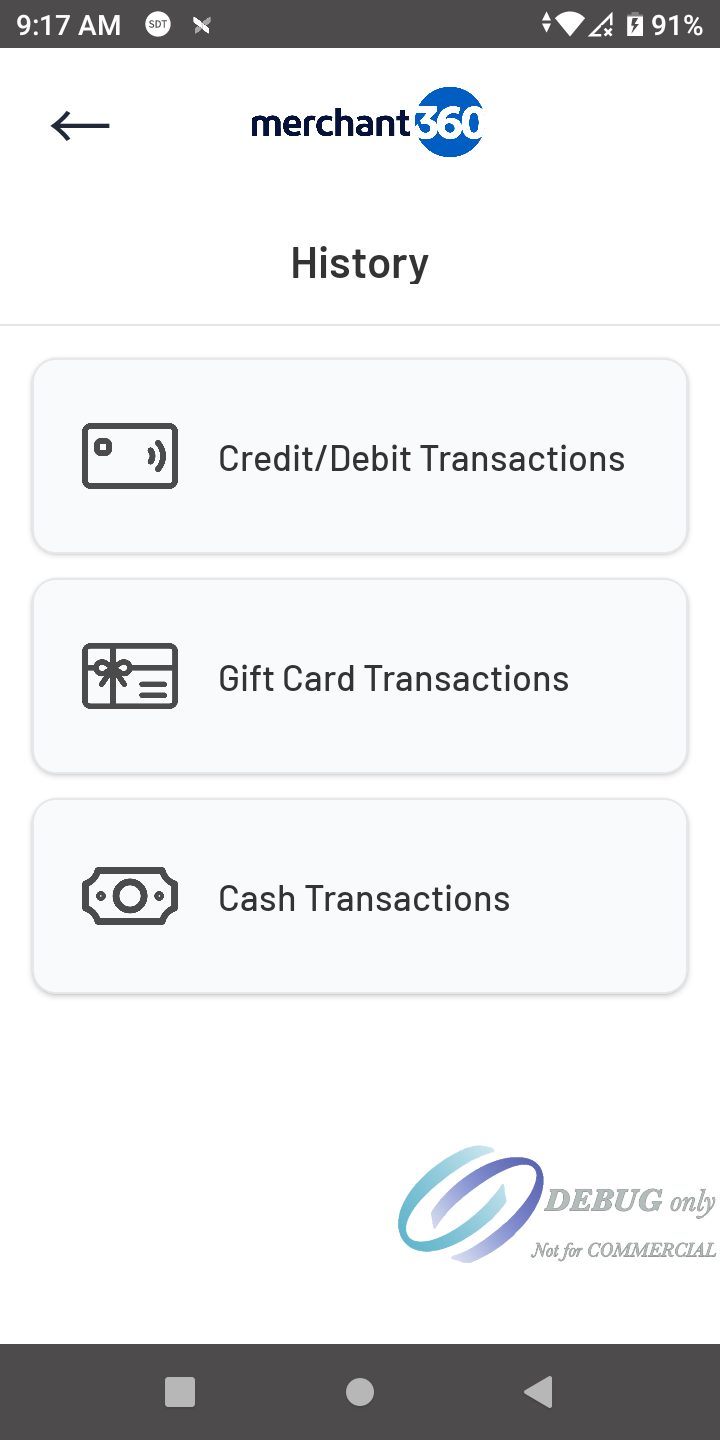
History lists the terminal's transactions with filters for date, type, card number, approval code, invoice, amount, tipped or untipped, and clerk. Open one to reprint either copy (Send Receipt by email or text on a terminal without a printer) or to void, refund or adjust it.
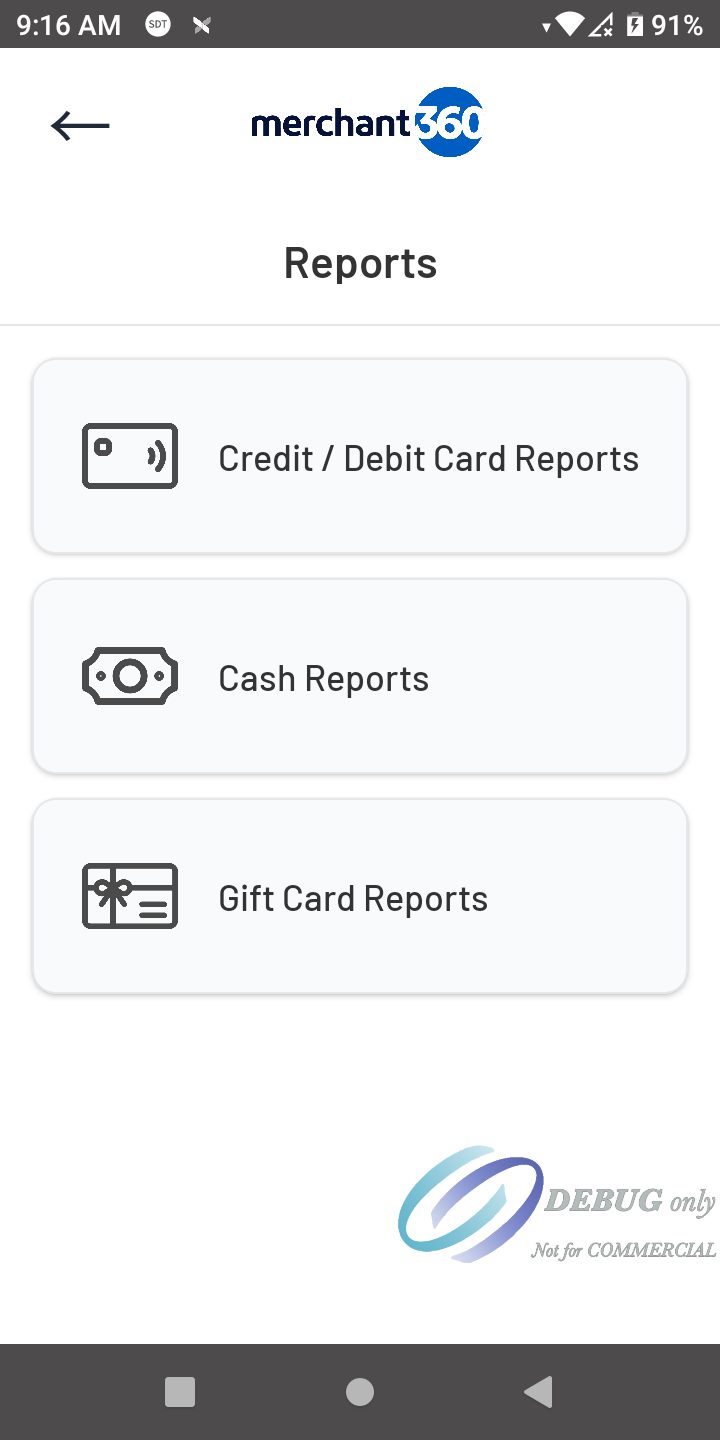
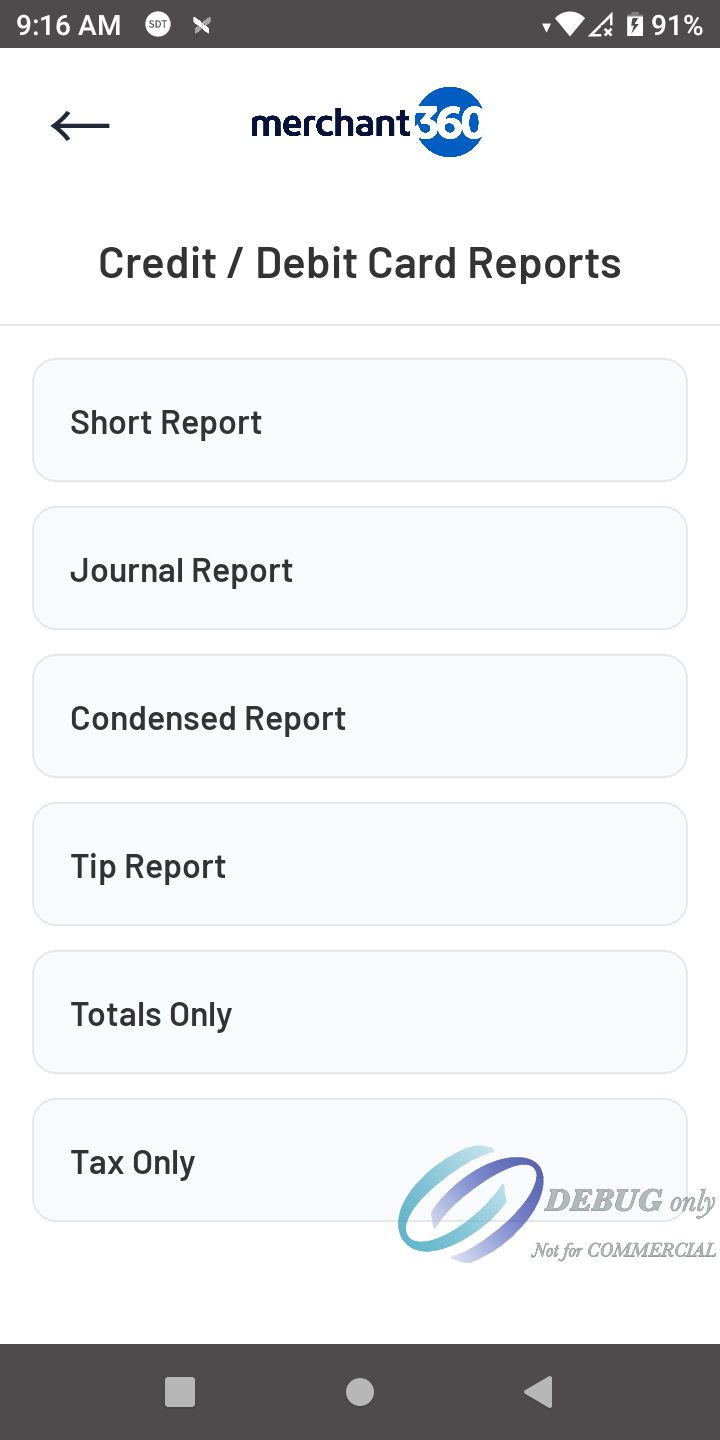
Reports show and print a day's activity by tender. Filter picks the date and, optionally, one clerk.
Gift cards on the terminal
With gift cards on for your business and the terminal connected, the menu's Gift Card opens Redeem, Activate, Add Funds, Balance Inquiry, Store Credit, Balance Transfer and Reissue. No gift card codes are entered on the terminal; it uses its Merchant360 connection.
On the Pay screen from the item grid, Gift Card redeems the total on a gift card. A card with less than the total is approved for its balance and the rest is paid another way.
Before a redeem the terminal checks the card's balance. With enough balance the full amount is redeemed. With less, the terminal redeems what the card holds and shows A partial payment of $X was processed. Collect $Y another way; back at the start screen, Pay opens titled Balance due with the rest filled in. If your business turns gift card partial approval off, a short card is declined with its balance shown instead. A card with no balance is declined with No balance on this gift card, and nothing is charged.
If the screen says No answer from Merchant360, check the card balance before running the card again.
Training mode
Training mode is for practice and demonstrations. Turn it on in Settings > Training mode (supervisor PIN). It is set on the terminal only.
While it is on, an orange TRAINING MODE banner shows across the top of every screen, and printed receipts say TRAINING and NO CARD WAS CHARGED at the top and bottom.
Every card sale, refund, void, pre-auth and tip adjustment is approved without reading a card, and no card is charged. Cash sales work as usual. Nothing fails, and the terminal works without internet.
Training sales show in History and Reports only while Training mode is on; your real sales are hidden until you turn it off. Training sales are never sent to Merchant360.
Gift cards, appointments, Text to pay, loyalty and sales sent from the PC are off in Training mode. Email and text receipts are not sent.
Turn Training mode off before taking real payments.
Integrated mode
In integrated mode the terminal shows Ready for payments and waits for amounts sent from Merchant360 (Take Payments, Handpoint Terminal). The customer presents the card; the result shows on the terminal and on your Merchant360 screen. Done returns to Ready for payments, on its own after 20 seconds.
More opens History, Reports, Settings and About. Sales start only from Merchant360 or your POS.
Sales sent from the Merchant360 Chrome extension or the Merchant360 API come in whichever mode the terminal is in, while Accept sales from the PC is on. When nothing is keyed on the terminal, the sale opens on the Pay screen with its amount (Sale sent from the PC). The terminal then runs its usual steps: the loyalty phone, the tip, the card, and a surcharge on credit cards when your pricing has one. The amount is taken as the full total: no sales tax is added. When a sale is under way on the terminal, a sent sale waits until it is done; one that waits 3 minutes is cancelled and the PC is told. Cancel at the bottom of the Pay screen or the card screen, or the Back key, cancels a sent sale: the terminal returns to its start screen and the PC shows it was cancelled on the terminal.
Appointments on the terminal
With Scheduling in Merchant360 and Appointments on the terminal on, the menu has Appointments. It lists today's appointments, soonest first, with the time, the customer, the service and staff member, and the amount due. Key the customer's phone and press Find to see that customer's open appointments from the last 7 days through today.
Tap an appointment to open its ticket: the booked service (or the work-order lines from Merchant360), the deposit paid at booking, anything paid earlier and the amount due.
Check in, pay later marks the appointment Arrived in Merchant360 (the appointment window shows Arrived and the time) and leaves it open. When the customer is ready, find it again in the list or by phone.
Pay now opens Pay with the amount due. The customer's phone from the booking fills the loyalty page, so the visit earns points or a punch, and a reward can be used. Card or cash, then the receipt. The approved sale pays the appointment: Merchant360 shows the amount paid on the terminal, and the appointment is Completed when nothing is left. An open invoice for the appointment is marked down by the same amount. Gift card and Text to pay are not offered on an appointment's sale.
Add items puts items from the terminal's item list on the ticket at their prices; they are saved on the appointment as its lines, so Merchant360 shows the whole visit.
Price changes on the terminal is set by you in Merchant360 → Hardware Terminal → Terminal settings, not on the terminal. Off: prices on the ticket cannot be changed, and no price button shows. With supervisor PIN: tapping a price asks for the supervisor PIN first, and Merchant360 checks the PIN again. Allowed: any clerk can change a price. Removing a booked line or lowering its quantity counts as a price change. Every change is logged with the old and new price and the terminal.
When the deposit covers the ticket, nothing is due and Complete closes the appointment. When the deposit is more than the ticket (for example after a price change), the button reads Complete, refund $X to card: the difference goes back to the card that paid the deposit, then the appointment closes. The supervisor PIN is asked first when your terminal asks for it on refunds. If the refund does not go through, the appointment stays open. A deposit that was not a card payment in Merchant360 is refunded in cash: the button reads Complete, refund $X cash, and the terminal says how much cash to give the customer.
| On this screen | What it does |
|---|---|
| Find | The customer's open appointments for the phone keyed. |
| Check in, pay later | Marks the appointment Arrived in Merchant360 and goes back to the list. |
| Pay now | Opens Pay with the amount due and the customer's phone for loyalty. |
| Complete | Nothing due: closes the appointment, refunding a deposit above the ticket to its card. |
| Add items | Items from the terminal's item list, at their prices. |
| Price (under a line) | Shows only when price changes are allowed or need the supervisor PIN. |
Text to pay from the terminal
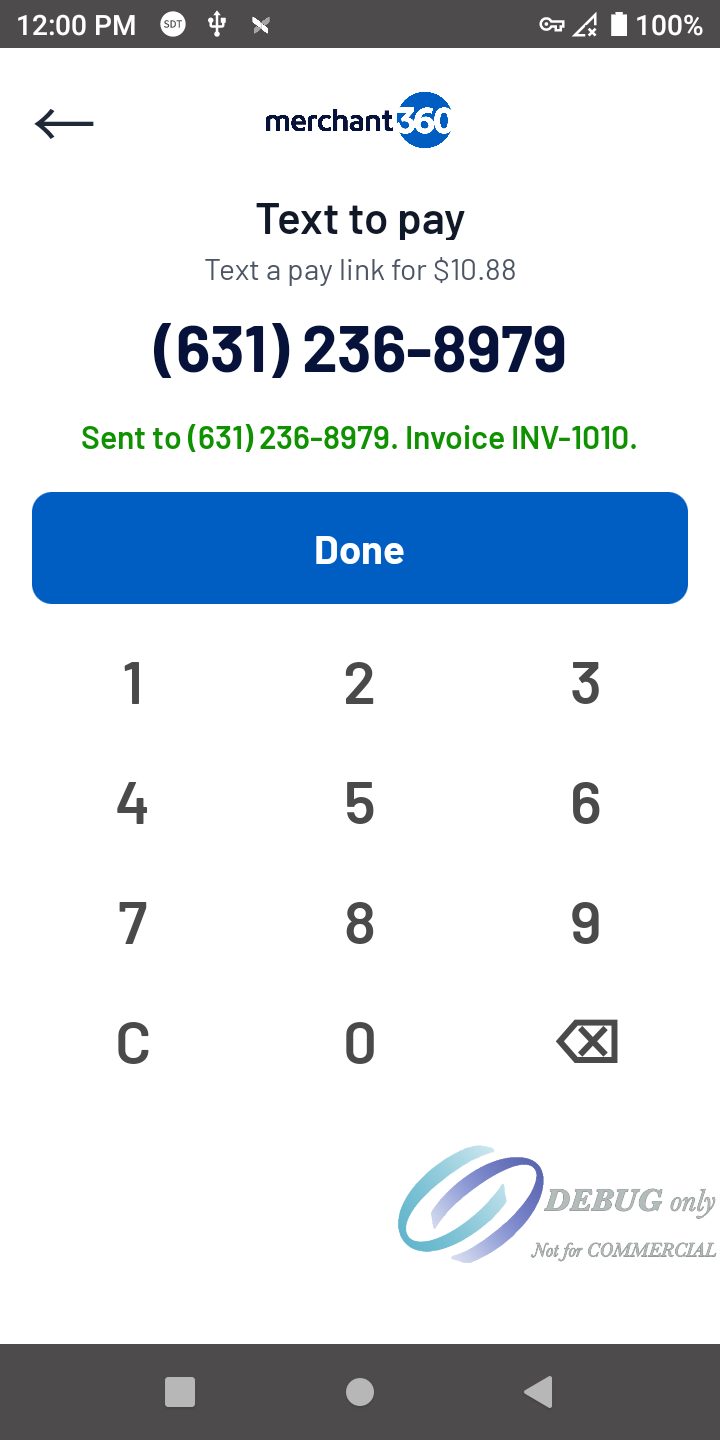
With Text to pay on, a Text button sits beside Card and Cash. When Card, Cash, Gift Card and Text are all on, Text is a slim Text to pay button under the amount, so the three payment buttons keep their size. Key the amount (or pick items), press Text, key the customer's mobile number and press Send pay link.
Merchant360 makes an invoice for the sale and texts the customer its pay link. The customer pays on their phone; any card fee (dual pricing or surcharge) is added there from their card. Nothing is charged on the terminal.
The invoice is listed in Invoices under the mobile number, with the item lines when the sale came from Items, and the reminder texts follow it like any Text2Pay invoice. A customer who replied STOP is not texted. The terminal needs Merchant360 to send.
| On this screen | What it does |
|---|---|
| Text | Opens Text to pay with the cash price and tax of the sale. |
| Send pay link | Makes the invoice and texts the link. Pressing it again after a network drop does not text twice. |
| Done | Back to the start screen. |
Loyalty at the terminal
The Payment App uses your loyalty program from Marketing. It is a punch card or points. Punch card: a customer earns a punch per visit (or per amount spent) and a reward (a free item, an amount off or a percent off) when the card fills. Points: a customer earns points per visit and per dollar spent, and spends them on the rewards you set up on Loyalty (an amount off, a percent off up to a cap, or a free item from your inventory). The customer is their phone number.
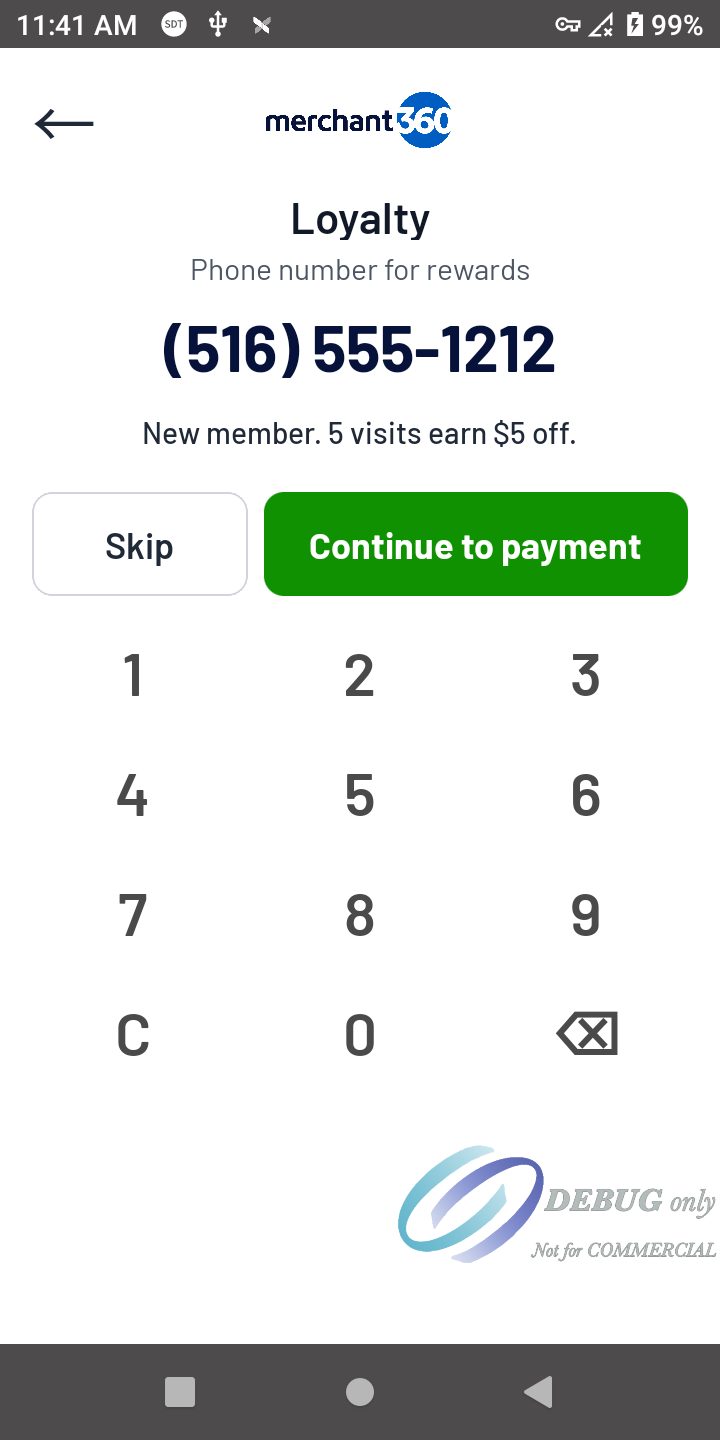
With Ask for loyalty phone on, a Loyalty page comes after you press Pay and before the tip, so a reward lowers the amount the tip is figured on. The clerk or the customer keys the phone number and presses Continue, or presses Skip. A new number joins the program.
Punch card: the page shows the punches so far. When a reward is ready, Use reward takes it off this sale.
Points: the page shows the balance, what this sale earns, and the rewards marked Show on the terminal. The rewards the balance covers can be tapped; the others show how many more points they need. A free-item reward asks which item: its price comes off when the item is on the sale, otherwise the item is handed over free. For an item handed over, Reward slip for a free item (terminal settings) can print a slip with the item, the reward, the customer's last 4 phone digits and the sale, either as its own slip after the receipts or as a tear-off block at the foot of the customer copy, to present where the item is collected. Save my points goes on to the tip and payment without using any.
With eGift gift cards set up, points live on an eGift card for each member. When a new member's first visit counts (an approved sale, a text receipt or a receipt QR), a card is taken from your eGift card pool, activated and tied to the phone, and the customer gets a text with the card number and points balance (no physical card is handed out). Points earned, used, voided or refunded are made on the eGift card. Customers sign in at egift.online/manage with their phone (a texted code) or email (a sign-in link) to see their cards and points. A customer who already holds one of your gift cards can link it to their phone there, with a code texted to the phone.
Loyalty in Merchant360 lists your Loyalty members by phone number: points (or punches), visits, last visit and when they joined. Search by phone, press Add member to add a customer with starting points, or open a member to see their history and add or take off points with a note.
A used reward prints on the receipt as its own line under the items. The visit's punch or points are added when the payment is approved, so a declined card earns nothing. A void or refund on the terminal gives back the points the reward used and takes back the points or punch the sale earned.
With Text receipt phone joins loyalty on, the number keyed for a text receipt earns the visit too. A sale earns one punch however the phone is given.
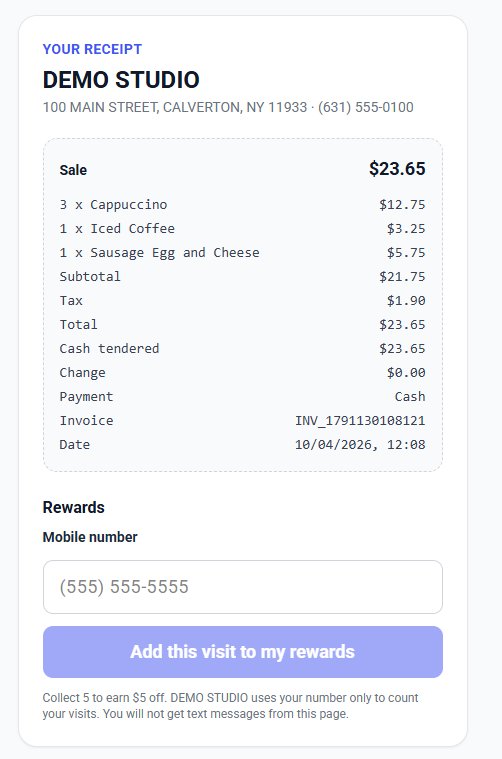
With Loyalty QR on the receipt on, the customer copy has a QR code. Scanning it opens the customer's receipt on their phone (items, subtotal, tax, total, payment, invoice and date), with a Rewards box below: they enter their mobile number and the visit counts toward their card (once, within 30 days).
A terminal without network keeps the phone number and adds the punch when it is back online; a reward needs Merchant360 to be used. Loyalty activity from the terminal shows on Loyalty in Merchant360.
| On this screen | What it does |
|---|---|
| Skip | Continues to payment with no loyalty. |
| Continue | Looks up the card: punches so far and what earns the reward. |
| Use reward | Punch card, when a reward is ready. Takes it off this sale before payment. |
| A reward (points) | Uses the points on that reward for this sale. A free item asks which item first. |
| Save my points | Points: goes on to the tip and payment without using points. |
| Change number | Points: clears the number to key another one. |
| Continue to payment | Goes on to the tip and payment with the phone kept for the punch or points. |
Terminal settings
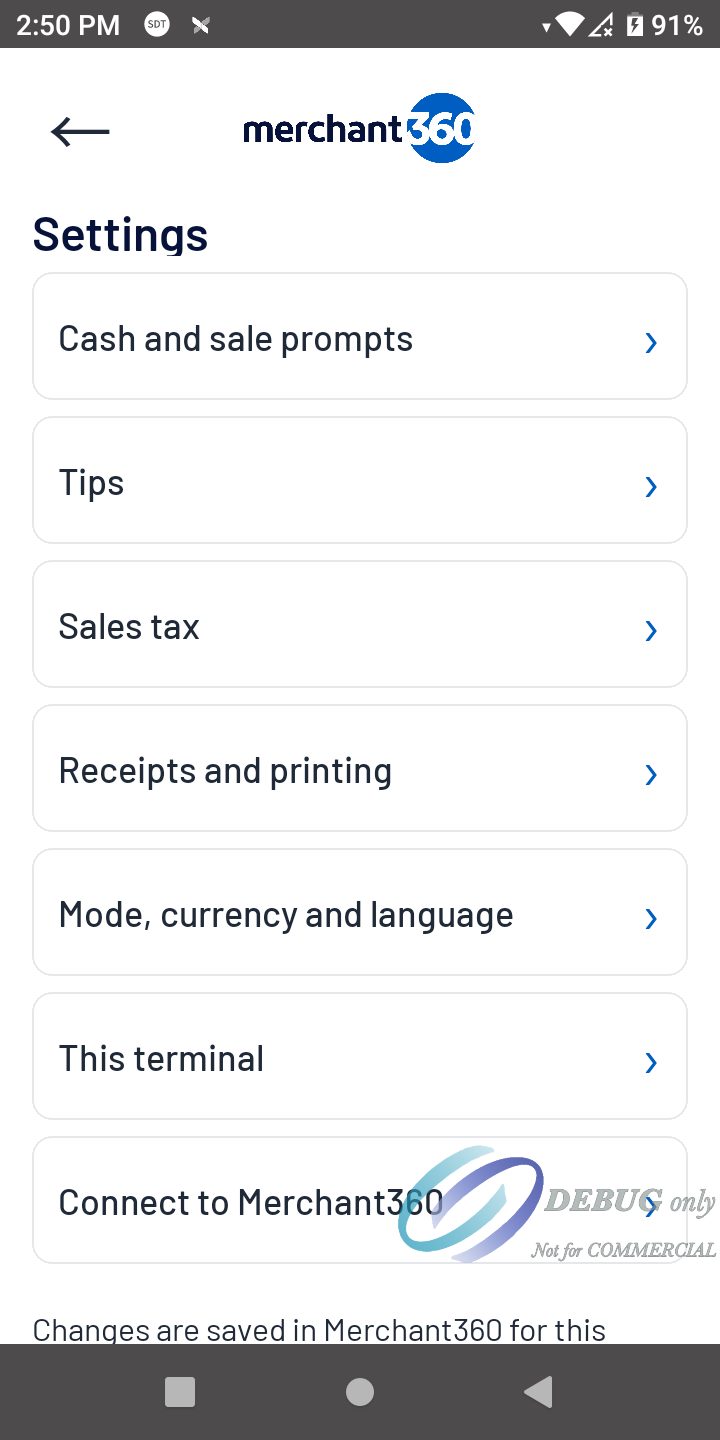
Settings opens with the supervisor PIN (4 digits, set by Electronic Payments) and shows only what you can change. Each change is saved in Merchant360 at once. With no network, the change applies on the terminal right away, the page says Saved on this terminal, and it goes to Merchant360 when the terminal is back online.
Amount limits, the pricing program, transaction types, which actions need the PIN, the order of the receipt header lines and the signature rules are set by Electronic Payments and are not shown on the terminal.
Level II: every card sale sends the invoice number and the tax amount to the processor, with no prompt.
Print the daily report (Receipts and printing): the day's totals print once a day at the print time, 11:00 PM unless you choose another hour, so the report is ready in the morning. A terminal that was off or asleep then prints it when it is next opened.
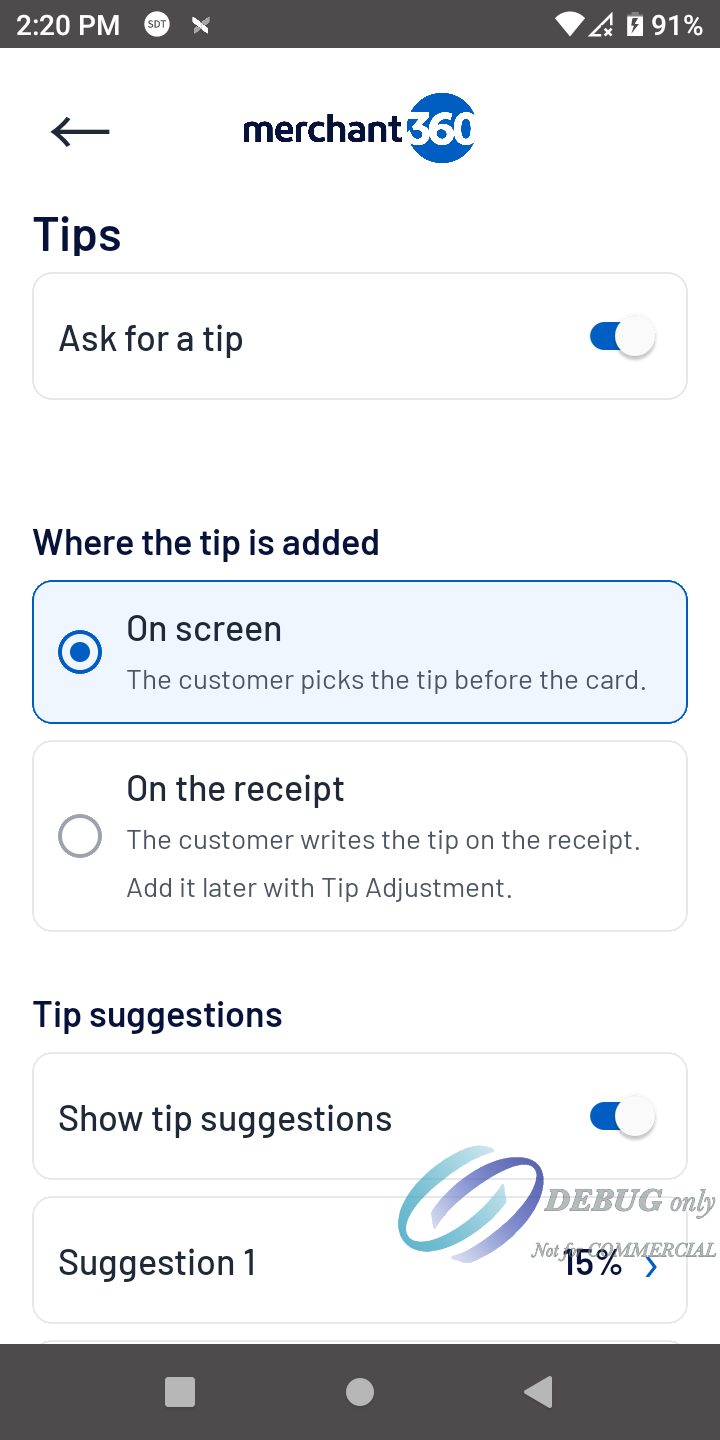
Tip on the receipt: the customer writes the tip on the receipt and the clerk adds it later in History: open the card sale and press Tip Adjustment, before the batch closes.
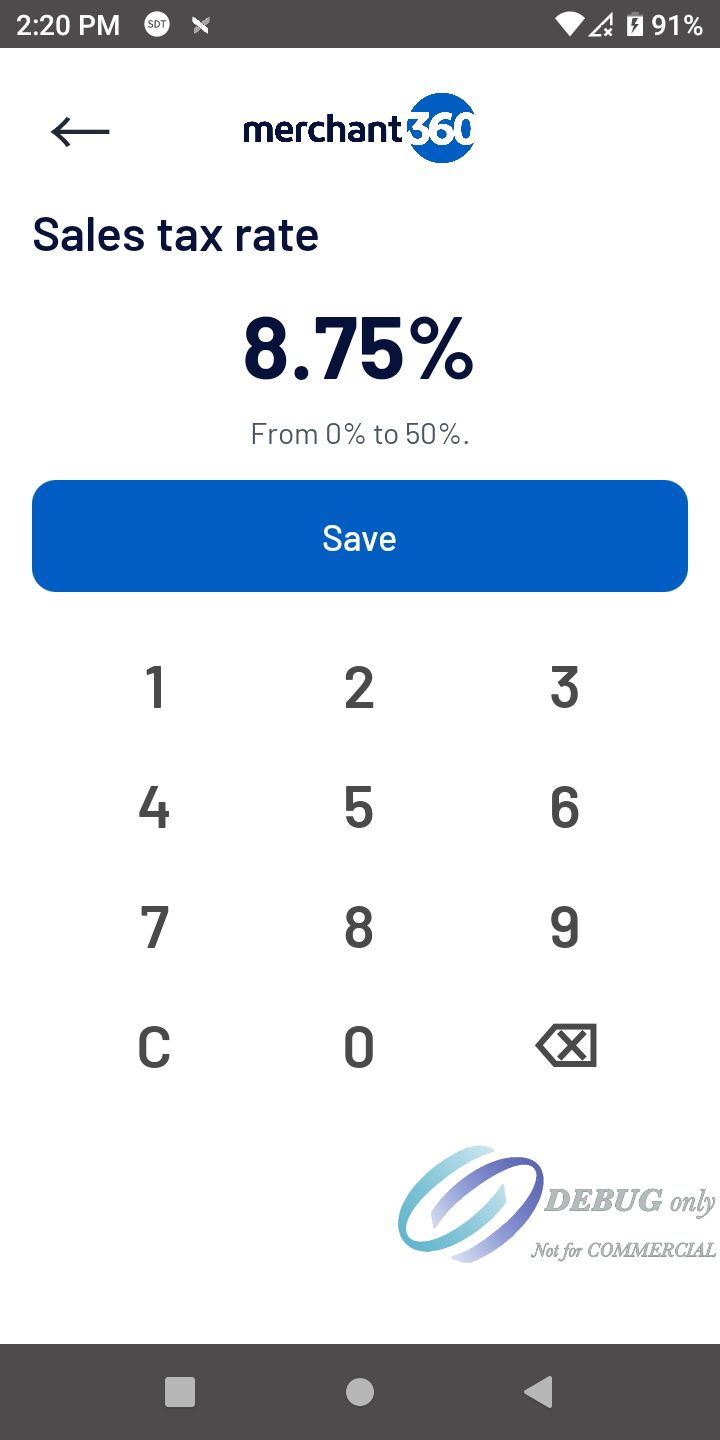
The sales tax rate is your business's tax rate in Merchant360, two decimals (for example 8.75%). Invoices use the same rate.
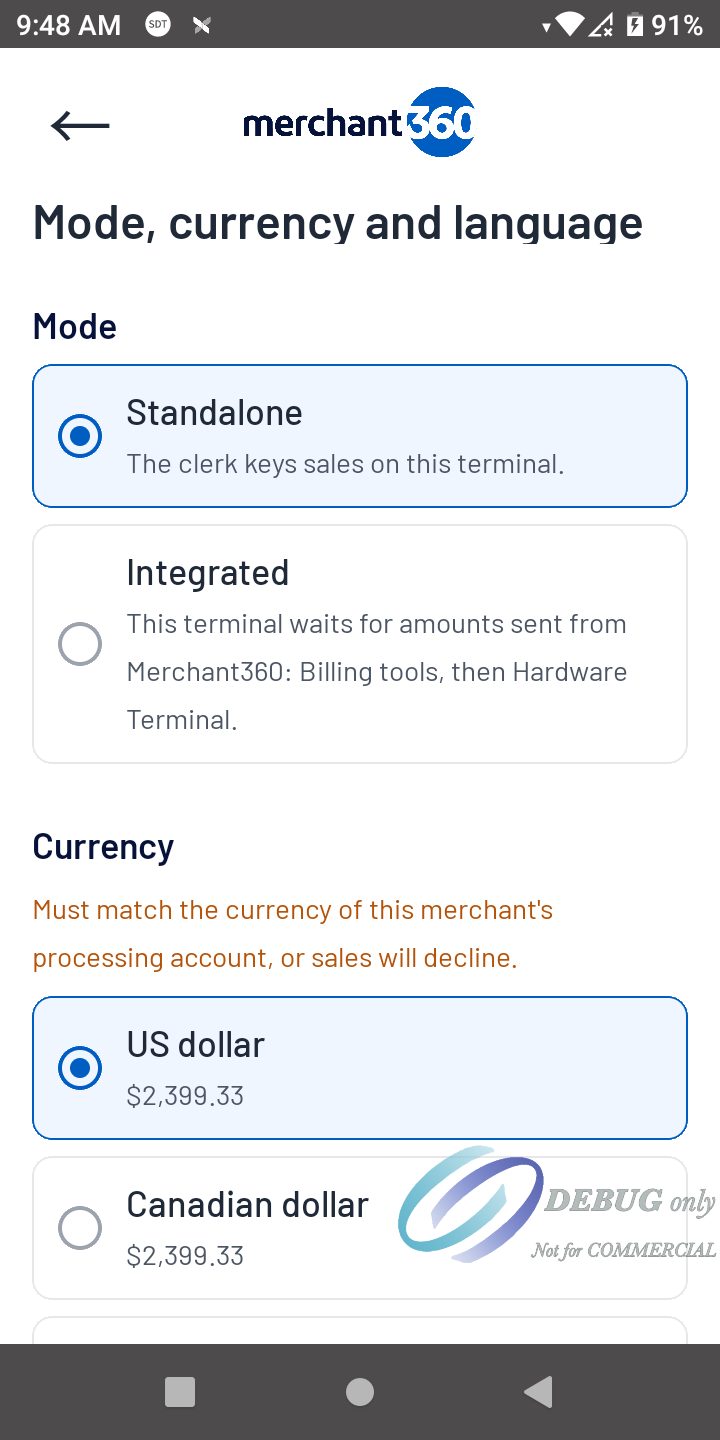
Currency must match the currency of your processing account, or sales decline.
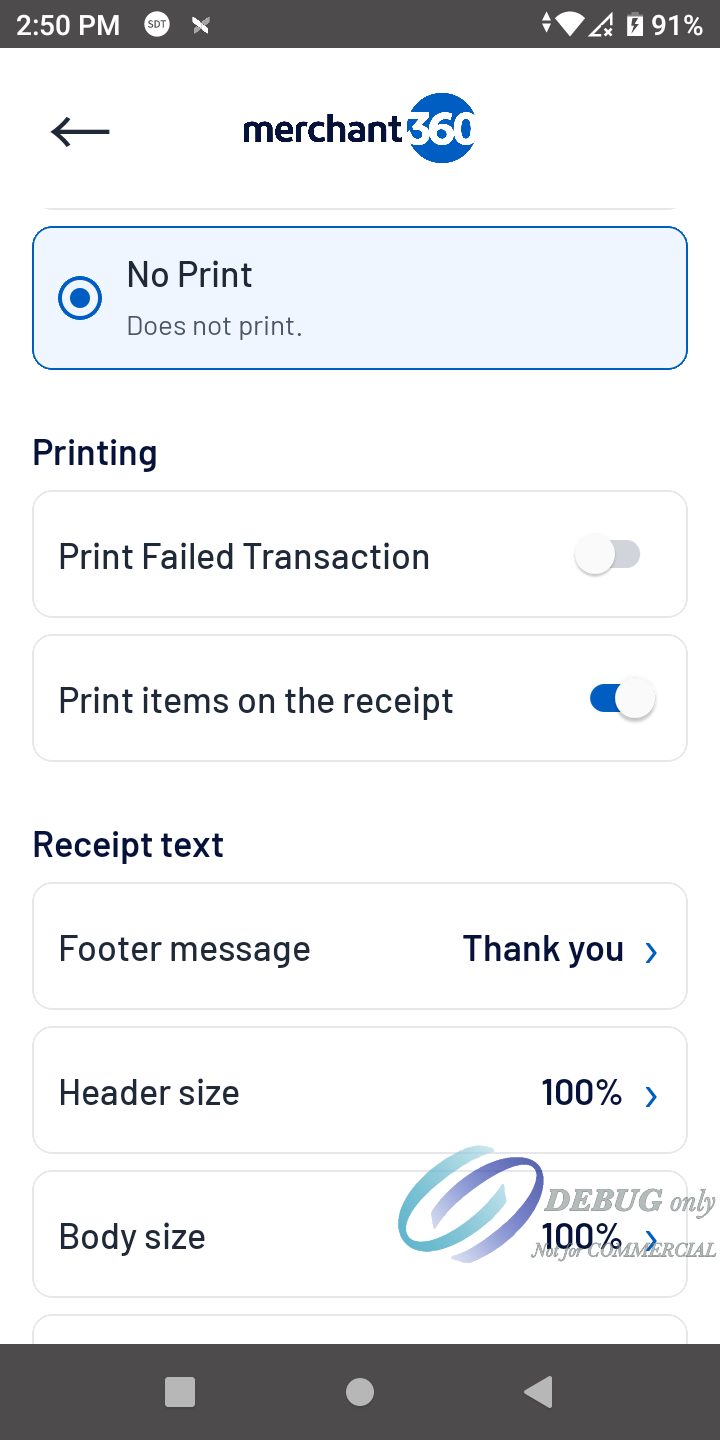
Terminals without a printer (PAX A77 and A800): the app shows no print buttons and does not ask to print. After a sale, Email receipt and Text receipt are always offered. Settings shows Receipts in place of Receipts and printing, with the footer message, and the daily report is on screen in Reports. The reward slip for a free item does not print. The terminal model comes from your terminal record, so nothing has to be set.
The footer message (for example your return policy) is at the bottom of every receipt: printed, email and text.
Terminals with a customer screen (PAX A8700 and A960): the screen facing the customer shows your business name, the amount as it is keyed, Tap, insert or swipe your card, then Approved or Declined, and Thank you.
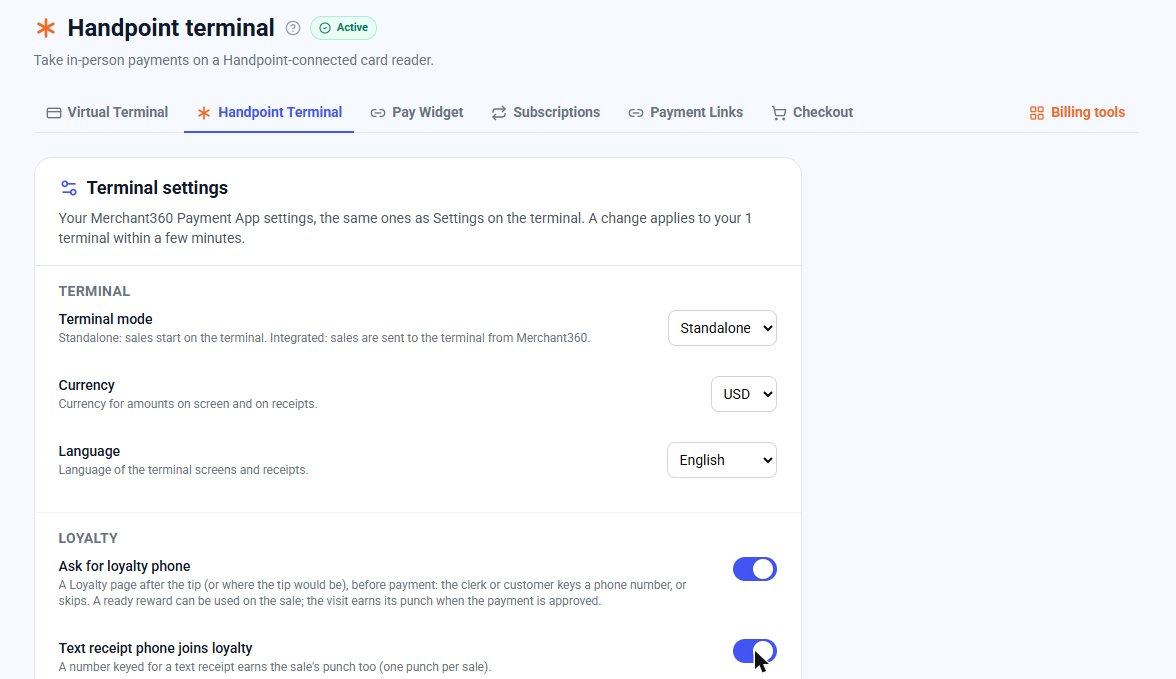
You can also change these settings from Merchant360: Billing tools, Hardware Terminal, Terminal settings (managers and owners). A change there applies to all your terminals within a few minutes, and the terminal and Merchant360 always show the same values. A switch or a choice saves at once; a number or text saves with its Save button.
| On this screen | What it does |
|---|---|
| Cash and sale prompts | Take cash and ask for cash tendered; ask for an invoice number (made by the terminal or keyed by the clerk, blank allowed or not); ask for a clerk ID (Clerk, Server or Operator ID, blank allowed or not). |
| Tips | Ask for a tip, where the tip is added (On screen or On the receipt), tip suggestions (up to 4 percents) and the maximum tip. |
| Sales tax | Add sales tax to each sale, the sales tax rate, and Allow tax bypass (the clerk can remove the tax from a sale). |
| Loyalty | Ask for loyalty phone, text receipt phone joins loyalty, and the loyalty QR on the receipt. Shown when your loyalty program is on in Marketing. |
| Receipts and printing | Receipts on or off, when the customer and merchant copies print, print declined transactions, the daily report and its print time, items on the receipt, the footer message, header, body and footer size and style, and the logo on receipts and on screen. Called Receipts on a terminal without a printer: receipts on or off and the footer message. |
| Mode, currency and language | Standalone (the clerk keys sales on the terminal, and sales sent from Merchant360 open there too) or Integrated (dedicated: the start screen waits for sales sent from Merchant360 or your POS, with no keypad; More opens History, Reports, Settings and About), currency, language, and the start screen (Sale keypad or Items) when items are set up. |
| This terminal | Merchant name, MID, TID, serial number, model and app version for support. Sync settings from Merchant360 now, and Test print on a terminal with a printer. |
| Connect to Merchant360 | Connects the terminal with an activation code. |
| Wi-Fi | Opens the Android Wi-Fi panel over the app: pick a network and enter its password. No tech PIN needed; the panel closes back to the app. |
| Check connection | The network and its signal, a VPN left on, whether the internet and Merchant360 answer, the Merchant360 account, and whether the card reader is ready for payments. Check again runs it again. |
| Sound | Opens the Android volume panel over the app (media, ring, notification and alarm volume). |
Languages and currencies
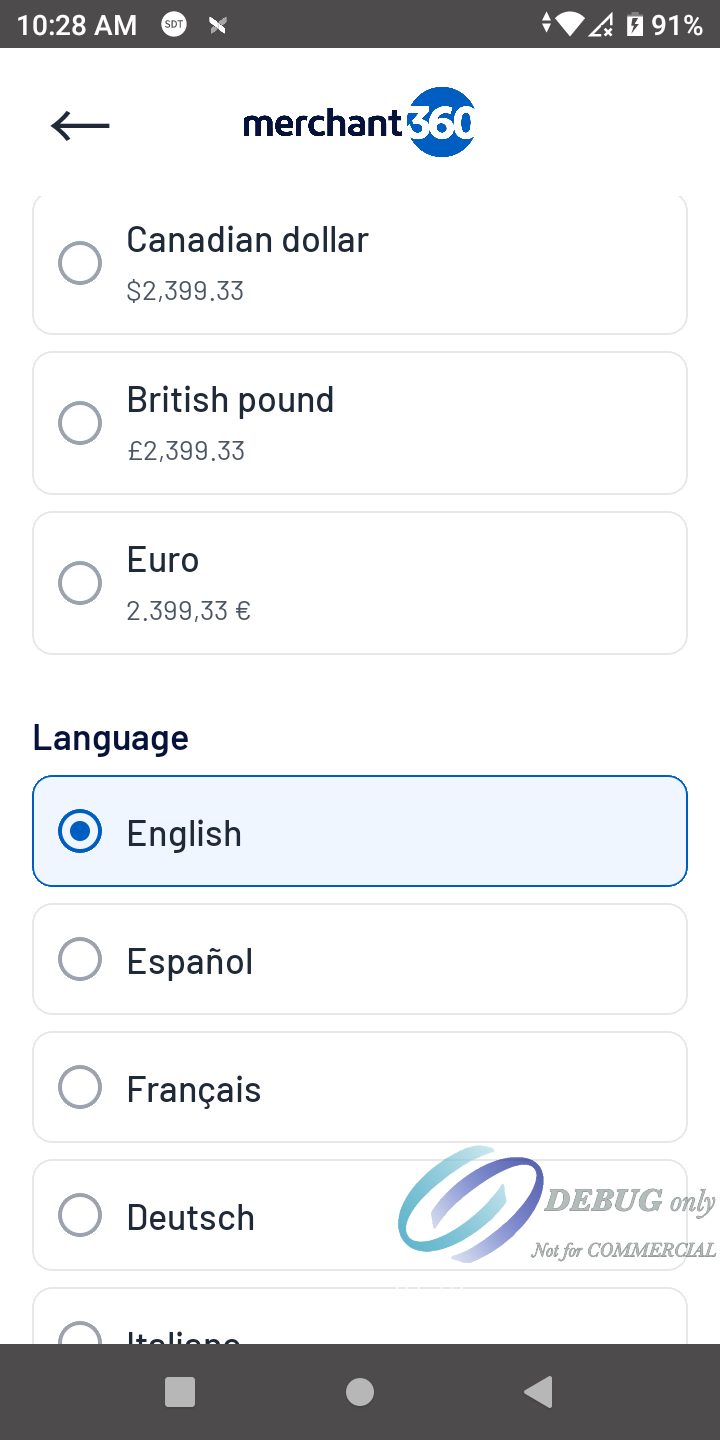
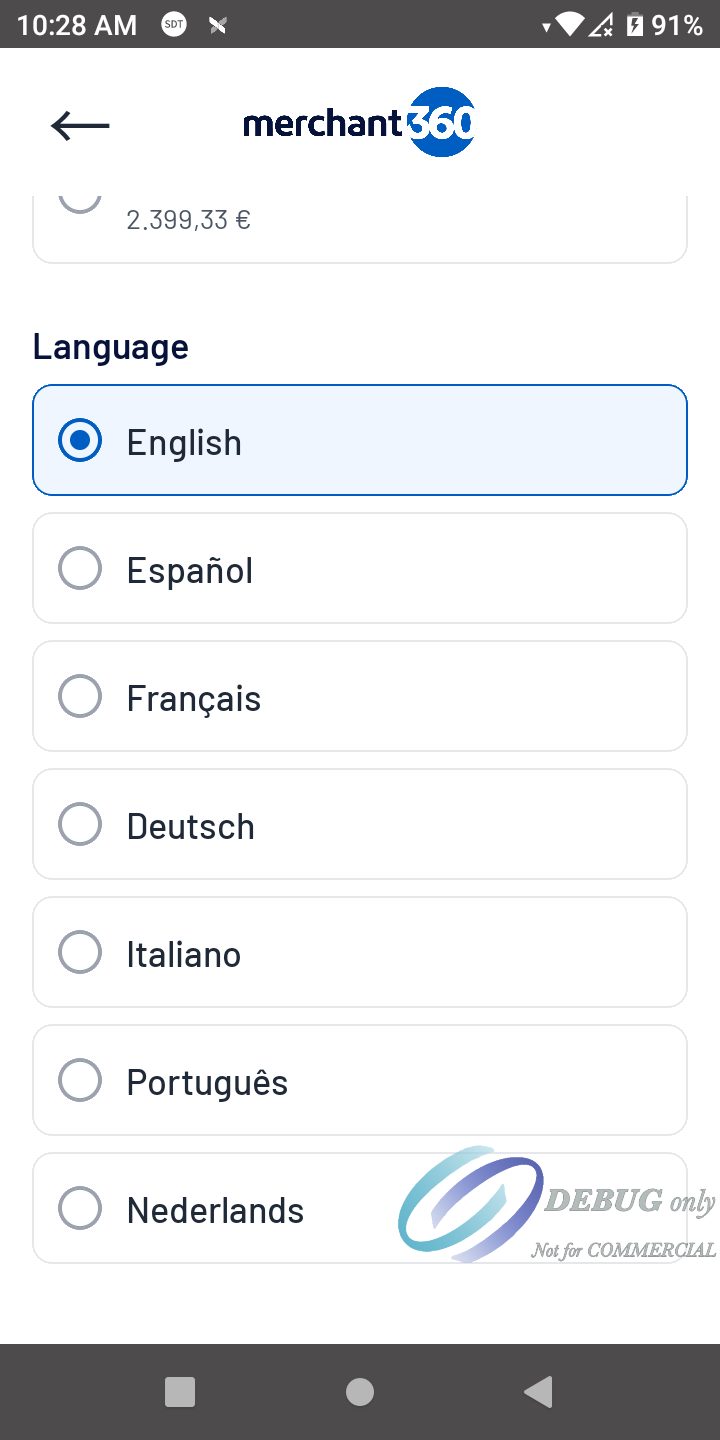
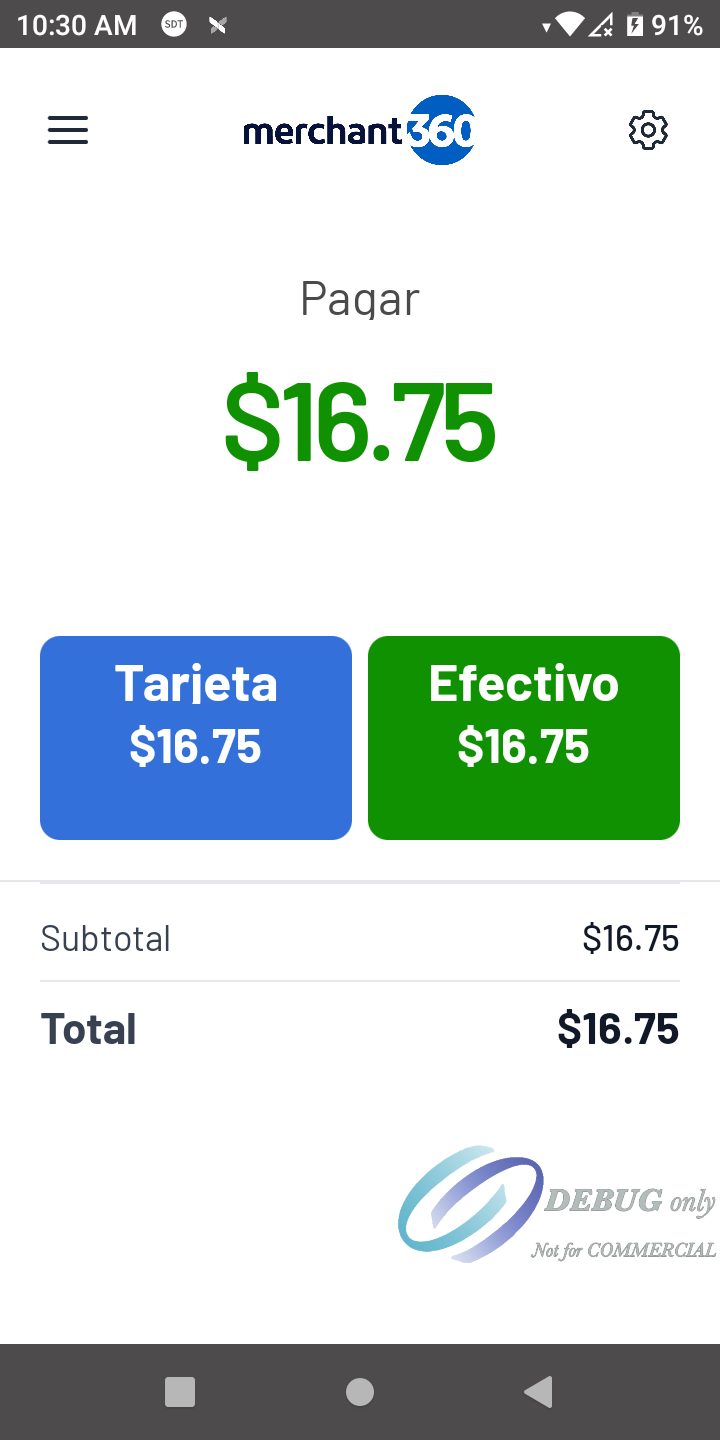
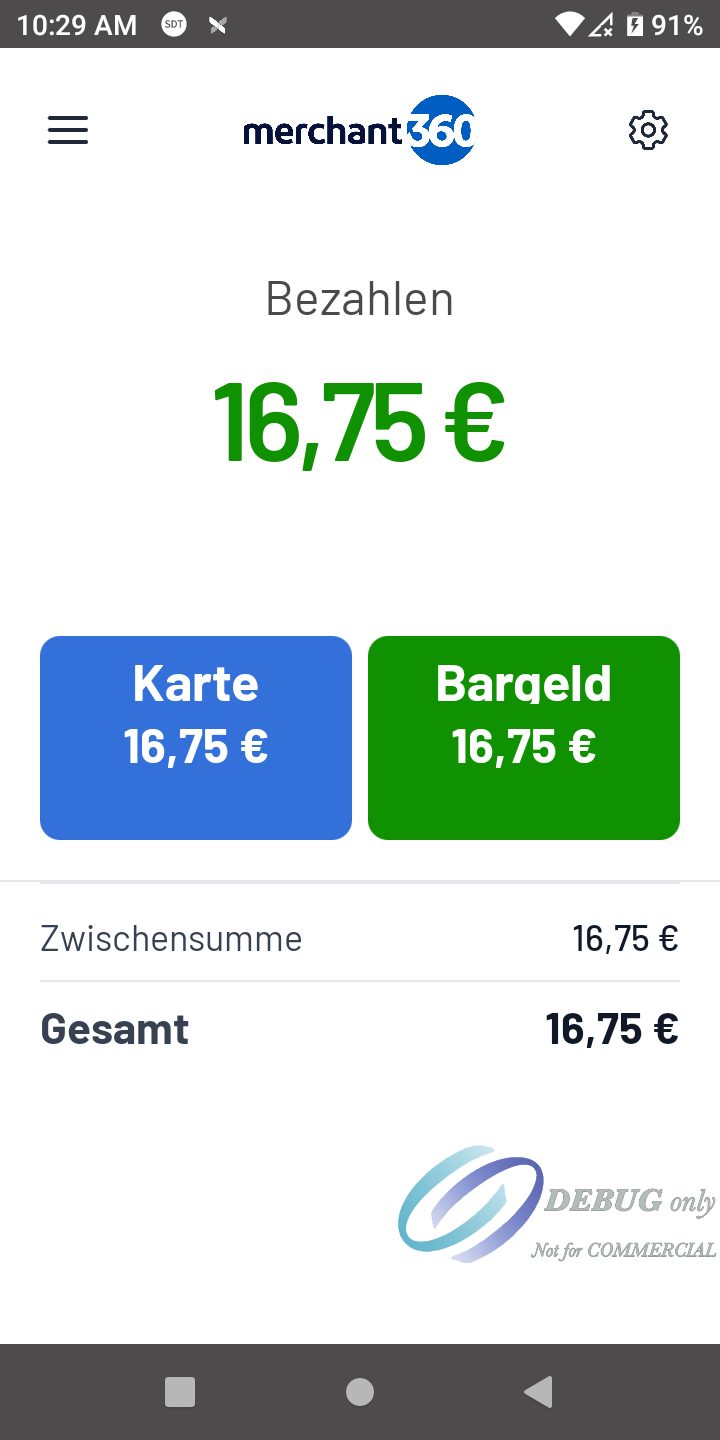
The terminal's screens and receipts come in English, Spanish, French, German, Italian, Portuguese and Dutch. Amounts show in US dollars, Canadian dollars, British pounds or euros, each in its own format: $2,399.33, £2,399.33 or 2.399,33 €.
Language and currency are chosen on the terminal under Settings, Mode, currency and language (supervisor PIN), and can also be set by Electronic Payments. A change on the terminal applies at once; a language change returns to the start screen in the new language.
Item names come from your inventory and show as you entered them, in any language.
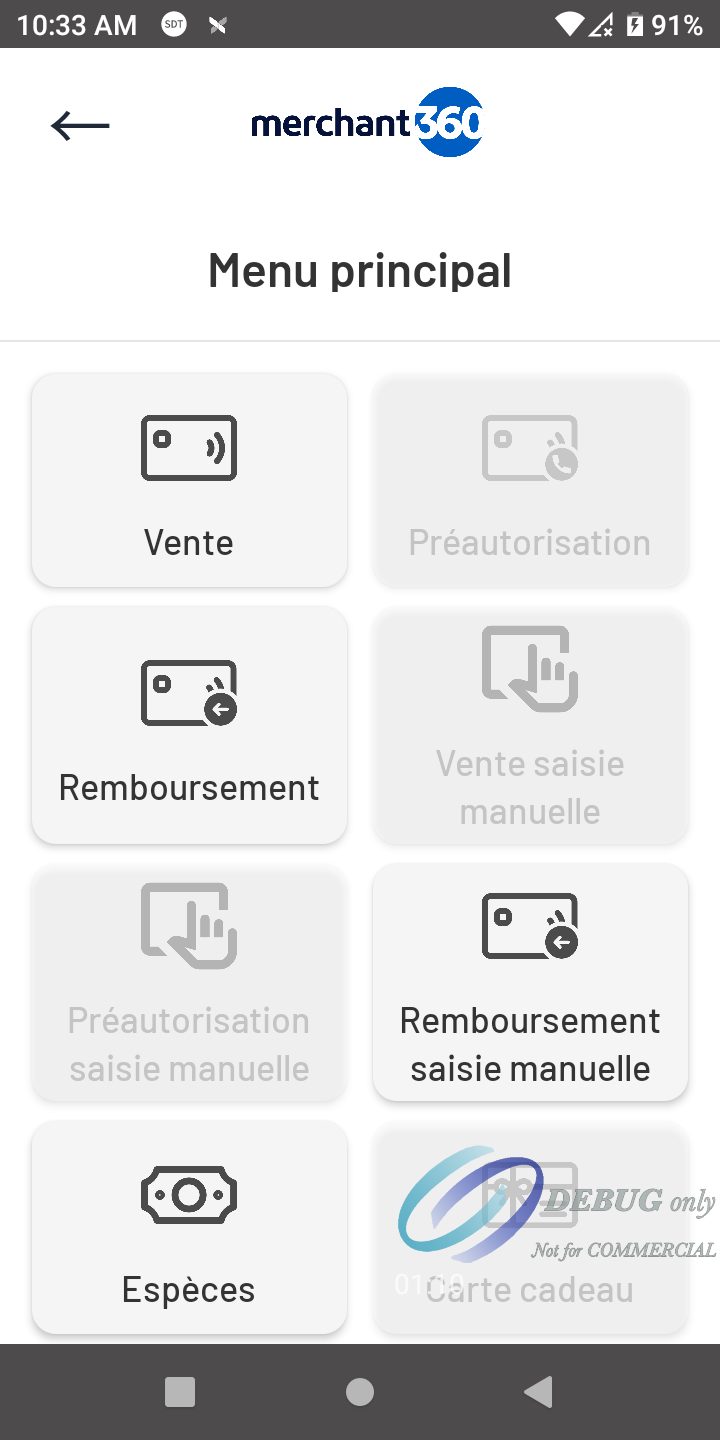
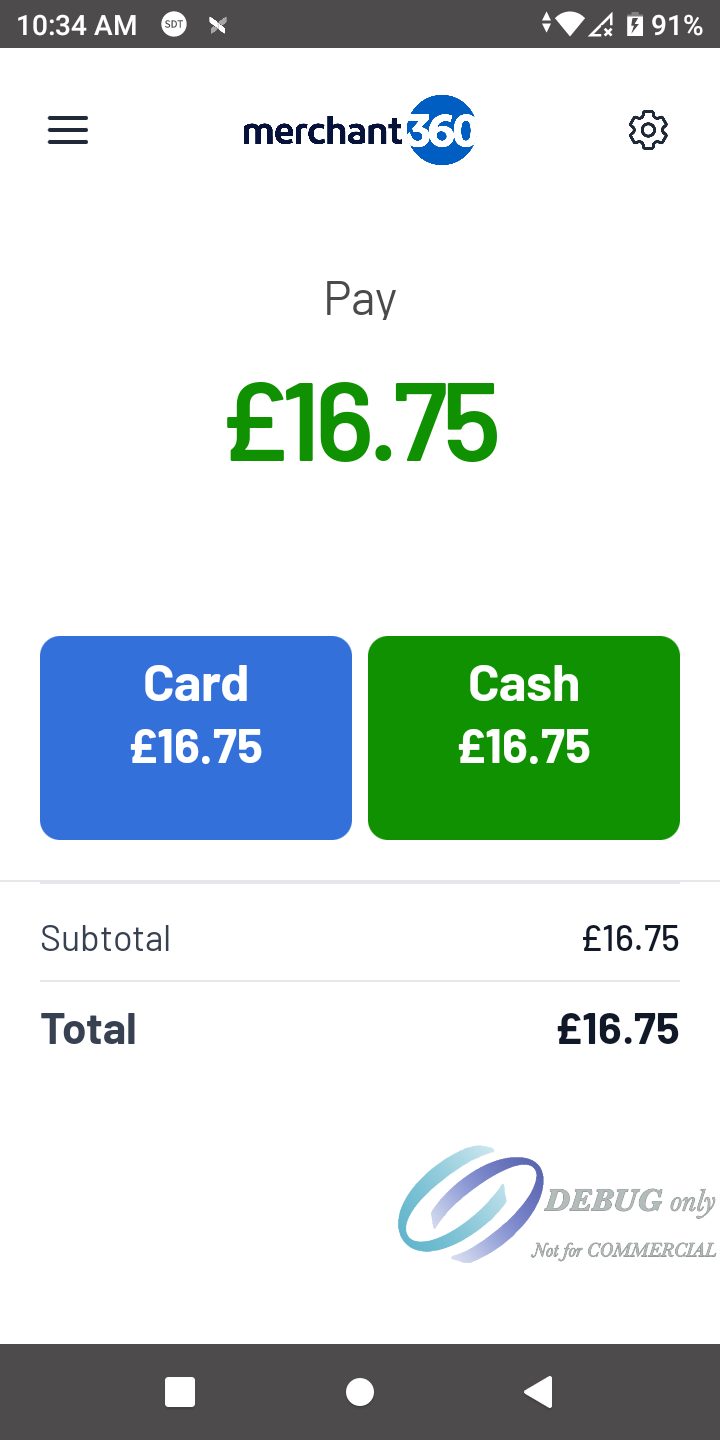
The currency must match the currency of your processing account. A terminal set to euros on a US dollar account will see its sales declined.
Messages that need attention
approved transaction(s) recovered to History: the app closed after an approval; the sale is now in History.
transaction needs review: an approved void, completion or tip adjustment was not saved on the terminal. Record it in Merchant360, then press Mark reviewed.
Outcome unknown: the app closed while a card was being processed. Check Merchant360 before running the card again, then press I checked.
Couldn't load settings: the terminal could not load its settings at start. Check the network and press Retry.